Return to Topic![]()
Raw image files can be selected from any available source to be imported into the active Case File. These images will be copied into the currently selected folder of the Folder Tree within the Case Directory.
|
It is not recommended to use this import method with PDF files. Instead, please use either Turbo Import or ED Loader. |
This import method is performed through the Import Raw Images window.
|
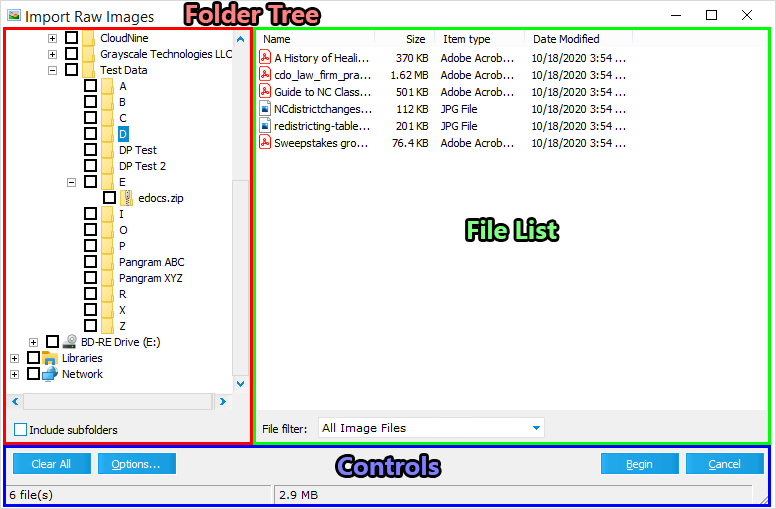
File Filter options: |
ADOBE (*.pdf) |
All Files (*.*) |
CALS Files (*.cal) |
Compuserve (*.gif) |
FAX (*.dcx) |
JBIG Files (*.jbg) |
JPEG (*.jpg) |
JPEG 2000 (*.jp2) |
MO:DCA Files (*.mda) |
Paintbrush (*.pcx) |
Plexus TIFF (*.tif) |
Portable Network Graphics (*.png) |
TIFF (*.tif) |
Windows Bitmap (*.bmp) |
Left-click on an image file to highlight and select it for import. You can Ctrl+click on files to select multiple files individually, or Shift+click to select a range of files instead. The bottom-most section of the Controls pane reflects your current import selections, with both a file count and total file size.
Controls
•Clear All - Clears all check-boxes to the left of each folder in the Folder Tree.
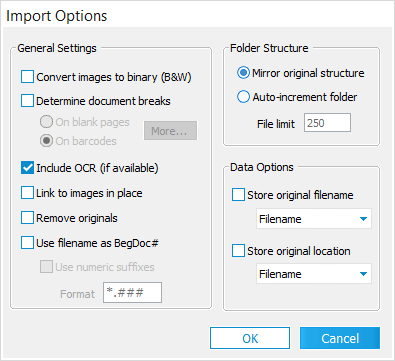
•Options... - Opens the Import Options window, which provides additional import settings.
•Begin - Imports all selected image files into the currently selected Case Directory folder. Once completed, the Import Status dialog will appear with counts for the Total Docs and Total Pages imported, as well as the Elapsed Time. Clicking OK will close both the Import Status dialog and the Import Raw Images window.
•Cancel - Closes the Import Raw Images window without importing any image files.
|
|
