Initiating a Distributed Batch Process (Job) Initiating a Distributed Batch Process (Job)
NOTICE: These instructions cover running batch processes from multiple machines. For running batch processes from a single machine, please see Using the Batch Processing Utility.
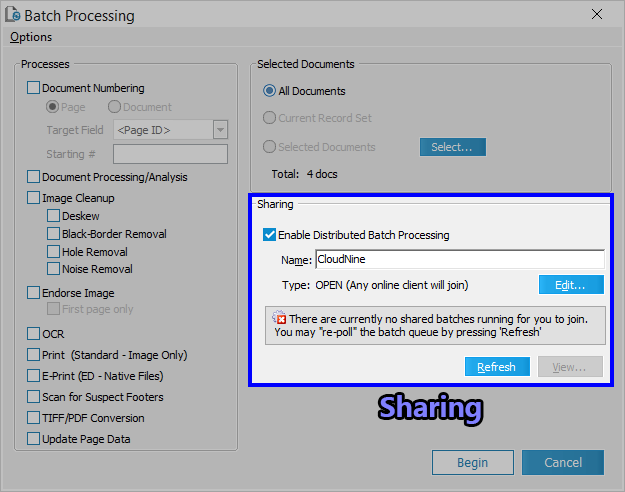
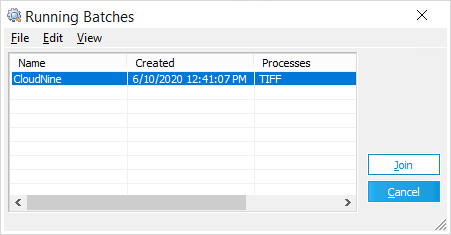
1.Start by determining which batch of documents (from the active Case Database) should be processed by selecting one of the following options: 1)To process all documents, open the Batch Processing Utility from the Main User Interface (Tools > Batch Process...), and then skip to Step 3. 2)To process specific search results, generate a search query with the Database Query Builder (select Batch Process from the Send Results To drop-down menu), and then skip to Step 3. 3)To process documents listed within either Grid View, click the Batch Process button within the Toolbar, and then skip to Step 3. 4)To manually select documents and/or folders for processing, open the Batch Processing Utility from the Main User Interface (Tools > Batch Process...), and proceed to Step 2. 2.Skip this step if you're not manually selecting documents and/or folders to process. Manual selections can be made by doing the following: A.Under the Selected Documents section, click on the Select... button to open the Select Folders window. B.Use the Select Folders window to navigate through the Case Directory and select entire folders for processing. C.To choose specific documents from folders, select a folder from the list, and click the Set Range... button to open the Set Document Range window for that folder. D.Use the Set Document Range window to select specific documents contained within any folder. E.When you are happy with the selections made within either window, click OK to confirm those selections. 3.Select what Processes should be performed by checking the boxes on the left of each desired process under the Processes section. 4.Depending on which Processes have been selected, you should configure additional settings from their relevant Batch Processing Options windows. 5.In the Sharing section, check the box to the left of the Enable Distributed Batch Processing option. 6.Enter a Name for this distributed batch Job into the appropriate box, and then click the Edit... button. 7.The Create/Modify Job Invitation window (shown) opens. From here, configure the following options as desired: A.Determine the appropriate Invitation Type by selecting one of the radio buttons at the top. i.You can enter a numeric value into the input box here to Limit [the number] of stations for the job as well. B.If the Job should start at a specific date/time, then enable the Do not start job until after option and either enter a date/time into the available input boxes. i.You can also use the <Date> drop-down to select a date from the calendar, and the <Time> up/down arrows to automatically increase/decrease the time by one hour. C.If the Closed Invitation Type was selected, then decide which other machines should be allowed to join this Job from the Clients list at the bottom. 8.Once you have your Job configured as desired, click Accept at the bottom-right to close the Create/Modify Job Invitation window and apply these settings. 9.Review the Selected Documents, Processes, and Sharing sections of the Batch Processing Utility to ensure that everything is correct before initiating the Distributed Batch Process. 10.If everything is correct, then click Begin at the bottom-right to initiate the Distributed Batch Process. 11.Other machines (Clients) can now join this Distributed Batch Process. |