Scan Preparations

<< Click to Display Table of Contents >>

Navigation:  Using CloudNine LAW > Importing Documents > Document Scanning >

Scan Preparations

Scanners with ISIS drivers can be used to import physical (paper) documents into a Case Database as image files. You can control the scan operations for many supported scanners directly from the Main User Interface. These image files can later have OCR performed on them in order to create text files for Full-Text Indexing/Searching.

Due to the wide variety of scanning scenarios that can occur, it would be impossible to include a fully detailed set of preparations that covers every unique situation. In this topic, we cover several important actions that should be taken prior to importing physical documents with a scanner. General Preparations will apply to every situation, while Break Sheet Preparations apply specifically to the use of Barcode Break Sheets (also known as slip sheets):
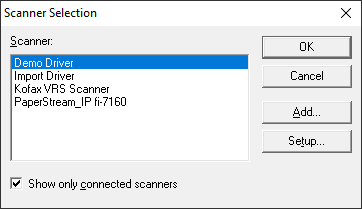
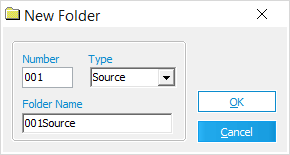
General Preparations

Gather and sort all the physical (paper) documents being scanned. Consider what folder structure may be necessary for the best organization of these documents within the Case Directory.

Create and organize New Folders for these documents within the Case Directory.

Install the necessary ISIS or TWAIN drivers for your scanner. These should be provided by the scanner's manufacturer.

Connect to your scanner through the Scanner Selection window (Scan > Connect to Scanner).

Configure an appropriate Scan Profile. This will be based on your scanner model and the documents being scanned.
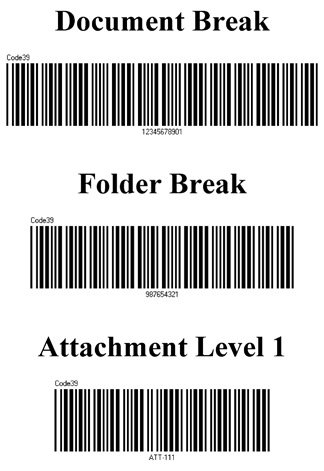
Break Sheet Preparations

Folder names in the Case Directory should be auto-generated when using Folder Break sheets. Otherwise, LAW may be unable to properly find (or create) folders as needed during the import process.

Print out the necessary Barcode Break Sheets. It's a good idea to print out more than you think you'll need.

Observe your Barcode Breaks settings (Tools > Options... > Imaging). Make sure these codes match up with the barcodes being used on your Break Sheets.

Make sure the Detect Barcode Breaks filter (Scan > Scan Options > Detect Barcode Breaks) is turned on.

ScannerSelectionWindowIcon Scanner Selection

To open the Scanner Selection window, from the Menu portion of the Main User Interface select Scan > Connect to Scanner.

Here you can select a scanner for LAW to connect to. A full list of scanners with installed drivers will appear by default, but you can opt to Show only connected scanners instead by checking the appropriate option at the bottom-left. Once you've selected a scanner from the list, click OK to connect to that scanner.

Additionally, you can use the following buttons for more advanced scanner connectivity:

Add... - Opens the Add Scanner window, allowing you point to a physical disk with scanner drivers to install.

Setup... - Opens the manufacturer-provided settings interface for the currently selected scanner, when available.


While LAW is properly connected to a scanner, the Scanner Status Bar located at the bottom-right corner of the Main User Interface displays a snapshot of the active Scan Profile. Otherwise, the message <No scanner connected> will be displayed.

ScannerStatusBar

NewFolderWindowIcon New Folder

To open the New Folder window, from the Menu portion of the Main User Interface select Folder > New....

You can also right-click on any folder/location within the Folder Tree of the Case Directory pane to open a pop-out menu, and select New... from there instead.

This tool is used to create new folders within the Folder Tree of the Case Directory pane. You can either type directly into the Folder Name box, or use the Number box and Type drop-down menu to have LAW automatically generate a name for you. Only folders with automatically generated names are eligible as selections when using the Auto-Create function (Folder > Auto-Create/Auto-Create N Folders...).

When you are satisfied with the folder name, click OK to have it created in the same location currently selected (or wherever you've right-clicked) within the Case Directory pane.

BreakSheetsBarcode Break Sheets

Barcode Break Sheets are page separators used to indicate the start of new documents, folders, or attachments while batch importing stacks of physical documents into LAW via scanner. They can either be printed using the default TIFF files ("Break_Doc1.tif", "Break_Doc2.tif", "Break_Folder.tif", "Attach1.tif") that are located in the LAW50 root install folder, or may be created with user-defined custom barcodes instead.

Using poor quality prints or improper scan settings can greatly diminish the barcode detection capabilities of LAW, so it's important to adhere to the following guidelines when using Break Sheets:

Print Break Sheets onto lightly-colored or pristine white paper.

Use a laser printer for sharper barcode images.

Avoid wrinkling or damaging Break Sheets, and replace them if they become too worn.

Do not photocopy Break Sheets to create extra copies, as this often results poor barcode quality.

Use a higher scanner resolution (DPI) to increase the quality of scanned barcodes.

Increasing the brightness or contrast can help with detection, but may also diminish the quality.


RightArrowFor specific Barcode Break settings, see the Miscellaneous Scan Settings topic.