Scan Options Sub-Menu Scan Options Sub-Menu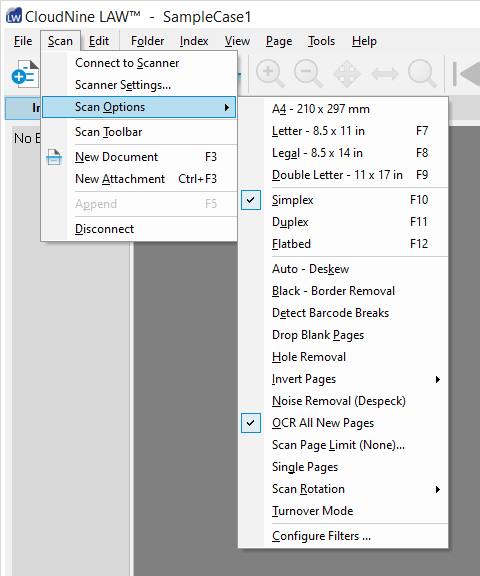
To view the Scan Options sub-menu, from the Main User Interface use the Menu to select Scan > Scan Options. Alternatively, you can right-click on the Scanner Status Bar in the bottom-right corner of the Main User Interface:

From here, you have a variety of commonly used scanner options available for quick and easy configuration on the fly, without needing to have the Scan Toolbar open. This is helpful when scanning large amounts of physical documents that may each require slightly different configurations in order to import properly.
Page Sizes
The following options determine the size of pages being scanned. Most modern scanners will correctly determine sizing automatically.
The available sizes are A4, Letter (F7), Legal (F8), and Double Letter (F9).
Scan Mode
The following options determine how and where pages will be scanned:
•Simplex - Only one side of each page is scanned from the feeder. •Duplex - Both sides of each page are scanned from the feeder. •Flatbed - Scans pages from the glass flatbed. Defaults to Simplex and scans only a single page from the feeder if page if no pages are available in the flatbed. Filters/Other
The following options provide image manipulations (Scan Filters) that can automatically be applied to document pages during the scanning process, and additional supplemental settings for more uncommon scanning needs.
•Auto-Deskew - Straightens images as they're scanned if they appear crooked or misaligned. (see Page-level Cleanup). •Black-Border Removal - Removes black edges from the borders of scanned images. These borders are often the result of the scanner model being used, and will prevent LAW from recognizing blank pages. If these borders are uneven, then they will not be removed automatically, and you may need to adjust the Scan Area in order to correct the issue. •Detect Barcode Breaks - Allows scanning of multiple documents with varying page amounts at once by inserting Break Sheets (Slip Sheets) that contain barcodes between separate documents. These barcodes can indicate either the start of a new document, or a new folder to be created.
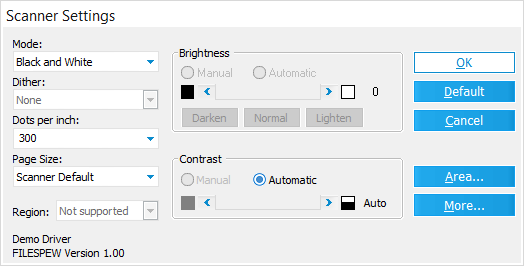
These images can be opened with any image viewer and printed if users need to prepare a scan job with break sheets. Light-colored paper is recommended when printing barcode sheets (e.g., white, light blue, light yellow, or light green). LAW relies on the contrast between the bars in the barcode and the background color of the paper for detecting the barcode value. Scanner brightness or contrast (Scan > Scanner Settings) may require adjustment if LAW is having a difficult time recognizing the barcodes. See Barcode Break Sheets for more information about barcodes. •Drop Blank Pages - Images containing very small pixel ratios (as is typically the case with blank pages of any color) are automatically removed as they're scanned. This is useful when scanning documents containing both double-sided pages and single-sided pages. •Hole Removal - Removes visible holes from the images of hole-punched pages. Only standard-sized holes (1/4" - 5/16") are supported. •Invert Pages - Select Odd or Even from this menu to automatically rotate select pages 180º while scanned. This is helpful when scanning double-sided pages that have opposite orientations on the front and back sides. •Noise Removal (Despeck) - Reduces the amount of dots/specks that can appear randomly on poorly scanned images. This noise often reduces the accuracy of OCR. •OCR All New Pages - Automatically flags every scanned page for OCR. Does not perform OCR - this will need to be done separately after scanning has completed. See the Flagging Documents/Pages for OCR section for information on flagging pages after they have been scanned. •Scan Page Limit (Current)... - Opens the Set Scan Page Limit window, allowing you to set a limit on the number of physical pages (front and back) comprising each document while scanning. Useful when scanning large numbers of checks, note cards, business cards, etc. without the need for Break Sheets or individually scanning documents one at a time. Note that for double sided pages, both sides of the page are treated as a single page with this setting. The Current limit is displayed in parenthesis. •Single Pages - Overrides the Scan Page Limit and sets it to 1. All pages being scanned are treated as separate one-page documents. •Scan Rotation - The Scan Rotation setting can be used to rotate pages as they are scanned. Images can be rotated 90, 180, or 270 degrees. Scanning documents in landscape mode may increase the scanner throughput and help prevent paper jams. If using this feature to scan landscape, the scanner must support double-letter page size in order to capture the full height of the document. •Turnover Mode - Used to scan double-sided pages in the flatbed without using a duplex scanner. LAW will prompt users to flip pages during the scanning process, and will rebuild documents in their correct page order afterward. This setting will disable the Detect Barcode Breaks filter. •Configure Filters... - This button opens the Configure Scan Filters window.  See the Scan Filters topic for more information on the Configure Scan Filters window. See the Scan Filters topic for more information on the Configure Scan Filters window.
|