Exports are the final output from CloudNine™ Explore. There are three types of exports available in CloudNine™ Explore:
•LAW Direct Export - CloudNine™ Explore exports files directly into a new or existing CloudNine™ LAW case file. ED Loader is not used.
•Native File Export - CloudNine™ Explore generates a DAT load file, along with native files and text files, for importing into CloudNine™ Concordance®, kCura® Relativity® , or other applications that support a DAT load file. The native file export can also generate an EDRM XML version 1.0 load file, along with native files and text files for importing into products that support EDRM XML version 1.0. The files generated by the native file export are saved to an export output directory.
•Native Subset Export - Created for existing native exports in CloudNine™ Explore. Before a native subset export set can be created and exported, the parent native export set must exist in the case. Native subset exports can be used to speed up the file review for a case by only exporting the native files for specific CloudNine™ Explore IDs or specific export numbers. Like the native file export, CloudNine™ Explore can generate a DAT load file along with native files and text files for importing into CloudNine™ Concordance®, kCura® Relativity® , or other applications that support a DAT load file. The native subset export can also generate an EDRM XML version 1.0 load file, along with native files and text files for importing into products that support EDRM XML version 1.0. The files generated by the native subset export are saved to an export output directory.
Depending on which type of export you use in CloudNine™ Explore, the export process passes filtered/tagged files directly to a new or existing CloudNine™ LAW case, or to the native file export directory. The export process involves two steps. First, you generate an Export Set, which contains the saved export settings and the list of items that will be exported. Second, you send the export set to a new or existing CloudNine™ LAW case, or to the native file export directory. You can create multiple export sets for a case in CloudNine™ Explore, and can use the same export set for multiple exports (such as for rolling productions).
You can also save export settings to an Export Profile, which can be applied to other exports in the case or other cases.
|
Before you generate an Export Set it is recommended you check the following: •Have all custodians been committed? If a custodian has been set up with source files but not committed, none of its items will be available for export. For more information on setting up custodians and importing sources, see Importing. •Are filters and tags appropriately configured? The contents of the export directly reflect whatever filtering and/or tagging is in place at the time the set is generated. For more information on configuring filtering in CloudNine™ Explore, see Filtering. For more information on tagging files, see Tagging. |
|
Starting with LAW 7.13, Explore can directly export to Turbo Import enabled cases. NOTE: that it can't make Turbo cases yet but it can import into them. |
Within a top-level case tab in CloudNine™ Explore, exports are created from the Export sub-tab.
Opening an Export Set
When you open the Export tab after an Export Set has been created, the Export tab displays the set last created for the case. If you want to open a different set for the case, click the Manage link next to the Export field at the top of the Export Settings pane.
1.Click the Case Manager tab.
2.Double-click a case to open it.
3.Click the Export tab. The last created Export Set displays.
4.Click the Manage link next to the Export field at the top of the Export Settings pane.
5.In the Active column, select the circle next to the set you want to open.
6.Click Done. The selected data set displays.
If you want to export additional files from the case using an existing Export Set, the new files will be appended to the existing files in the export, and the .dat and/or .xml file already generated for the set will be appended with the file information for the new files.
If you need to remove the new items added to an Export Set, or any items not yet exported from the export set, you can click the Remove link next to the New field in the Export Statistics section to remove those files from the set. After clicking the Remove link, click Yes when asked, Are you sure you want to remove all new/not-exported items from the export set?.
If you want to reuse an existing Export Set for a new export, you can clear the export statistics, the item list, and item details that were generated previously for the that set by clicking the Clear All link next to the Total field in the Export Statistics section, and then clicking Yes when asked, Are you sure you want to remove ALL items from the export set?. When you click the Clear All link, all options associated with that set are retained.
|
Use caution when clearing an Export Set. The Clear All link can increase the risk of introducing duplicates into a CloudNine™ LAW case, .dat file, or .xml file. If you need to change filtering in CloudNine™ Explore and then export to the same CloudNine™ LAW case a second time, try opening the target CloudNine™ LAW case and then remove previously added items. Alternatively, create a new CloudNine™ LAW case instead of re-exporting to an existing case. For native exports, clicking the Clear All link only removes the files in the Export Set from the set itself, it does not affect the files exported to the output directory. If you export new files using the same set, the new files are appended to the existing files and the existing .dat and .xml files in the export output directory. If you only want the new files to be exported, you will need to delete the existing files in the export output directory before re-running the export for that set.. |
|
You can generate Export Sets multiple times from a CloudNine™ Explore case for export to the same CloudNine™ LAW case. This process is additive. Each time you create a new set and then export to CloudNine™ LAW, only new items are added to the case. |
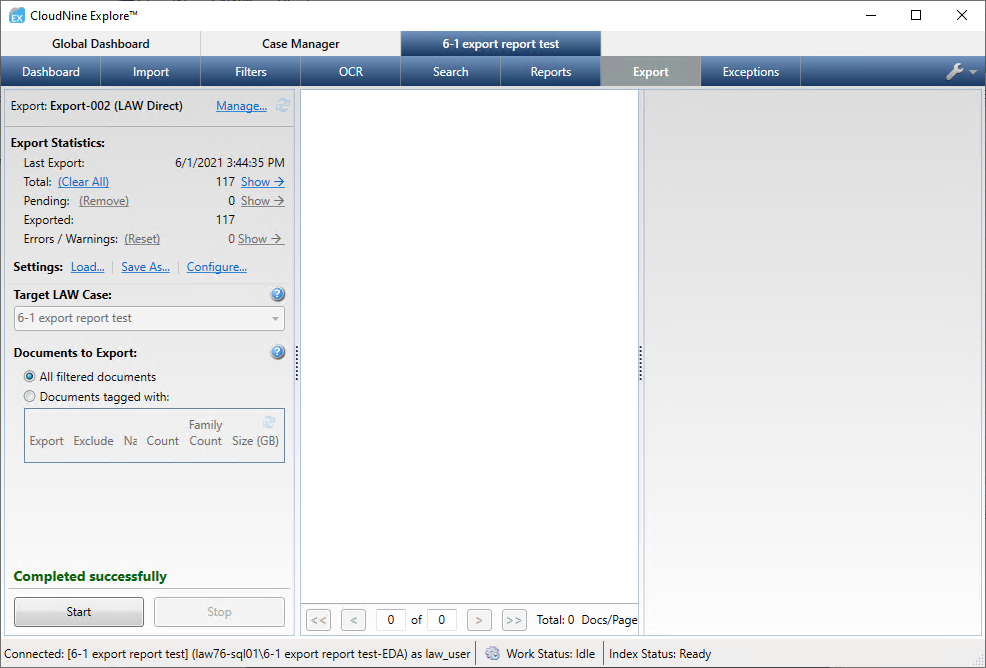
Export Statistics
The Export Statistics section in the left pane of the Export tab displays details relevant to the most recent export run for the export type selected.
•Last Export - The date and time the last export of this type was completed.
•Total - The count for all top level items in the Export Set. Parent files are counted, but attachments are not. The contents of containers are included, but the container itself is not. Note that attachments are not counted even if they are tagged, because they are considered “family members” of the parent, and attachments are already counted in the Family Count.
•Family Count (Explore) - Appears for CloudNine™ LAW exports only, representing the total number of items expected to be exported. The items counted are expanded from the top level items, so an email item with two attachments would be counted as a total of three items, but an archive containing two attachments would be counted as a total of two items because the archive itself is treated as a folder.
•New - This value is updated when the export is complete, reflecting the number of items that were queued for export. This number should be zero immediately after export.
•Exported - The total number of items sent to LAW to be processed by ED Loader. For CloudNine™ LAW exports, this number should be the same as Family Count (Explore). If it is not, there should be error message(s) to indicate which items ran into issues during the export.
•Family Count (LAW) - The total number of items actually exported from CloudNine™ Explore to CloudNine™ LAW, appearing only for CloudNine™ LAW exports. The items counted are expanded from the top level items, so an email item with two attachments would be counted as a total of three items, but an archive containing two attachments would be counted as a total of two items because the archive itself is treated as a folder.
|
Embedded mail stores are not included in the totals. |
Export Summary Report
After export, Explore displays a summary report with the following information:
•Items Discovered - Total number of items written to LAW, including emails, attachments, archives, and archive items.
•Records Written to LAW - The number of records created in LAW. This number may be smaller depending on ED Loader settings, or larger if ED Loader finds embedded items.
•Emails - Number of emails written to LAW.
•Attachments - Number of attachments (both email attachments and embedded documents) written to LAW.
•Archives - Number of archives written to LAW. Archives can include ZIP, PST, and NSF files and others.
•Archive Items - Number of items written to LAW from archives, not counting the archive itself.
•Size Processed - Total size processed, including emails, attachments, archives, and archive items.
•Messages - The number of error messages generated by the export. Click the Show link next to the number of error messages to display the errors in the Viewer pane.
Viewing and Saving Native and LAW Direct Export Errors
The number of errors encountered during an export is displayed in the Errors field in the Export Statistics section. Errors encountered during a native export or LAW Direct export can be written to a .csv text file, and the files returned with errors can be viewed in CloudNine™ Explore by clicking the Show link next to the Errors field.
The export logs two types of errors:
•File Not Found - File Not Found errors occur when the export cannot locate the original file or container for the exported record. For native exports, when a File Not Found error occurs, no record will be added to the load file for the missing file.
•Extraction Error - An Extraction Error indicates that the export was unable to extract an embedded file that was included in the export. For native exports, when an Extraction Error occurs, a record is added to the load file and a text file containing the details of the error is exported in place of the native file to serve as a placeholder. An Extraction Error generally indicates a bug or problem with the export.
If an export fails, instead of encountering errors, the message Export Failed and the View Details button are displayed in the Document list. You can click the View Details button for more information about the failed export.
1.On the Export tab, open the Export Set containing the errors you want to save.
2.Click the Show link next to the Errors field. All files associated with the error are displayed in the center pane, and the Save Export Errors to CSV link displays at the bottom of the center panel. Click on a file in the center pane to review it. Text extracted from the file, along with the file metadata, are displayed in the rightmost pane. If available, click Document text truncated due to length... to view the extracted text in a text editor.
3.At the bottom of the center pane, click Save Export Errors to CSV. The Save Export Errors dialog displays.
4.Browse to where you want to save the export errors .csv file and type a name in the File name box. By default, the file is saved to the ...\Documents and Settings\All Users\LexisNexis\EdAnalyzer\Home\cases\[case name] directory with the file name "ExportErrors.csv".
Resetting Export Errors
When you are ready to re-export files associated with an error, you will need to click the Reset link next to the Errors field to make those files available for exporting again.
1.On the Export tab, open the Export Set containing the errors you want to reset.
2.When you are ready to re-export those files, click the Reset link next to the Errors field. The documents are available for export again.
3.Re-export the files.
When you re-export the files, if a file was exported in the original export, the export will overwrite the file originally exported with the re-exported version of that file.