It is best practice to store the body text of your records, also called OCR, in a separate text file from your field metadata. When your OCR is placed into individual document-level text files, you can import the text into each corresponding record. The text file name must match the image key field (the BEGNO field or its equivalent).
If the body text contains more than 12 million characters (the capacity of a paragraph field), Concordance automatically overflows the text into the next available field. If you import your OCR from a delimited text file and there are more than 12 million characters in a record, then you need to separate the text in the delimited text file into multiple fields to avoid truncation during import.
After your metadata is imported into your Concordance database, it’s time to import your record content into the body text fields. If you have already created your database, you can use a CPL script (ReadOCR<version>.cpl) to quicky import OCR text files into your database field structure by linking them with the image key field and ensuring that the correct file path is designated. Your record content from OCR files usually populates the OCR1 and OCR2 fields or their equivalents. The OCR fields are where the bulk of full-text searching is done in Concordance.
If your OCR files aren’t importing properly when using the CPL, check the following:
•Verify file names and extensions - OCR text file names should match the associated image key, and have a .txt file extension
•Check your .LOG file to verify whether each OCR file successfully loaded
|
Your OCR text files can reside in the same directory as the image files. They do not need to be separated. You will need to import your OCR for each volume where it resides. |
Using ReadOCR.CPL
1.In Concordance, on the File menu, click Begin Program.
2.In the Open box, navigate to your CPL folder, select the ReadOCR<version>.cpl file, then click Open. By default, CPLs are installed in C:\ProgramData\CloudNine\Concordance 10\CPL.
3.A dialog displays confirming you are running the Read OCR Utility. Click OK.
4. In Concordance, the Workspace pane background is now blue, an indication that you are running a CPL script. The OCR IMPORT MENU and Status details display. The Current CPL displays in the Navigation pane.
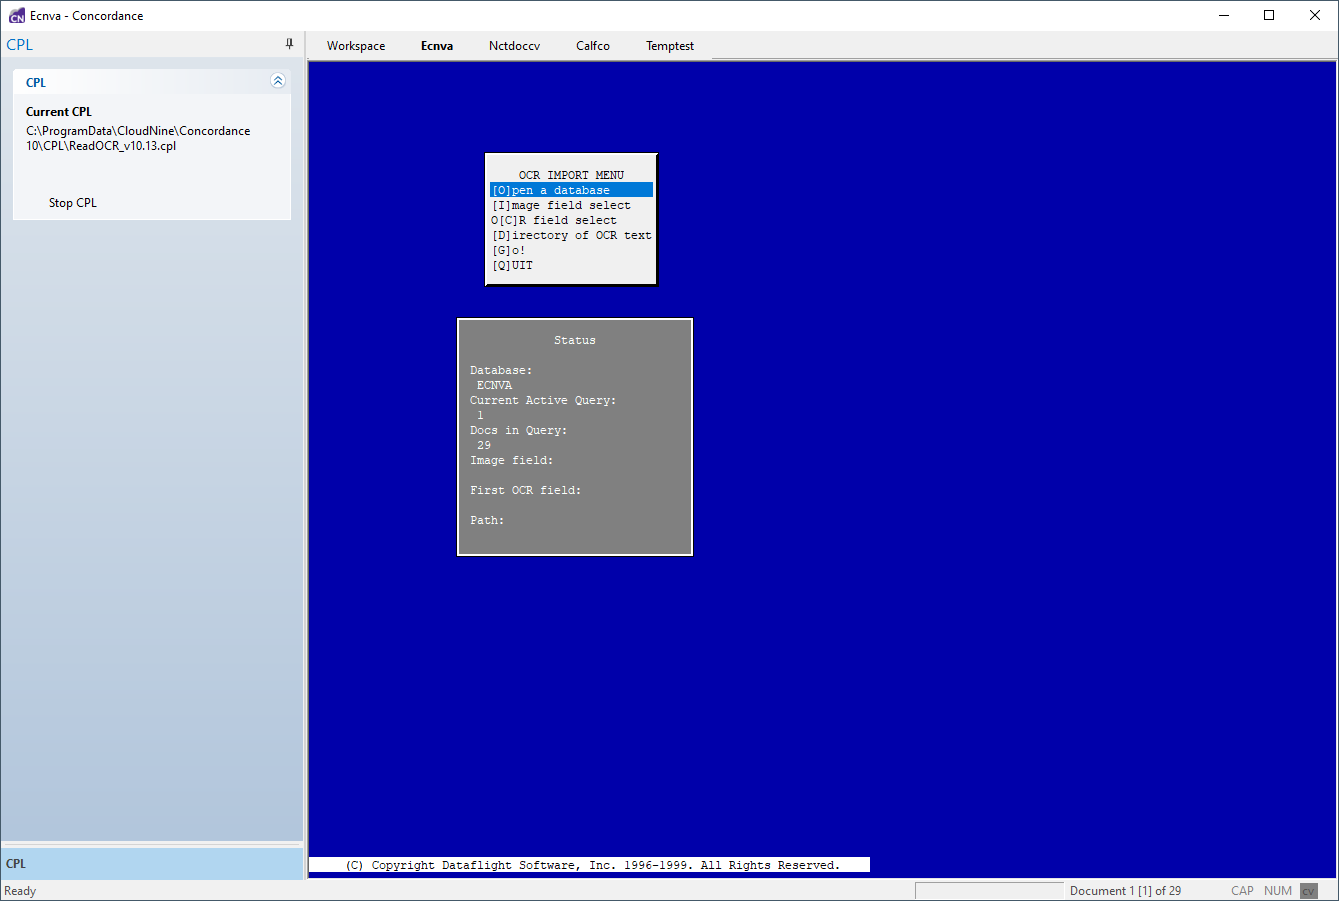
5.CPLs work off of current queries in Concordance. The number of documents in your current query is displayed in the Status Bar at the bottom.
6.On the OCR IMPORT MENU, click [I]mage field select.
7.An additional window displays a list of fields and their associated types. Select BEGNO or its equivalent. The Status window updates to show BEGNO as the Image field.
8.On the OCR IMPORT MENU, select O[C]R field select.
9.An additional window displays a list of fields and their associated types. Select OCR1 or whatever field you want to use as the first OCR field. The Status window updates to show OCR1 as the First OCR field.
10.On the OCR IMPORT MENU, click [D]irectory of OCR text.
11.A browse dialog is displayed. Navigate to the folder containing your OCR files, select the first OCR file, and click Open. The Status window updates to show the Path to your OCR files to import.
12.In the OCR IMPORT MENU, select [G]o!.
13.A browse dialog is displayed. Navigate to a location for the OCR import log file, enter a File name for the log and click Open.
14.The OCR import runs. Review the log file to see if the import ran successfully.
15.On the OCR IMPORT MENU, click [Q]uit to exit the CPL script.
Verify the Imported OCR Text
Once you have imported your OCR files, it is best practice to verify the imported text. After verifying, you will need to reindex or index the database.
1.In Concordance, open the Browse view.
2.Verify that the data you just imported populated the OCR field correctly in your database records.
3.Scroll to the bottom of a record to verify the administrative fields.
•Notice that the CREATEDATE field displays the import load date of the document. The EDITTRAIL field is populated with the record modification date, session and accession numbers, and the user ID of the person who last updated the file. The ACCESSID field displays the load order number of the document.
•If you have corresponding OCR for every record and need to verify whether all text was loaded into the OCR1 fields, then use a relational search to ensure that every field was populated.
4.Run an empty OCR field search. To do this, type OCR1 = “”. The search provides query results on all OCR1 empty fields. You should receive the, “No documents found in current query” message if all documents loaded properly.
5.Run a populated OCR field search. To locate specific paragraph fields that are populated, you can also run the relational search of [fieldname] = *. You should receive query results for all documents that have this field populated with any value.