Return to Section Header
Single document TIFF conversion, also referred to as manual TIFFing, makes it easy to review a native file, make adjustments if needed, and process (or re-process) to TIFF. Once printed, users can review the image and choose to either save or discard it. Saving the image will commit the image to LAW by either replacing an existing image or by inserting the image, depending on whether or not an image previously existed for that record.
This feature provides a simple method of opening and printing otherwise unsupported file types, provided the native application is installed on the machine. This feature is also useful when reviewing and re-processing "problem" supported file types.
Multiple options should be reviewed prior to using this method of converting to TIFF images:
•Decide whether to store the resulting image as serialized (single-page) or multi-page.
•Decide whether or not to generate printed text, that is, text created during a TIFF conversion when using the LAW Image Driver.
•Determine the desired color reduction setting.
•Decide whether or not to drop blank pages.
|
When you are doing single-document TIFF conversion, the time zones that are associated with image files do not automatically adjust to match the time zones of the native files. In such circumstances, if you need dates to match between the native files and image files, you can manually change the time zone on your system prior to printing to match the time zone of the native files. |
![]() To Configure Options for Batch TIFF Conversion
To Configure Options for Batch TIFF Conversion
1.On the Tools menu, click Batch Process. 2.In the Batch Processing dialog box, click Options, and then click TIFF Options. 3.Select the TIFF Output category. 4.In the Active Driver list, click one of the following print drivers: •LAW Image Driver •LAW Image Driver 300 DPI 5.Set the other TIFF output options as needed and then click OK. For more information about the TIFF output options, see Output Settings for E-Print, TIFF Conversion. 6.Close the Batch Processing dialog. The selected options will now apply to the single document TIFF conversion process in addition to the batch TIFF conversion process.
|
![]() To Convert a Single Document to TIFF
To Convert a Single Document to TIFF
|
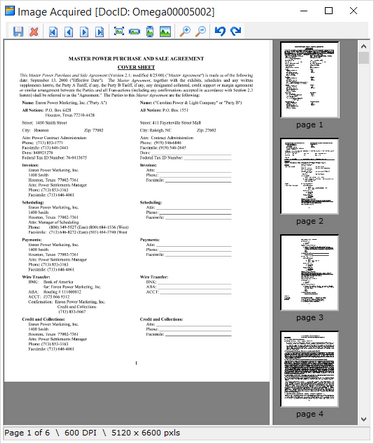
1.Select a document to be printed from its native application. 2.Above the image display on the main form, click the hyperlink or click Open File. 3.In the native application, print the file. 4.In the print dialog box, select the Informatik Image Driver or the LAW Image Driver. 5.Click Properties to adjust settings, as needed. 6.Print the file. After the file has been converted to a TIFF image, the Image Acquired dialog box appears. 7.If the image is acceptable, click the Save the Image button, Clicking the Save the Image button adds the TIFF image to the selected record. If you want to discard the TIFF image, click the Discard the Image button,
|
