Return to Topic![]()
 Opening ED Loader
1.Start from the Menu of the Main User Interface by selecting File > Import > Electronic Discovery.
2.The Main User Interface will close, and the ED Loader tool will open with the Sources tab displayed.
![]() Starting an ED Loader Session
Starting an ED Loader Session
1.Start by selecting the Sources tab within ED Loader.
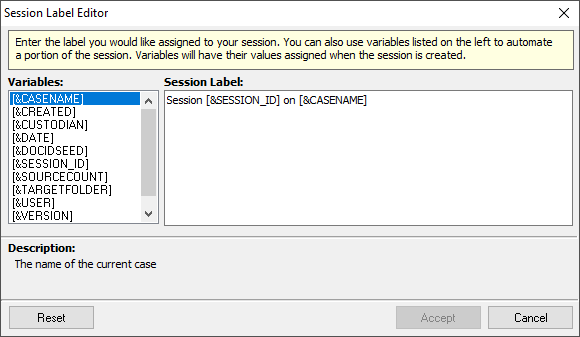
2.Set your desired Session Variables for the current session if needed. In most instances, these will be left at their default values.
3.Add documents to the Source Queue via one of the following methods:
1)Drag and drop files/folders (not an entire drive) from any File Explorer onto the Source Queue pane.
2)Click on one of the six buttons located under the Add section of the Buttons pane to search for specific kinds of sources.
4.Edit the desired values for each source listed in the Source Queue as needed. All changes are highlighted in green.
i.Revert these changes by clicking on the appropriate Reset button at the bottom left.
5.Remove any unwanted sources by selecting the desired source from the Source Queue and clicking on the Remove Item button located under the Remove section of the Buttons pane.
i.Optionally, you may remove all listed sources from the Source Queue at any time by clicking on the Clear All button instead.
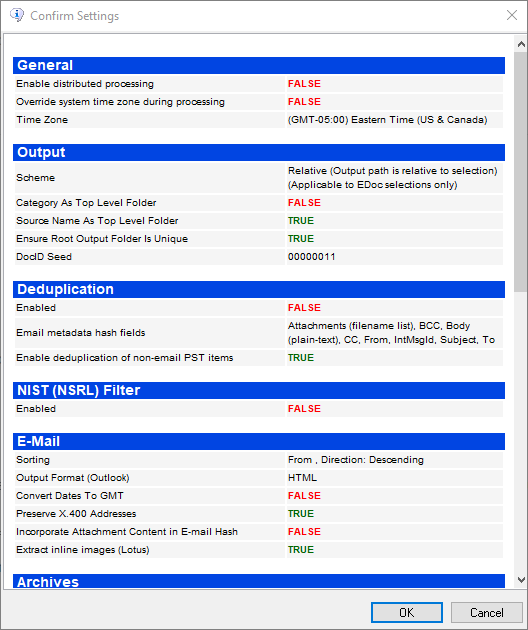
6.When you're satisfied with the Source Queue, click on Start at the bottom right to initiate the import process. The Confirm Settings window opens.
7.Ensure that you have the appropriate ED Loader Settings enabled/disabled, and then click on OK to initiate the import process.
i.If any settings look incorrect, you can click on Cancel instead, and navigate back to the Settings tab to change settings as desired.
8.You will be redirected to the ED Loader Progress screen.
|
|
To ensure the DocID is unique to each record when loading from multiple workstations, devise a file numbering scheme that uniquely identifies the workstation used to process documents, for example: ScannerPC1_000001, ScannerPC2_000001, etc. |
|---|
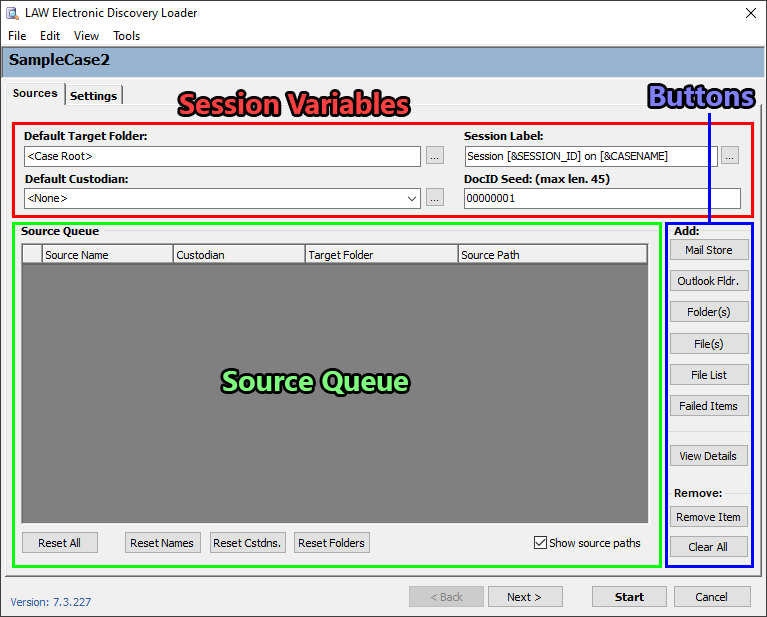
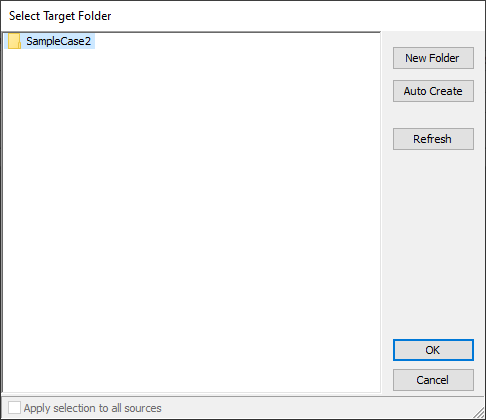
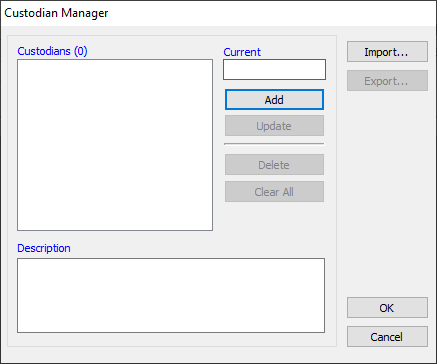
Source QueueThis pane displays a list of all sources currently selected for import. Separate columns at the top designate a Source Name, Custodian, Target Folder, and Source Path for each source listed. These values can be individually changed for each source (except for the Source Path) by clicking on the appropriate value and either typing directly into the field (for the Source Name), clicking on the down arrow (for the Custodian), or clicking on the [...] button (for the Target Folder) once that value is selected. Any changes made to these values are highlighted in green. Once changed, these values can be reverted back their defaults by clicking on the appropriate Reset button (Reset All, Reset Names, Reset Cstdns, Reset Folders) located at the bottom left. You can quickly add sources to the queue at any time by dragging any number of files/folders (not an entire drive) from a File Explorer onto the list. Buttons•Add - The following buttons are used to add specific files/folders to the Source Queue: oMail Store - Opens a File Explorer that specifically targets PST, OST, and NSF file extensions. Select the desired mail store, and then click Open to add it to the Source Queue. oOutlook Fldr. - Opens an internal Outlook folder browser, allowing you to select any number of Outlook mail folders from the available accounts. Check the appropriate boxes on the left of each desired mail folder, and then click Accept to add those folders to the Source Queue. This window has an optional setting: ▪Recurse Subfolders - All subfolders contained within selected mail folders are also added to the Source Queue. oFolder(s) - Opens an internal file browser, allowing you to select any number of source folders. Check the appropriate boxes on the left of each desired folder, and then click Accept to add those folders to the Source Queue. This browser has two optional settings: ▪Recurse Subfolders - All subfolders contained within selected folders are also added to the Source Queue. ▪Scan selection(s) for mailstores - Any mail stores contained within selected folders are also added to the Source Queue. oFile(s) - Opens an internal file browser, allowing you to select any files located within a specific folder. Navigate through folders on the left, and select files contained within on the right. Click Accept to add those files to the Source Queue. oFile List - Opens a File Explorer that specifically targets File Lists in TXT format. A File List contains full file paths to relative files, without quotations, separated by hard returns for each item listed. Relative file paths may be used as long as the File List itself is located within the top-level folder containing each path. oFailed Items - Repopulates the Source Queue with any source document that failed to import through a previous ED Loader session. •View Details - Opens the View Source Details window, providing brief details on any source selected within the Source Queue. •Remove - The following buttons are used to remove selected sources from the Source Queue: oRemove Item - Removes the selected source from the Source Queue. oClear All - Removes all listed sources from the Source Queue. |
![]() Long Paths
Long Paths
If the path to a source exceeds 260 characters, which is the Windows limit: •ED Loader copies the files to a temporary location to allow successful processing of the files. •A warning will be logged in the Session Viewer logs. |
|
|
|
|
A Knowledge Based Article on this subject can be found here: Why am I seeing a "Wrong OS or OS Version Error"? (cloudnine.com)