Buttons for Subtopics ![]() Return to Topic
Return to Topic ![]()
 Opening and Configuring Turbo Import
1.Start from the Menu of the Main User Interface by selecting File > Import > Turbo Import.
2.The Main User Interface will close, and the Turbo Import utility will open, with the Import Settings overlay on top.
|
The Import Settings overlay window automatically opens the first time you launch Turbo Import for a specific case. You can return to the Import Settings overlay by clicking the Settings button located in the top-right corner of the Turbo Import utility. Most Turbo Import Settings are locked and cannot be changed during and after the initial ingestion of data. |
|---|
3.From here, you can configure your Turbo Import Settings for this case based on the options shown below for each tab.
|
Only Passwords (in the Content tab) can later be changed. |
|---|
![]() Tabs:
Tabs:
4.Once you have the desired settings configured, click on OK at the bottom right of the overlay to close it.
5.You are now ready to Start a Turbo Import Session.
There are seven settings tabs available within the Import Settings overlay of the Turbo Import utility, as shown and described below.
|
|
The Turbo Import Password Bank is also used during Batch Process - Turbo Imager |
|---|
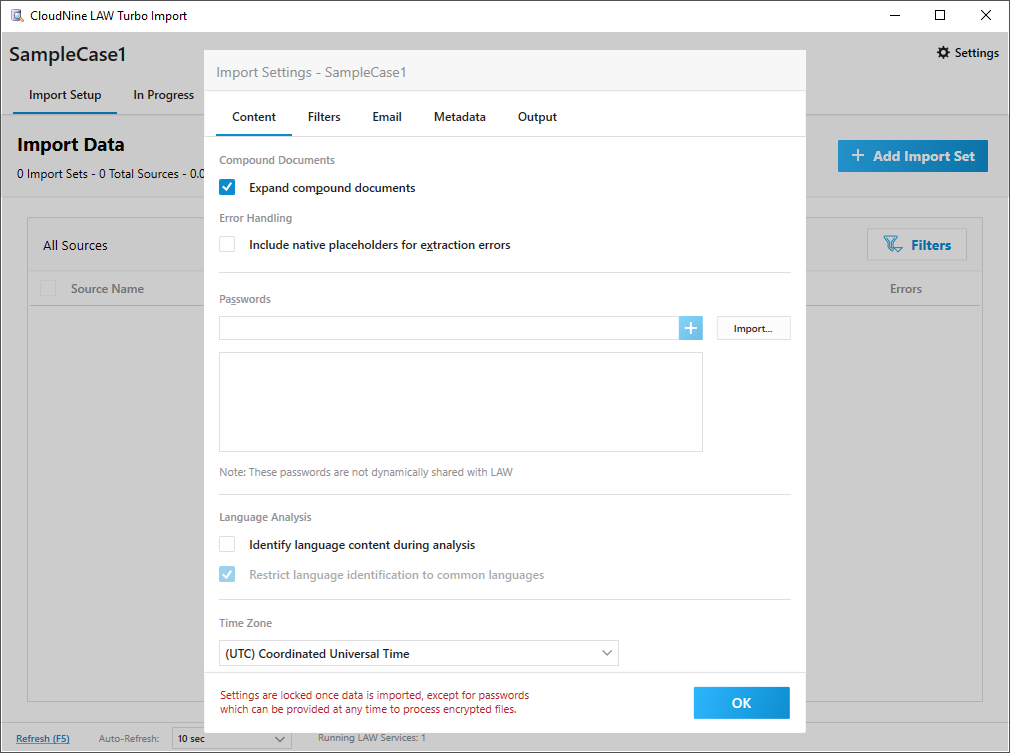
•Language Analysis:
oIdentify language content during analysis - All languages used within the files will be identified and analyzed. The first 200 MB of each file is analyzed during this process, or the entire file should the overall size be less than 200 MB. For more information on the languages please visit this site.
oRestrict language identification to common languages - Limits analysis to only the most recognizable languages to help improve accuracy. For more information on the restricted languages please visit the bottom of this site.
•Time Zone - Select your desired time zone from the drop-down menu here. Default is Coordinated Universal Time (UTC). All files and folders imported into the Case File will use the selected time zone for their records.
|
•Microsoft Word/RTF |
•Microsoft Excel |
•Microsoft PowerPoint |
•Adobe Acrobat PDF |
•SnapShot |
•Microsoft Visio |
•Microsoft Outlook.FileAttach (Word-authored e-mail with inline attachments, generally stored in RTF) |
•Microsoft Project |
•Package* |
|
*A Package is a general type of embed; it can be a text file or a zip file, for example. Any of the above types may also be embedded as a package type depending on the software installed when a user embeds the file. For example, if a user were to embed an Excel spreadsheet into a Word document, and Excel is not installed, the spreadsheet will be embedded as Package.
Supported containers file types and embedded files
The following table lists common embedded file types that LAW supports for extraction:
Description |
Detection |
Extraction |
|---|---|---|
Non-Microsoft Office Formats |
||
Adobe Acrobat (pdf) |
Y |
Y |
Rich text format (rtf) *Converted to Word format for extraction. Original file is preserved. |
Y |
Y |
Excel Spreadsheet (OpenXml, xml) & Excel *Compound documents not supported in xml format |
Y |
Y |
MS Office Data File (OpenXml) |
Y |
Y |
PowerPoint Presentation (OpenXml) and PowerPoint *Compound documents not fully supported in OpenXml format |
Y* |
Y* |
Word (OpenXml, xml) and Word |
Y |
Y |
OneNote |
N |
N |
Project (xml) and Project *Compound documents not fully supported in xml format |
Y |
Y |
Publisher |
**Y |
Y |
Visio (xml) and Visio *Currently not recognized by file engine |
*Y |
N |
**Detection of embeds in these types is limited to the types of files supported for extraction (see above list).
|
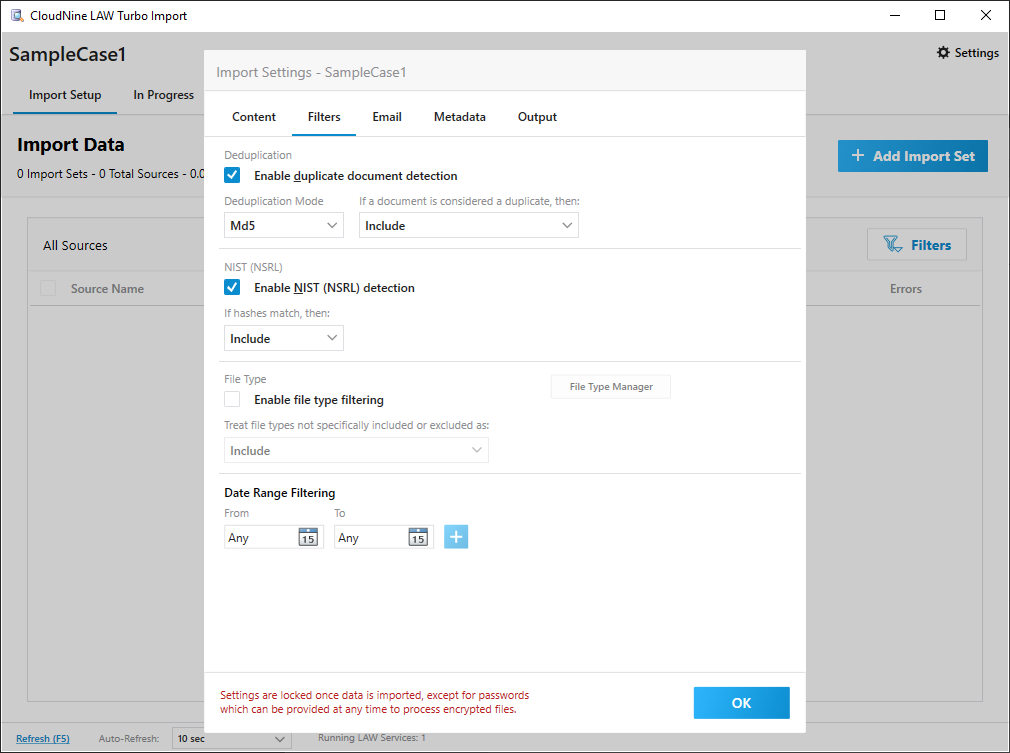
•Deduplication - A process that scans all source files for any duplicates (identical copies). This is done by subjecting all source files to a hashing process, which yields unique numerical values (hashes) for each file. Files yielding identical hash values are considered duplicates. In Turbo Import, this process can be performed either globally or within a Custodian, and is based upon family (parent/child) relationships, so embedded (child) files will not be deduped against other components of the same family. oEnable duplicate document detection - Turns on deduplication. If disabled, deduping can still be performed later via the Deduplication Utility. oDeduplication Mode - There are 2 primary modes for deduplication available, each with alternates for comparing sources within each Custodian rather than across all Custodians. In most cases, either MD5 (128-bit) or SHA1 (160-bit) will provide sufficient deduplication integrity. oIf a document is considered a duplicate, then - Two options are available from this drop-down menu: ▪Include - Creates a record for the duplicate in the Case Directory and copies the native source file to the Case Database. ▪Exclude - Does not create a record, no text is extracted, and the native source file is not copied into the Case Database.
•NIST (NSRL) - The National Institute of Standards and Technology (NIST) maintains and publishes a database of known computer file profiles referred to as a Reference Data Set (RDS), which is compiled by the National Software Reference Library (NSRL). The NIST uses this RDS to compare files against known sets of software applications. NIST filtering is to used to remove file types that are unlikely to have useful data. Examples of such file types include system files, executable files, and application logic files. oEnable NIST (NSRL) detection - Requires a NIST database to be provided through the LAW Configuration Utility. oIf hashes match, then - Select either Include or Exclude from the drop-down menu to determine what happens with NIST items detected during import.
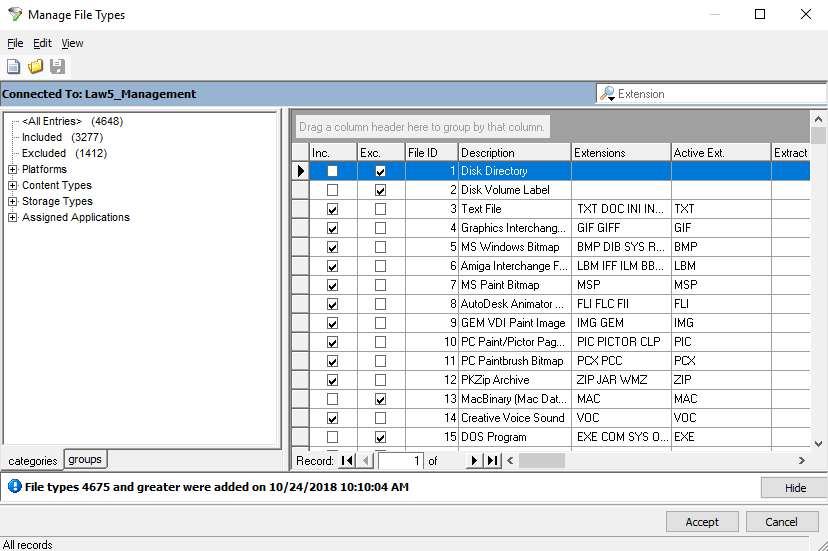
•File Type - This section is for manual filtering of files based on specified file types. Filtering is targeted to top-level (parent) files within a Case Database, thus applying automatically to any embedded (child) files contained within. LAW supports the import of all file types (recommended). oEnable file type filtering - Turns on manual file type filtering based on settings established within the File Type Manager. oFile Type Manager - This button opens a separate window dedicated to specifying file types for filtering. Changes made here apply globally to all cases using manual file type filtering. Certain file types may be Included, Excluded, both (Exclude takes preference), or neither (determined below). You can also assign default applications for opening each file type within LAW. oTreat file types not specifically included or excluded as - Select either Include or Exclude from the drop-down menu to determines how to handle file types not specified within the File Type Manager.
•Date Range Filtering - This section allows for filtering based on specified date ranges for files. This filtering is overly inclusive, so entire families of files will be included if even a single embedded file falls within the specified range. Add date ranges by clicking the Add(+) button to the right of the first range, and remove them by clicking the Remove(-) button to the right of the unwanted range. oFrom - Select a start date for each range by clicking on the appropriate calendar button located in this column. oTo - Select an end date for each range by clicking on the appropriate calendar button located in this column.
CloudNine™ LAW supports import of all file types. Even if a file type is not supported for printing or conversion, metadata and text may still be extracted. A full list of Supported File Types that are recognized by both CloudNine™ LAW and CloudNine™ Explore during Import, can be found here. Supported File Types |
|
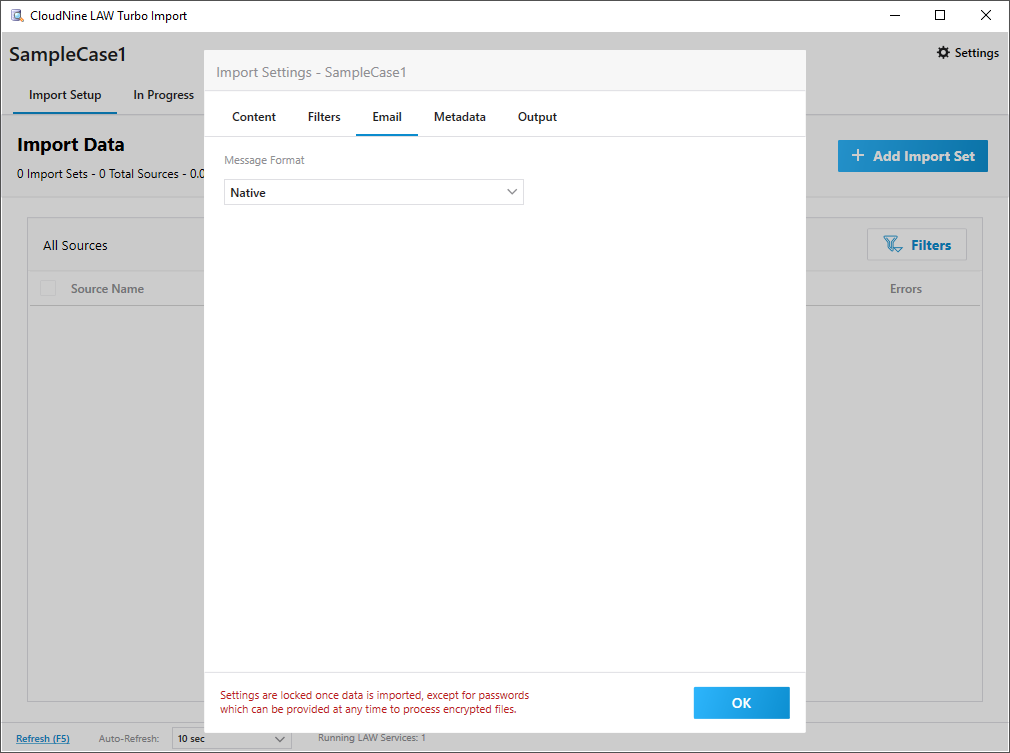
•Message Format - There are several options available from the drop-down menu: oNative - Import all e-mails in their original format. Any e-mails containing a number of recipients exceeding the maximum supported by .msg are either converted to .html, or to .mhtml for those containing images. oHTML - Import all e-mails in .html format. oHTML (MHTML when images are present) - Import all e-mails containing images in .mhtml format, otherwise import them in .html format. oMHTML - Import all e-mails in .mhtml format. |
|
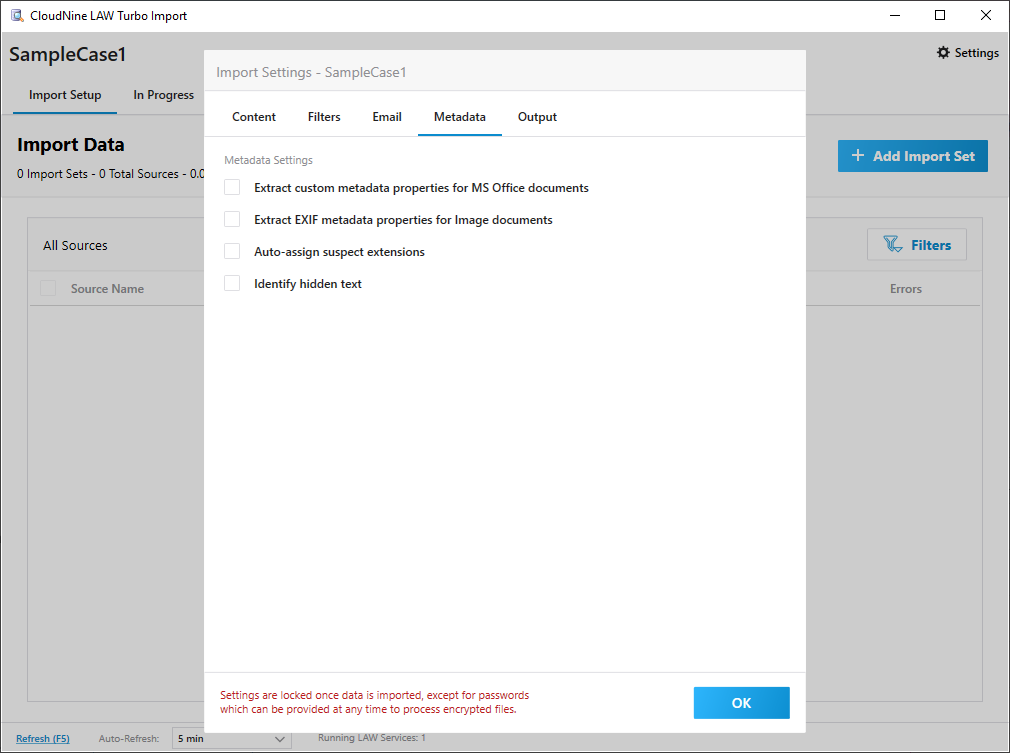
•Metadata Settings - For the following options, the metadata extracted during import is later displayed under various Extended Property, individually labeled as "EP" followed by the name of the field as it exists within the source file. For example, a file containing the metadata field named "Location" will be separately labeled as "EPLocation" within LAW. The options are as follows: oExtract custom metadata properties for MS Office documents - Causes the following metadata to be extracted from files during import: ▪Comments in Word, Excel, and Powerpoint ▪Tracked Changes in Microsoft Word and Excel ▪Hidden rows and/or columns in Excel ▪Hidden and Very Hidden worksheets in Excel ▪Hidden Slides and Speaker Notes in Powerpoint ▪Publisher and Access files are not supported
oExtract EXIF metadata properties for Image documents - Exchangeable Image File Format (EXIF) is a standard that specifies the format for image, sound, and ancillary tags used by systems that handle the metadata for those files. For example, many image files have EXIF tags for geolocation embedded within them. When enabled, these properties will also be extracted.
oAuto-assign suspect extensions - If the file extension for a source file does not match the file type detected by LAW, then selecting this option will place the detected extension in the DocExt field and the source file extension in the OrigExt field during import. oIdentify hidden text - Detects specific forms of text hidden within Word, Excel, and PowerPoint documents. If found, the hidden text will be bracketed in-between <<<Start Hidden Content>>> and <<<End Hidden Content>>> within the extracted text. Associated records will also have the HiddenText field set to Y. These types of hidden text can be extracted: ▪Text hidden inside shape controls, such as text boxes. ▪Text specifically formatted as hidden. ▪Hidden spreadsheets, columns, and cells. ▪Hidden slides.
|
|
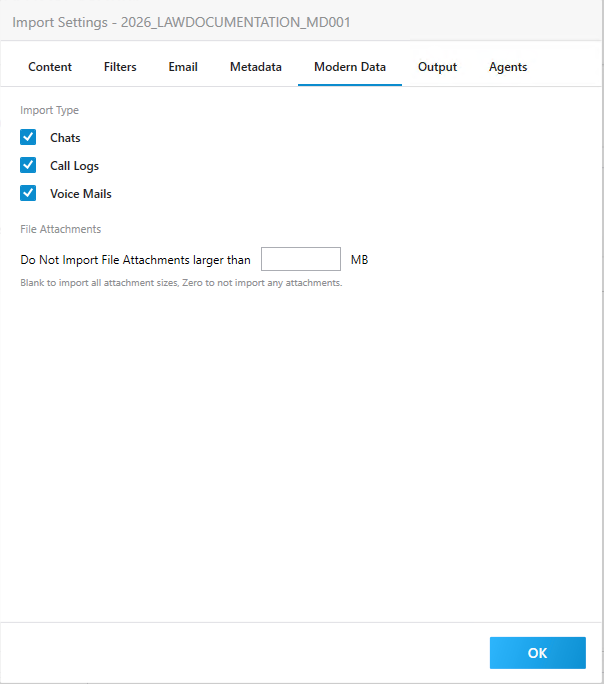
The Modern Data tab provides options for importing data collected from mobile devices. CloudNine LAW supports Cellebrite UFDR files, which are containers for parsed mobile device data, including chats, contacts, and images.
Import Type There are three Import Types: Chats, Call Logs, and Voice Mails. By default, all options are selected (checked). Uncheck any Import Type you do not want to include. At least one type must be selected.
File Attachments Do Not Import File Attachments larger than _________ MB. Option to exclude attachments that are over a specified size. •If blank (empty), all file attachments are imported into LAW. •If zero “0” is inputted, no attachments are imported. •Finally, if a specified value such as five “5” is inputted, then any file attachments greater than 5 MB are excluded from import.
|
|
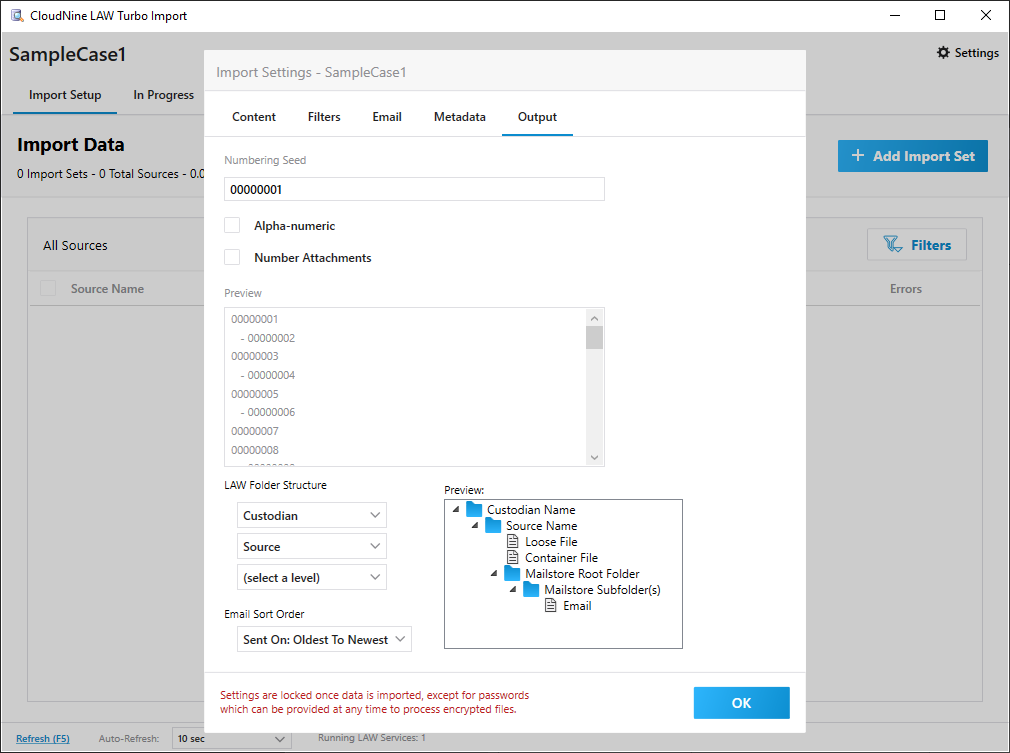
Settings established here are later reflected within the Case Directory pane of the Main User Interface. •Numbering Seed - This seed is used as the starting value for the unique DocID of each record listed, increasing in value for each record added. The seed automatically defaults to the next incremental value for subsequent import sessions based on the last successfully imported source. This value can be a mixture of numbers, letters, and symbols, and may contain up to 50 characters. oAlpha-numeric - With this option enabled, seeds ending in alphabetical characters will continue incrementing alphabetically instead of numerically. (ABC001a, ABC001b, ABC001c.) oNumber Attachments - With this option enabled, an additional set of bracketed numbers are added to the end of each record based on the total number of embedded or attached files within that family. Attached archives may not appear listed in LAW, though they will still be stored and numbered in the SQL Database. oUse nested filename for items extracted from archive - With this option enabled, the archive filename will precede the filename of each extracted item in the Filename field, as follows: archive.zip?filename.doc oPreview - Displays the incremental DocID to be expected for each record based on the starting seed and options enabled above. •LAW Folder Structure - The organizational folder structure of all sources being imported is grouped according to the levels selected here. Each additional level adds to the length of the file path recorded within, so its recommended to only add levels when needed. The following levels are available: Custodian, Source, and Import Set.
•Email and Communication Sort Order - Use the drop-down to choose how emails and communication records are organized, either Oldest to Newest or Newest to Oldest. •Preview - Displays the resulting folder structure to be expected in the Case Directory based on the levels established above. |
|
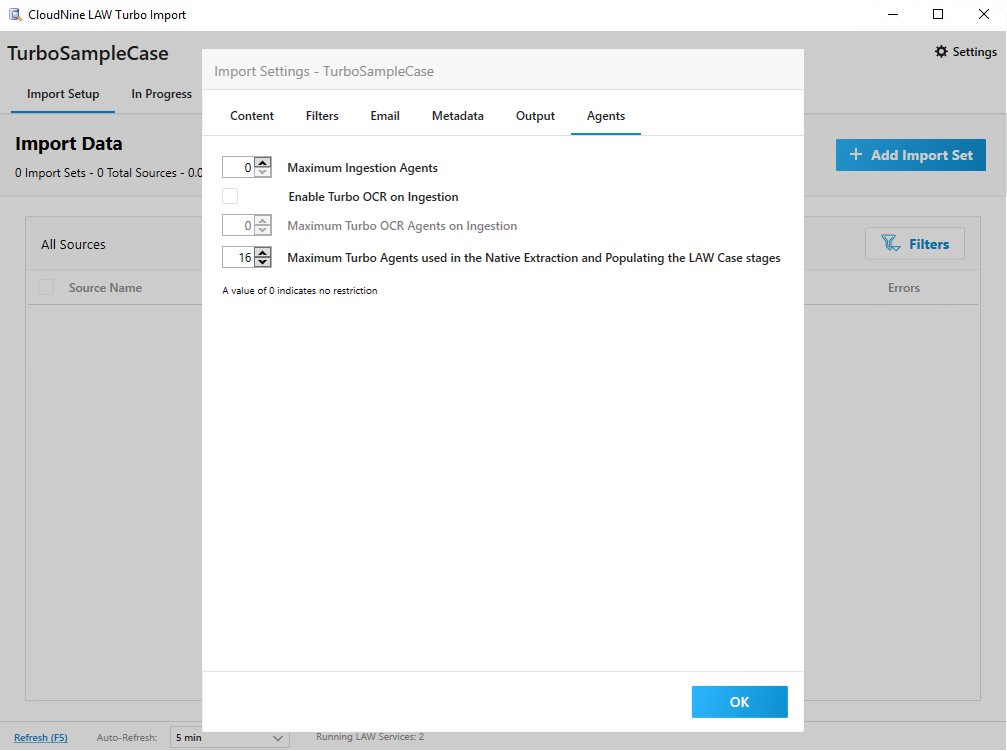
Here you can control the agent level to assign to an import session. •Maximum Ingestion Agents - Control the agents level that are used on all the ingestion stages except for OCR, Extraction and Populating the LAW case.
•Enable Turbo OCR on Ingestion - This setting will turn on the Turbo OCR application. Enabled PDFs and image-based documents to automatically go through OCR.
oMaximum Turbo OCR Agents on Ingestion - This engine is multi-threaded and will engage with all the cores on a workstation. If you are going to set this to a number, it is best to select a number on a workstation level. •Maximum Turbo Agents used in the Native Extraction and Populating the LAW case stages - Control the agents in the native extraction and populating stage.
|
||||||