![]() Action Panel
Action Panel
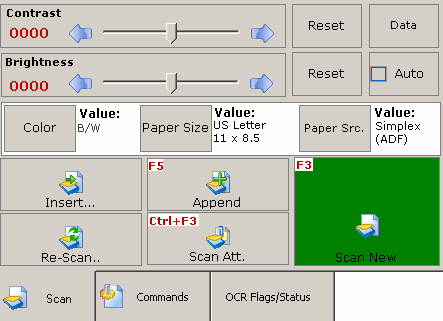
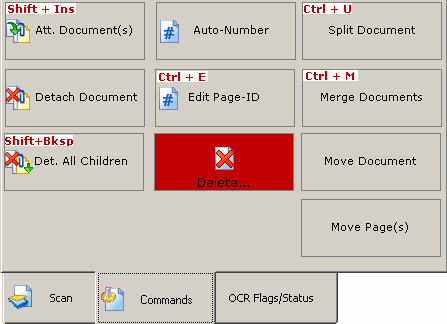
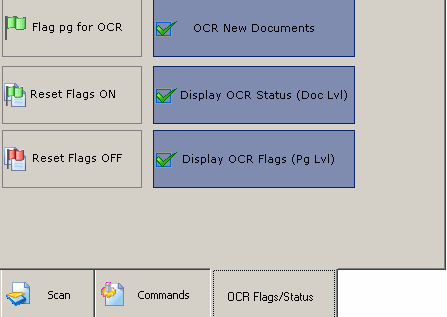
The Action Panel is located on the upper right-hand corner of the Main Interface of LAWtsi. This panel is where the buttons for the majority of LAWtsi's functions are located. The Action panel is broken up into three tabs. The tabs are Scan, Commands, and OCR Flags/Status. Pictured below are screenshots of each tab allowing you find out more information about each button

Scan tab - This is an interactive image of the Scan tab on the Action Panel.

Commands tab - This is an interactive image of the Commands tab on the Action Panel.

OCR Flags/Status tab - This is an interactive image of the OCR Flags/Status tab on the Action Panel.
![]() Interactive Keyboard
Interactive Keyboard
LAWtsi has a built in Interactive Keyboard that can be used to input text.. The Interactive Keyboard acts just like a regular keyboard except it is digital and accepts mouse or touch screen input only. It includes a NumPad similar to the NumPad on a regular keyboard.

Interactive Keyboard - This keyboard allows for users to input text via a touch screen or mouse.
The Interactive Keyboard can be invoked by clicking the Text Input button from any place which this button is location.
![]()
Text Input button - This button will launch the Interactive Keyboard.
Note: When the Interactive Keyboard is visible, all keyboard input is disabled. To input text from the keyboard, users will need to manually type the text in the Text Input box next to the Text Input Button.
![]() Settings Overview
Settings Overview
The Settings Dialog is where all the settings in LAWtsi are configured. This dialog can be accessed by clicking the Settings button on the Main Interface of LAW. Pictured below is an interactive screen shot of the Settings Dialog. Click the one of the buttons on the right of the dialog to view the settings and explanations of each setting.
