Acquisition Functions
Scan New Documents
To add new documents to the current folder, open the desired folder and click the Scan New button or hit <F3> on your keyboard located on the Scan tab of the Action Panel. All new documents will be added to the end of the current folder. If scanning from the document feeder, LAWtsi scans until the feeder is empty.

Scan New document - This button starts scanning new documents.
If Barcode Detection is enabled, LAWtsi will check every page of the incoming document for the values specified in the Barcode Options to determine how the documents should be organized.
Scanning Attachments
Documents can also be added as attachments to other documents. This enables logical grouping of related documents. Adding attachments during scan-time can be done in two ways. To manually add an attachment, click the Scan Attachments button from the Scan Panel (or <Ctrl+F3> on the keyboard). The new document will be added as an attachment to the last document in the current folder.

Scan Attachments button - This button will scan a new document and attach it to the previous document.
Attachments cannot be added at scan time to intermediate documents in a folder. If documents have been scanned out of order, you will have to scan the attachment as a normal document to the end of the folder, move the document immediately behind the appropriate parent document, and then manually attach it.
If using barcode break sheets to scan multiple documents, attachments should be preceded by an attachment break sheet, as opposed to a standard document break sheet. The break sheet for attachments can be found in the installation directory for LAWtsi. It is named attach1.tif and a shortcut to the break sheet (Attachment Break #1) can be found in the Break Sheets subfolder in the program installation group. Documents preceded by an attachment break sheet will always be attached to the previous parent document. Therefore, to scan a document with 3 attachments, a standard document break sheet would precede the parent, and an attachment break sheet would precede each of the 3 attachments. Attached documents will appear indented in the document list to indicate that they are attached to the previous document. See Attachments for more information.
Inserting Documents/Pages
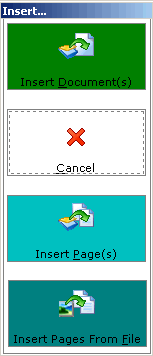
LAWtsi allows you to insert documents in a particular place within the current folder by clicking the Insert... button on the Scan tab. This will display the Insert Dialog. The Insert functions should be used to insert documents into place and maintain the current document order.

Insert Dialog - This dialog is used to insert pages or documents.
The following functions are available when inserting:
•Insert Documents - The insert documents button will insert a document before the selected document maintaining the order of the documents following it. This allows users to insert a document that may have been missed at scan-time and preserve the order of the following documents. When Inserting Documents LAWtsi will prompt the user to input a starting Page-ID for the document. The dialog will also offer an option to Auto-number to the end of folder. For more information see Auto-Numbering Documents. If Barcode Detection is enabled LAWtsi will check for the break sheets configured in Barcode Option and perform the corresponding action.
•Insert Pages - The insert pages button will insert scanned pages before the selected page in the current document. This allows users to insert pages that may have been missed during scan-time. When scanning is complete, the user will be prompted to renumber the document starting on the first page of the inserted pages. There is also an option to Auto-number to the end of folder. See Auto-Numbering Documents for more information. Barcode detection is disabled when Inserting Pages.
•Insert Pages from File - The insert pages from file button will bring up a dialog that allows users to browse to a TIFF file and insert it into the currently selected document before the selected page. If the selected input file contains multiple pages, then all of the pages will be inserted into the target document. This allows users to insert pages that may have been missed during scan-time. When the file insertion is complete, the user will be prompted to renumber the document starting on the first page of the inserted pages. There is also an option to Auto-number to the end of folder. See Auto-Numbering Documents for more information. Barcode Detection is disabled when Inserting Pages from File.
Note: Barcode Detection is only available for inserting documents. While inserting pages from the scanner or file, any barcode break sheets encountered will be scanned as normal pages.
Re-scanning Documents/Pages
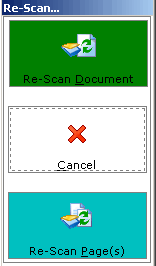
LAWtsi allows you to re-scan a document or pages by clicking the Re-scan... button on the Scan tab located on the Action Panel. This will display the Re-scan Dialog.

Re-scan dialog - This dialog is used to re-scan a document or pages.
The following functions are available when re-scanning:
•Re-scan Document - The Re-Scan document button will remove the existing document from the case and then replace with the newly scanned document. When doing this, LAWtsi will give the replacement document the same starting Page-ID as the document that was replaced.
•Re-Scan Page(s) <F6> - The Re-scan page function allows users to replace pages within a document, or the entire document. To replace individual pages within a document, select the page and then click the Re-Scan Page(s) button. The re-scan pages function will replace the selected pages in logical order. For example if three pages are selected in the page list, and the re-scan pages function is selected then those three pages will be replaced by the first three valid images acquired in the scan session. Images in the batch beyond the number of selected pages are discarded.
Note: The Re-Scan functions are not batch scanning functions. If Barcode Detection is turned on, any barcode sheets will be disregarded and scanned as normal pages.
Appending Pages
LAWtsi allows users to append new pages to the end of an existing document. To do this click on the Append button on the Scan tab of the Action Panel or <F5> on the keyboard.

Append button - This button will append scanned pages to an existing document.
Note: The Append Pages function is not a batch scanning function. If Barcode Detection is turned on, any barcode sheets will be disregarded and scanned as a normal page.
