When files are imported into cases in CloudNine™ Explore, each imported file is automatically mapped to its source file and source file directory. If the source files for Explore cases change or need to be moved, you can update the source file mapping using the Map Sources feature.
Changing Individual Source Mappings
1.Click the Case Manager tab.
2.Double-click the case containing the source mappings you want to change.
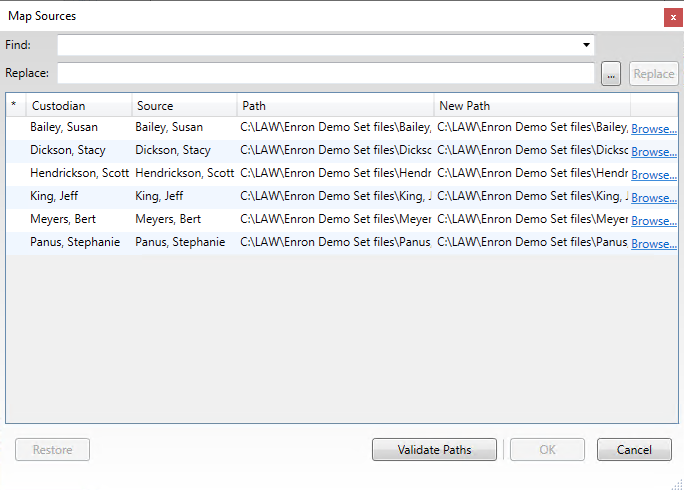
3.Click the down arrow next to the tool icon (wrench), located in the upper-right corner of CloudNine™ Explore, and select Map Sources. The Map Sources dialog displays. By default, the Path and New Path columns display the original source directory until the source mapping is changed.
4.Edit the New Path for the source mapping you want to change. You can click directly on the New Path value and edit, or click Browse on the right to edit via the Browse For Folder dialog. The source files must exist in the new directory for the new directory to be valid. Modified source directories will display with an asterisk until the mapping has been updated.
5.Click Validate Paths to verify the selected source paths.
6.If the paths are valid, a Validation Passed message displays. Click OK to close the message. If the paths are not valid, a Validation Failed message displays. Click Yes to view the error(s). Source mapping errors are logged to the ValidateSourcesLog.txt file.
7.Click OK to save your changes and close the Map Sources dialog box.
|
If you want to change the New Path column back to the source directory in the Path column, click the Restore button. The Restore button is only enabled until you click the OK button in the Map Sources dialog box. Once you click OK, the new source directory is permanently saved for the source and cannot be undone. |
Changing All Source Mappings
1.Click the Case Manager tab.
2.Double-click the case containing the source mappings you want to change.
3.Click the down arrow next to the tool icon (wrench), located in the upper-right corner of CloudNine™ Explore and select Map Sources. The Map Sources dialog displays.
4.In the Find list, enter or select the shortest common path for the sources you want to update. The Find list contains the shortest common paths found for all of the sources in the case.
5.In Replace, enter the new source directory for all of the sources in the Find path. The source files must exist in the new directory for the new directory to be valid.
6.Click Go. The new source directory is added to the New Path column for each of the appropriate sources. Modified source directories will display with an asterisk until the mapping has been updated.
7.Click Validate Paths to verify the updated source paths.
8.If the paths are valid, a Validation Passed message displays. Click OK to close the message. If the paths are not valid, a Validation Failed message opens. Click Yes to view the error(s). Source mapping errors are logged to the ValidateSourcesLog.txt file.
9.Click OK to save your changes and close the Map Sources dialog box.
|
Both Find and Replace are case-sensitive. |
|
If you want to change the New Path column back to the source directory in the Path column, click the Restore button. The Restore button is only enabled until you click the OK button in the Map Sources dialog box. Once you click OK, the new source directory is permanently saved for the source and cannot be undone. |