Importing Searches
On the Search tab, search queries can be created and saved manually or imported from a line-delimited .txt file. Up to 5000 search queries in a line-delimited .txt file can be imported at one time. You can import duplicate search queries, but you can only import one instance of a search query at a time.
If there are duplicate search queries in the line-delimited .txt file you are using, only one instance of the duplicate search query will be imported. If duplicate search queries are identified in the .txt file, the following message is generated during the import:
Search term import complete, [# of search queries] search terms were imported. [# of duplicate search queries] duplicate search terms were detected and not added.
CloudNine™ Explore does allow you to import the same search multiple times into the same case. When the .txt file you are importing contains a search that already exists in the case, the import will add the duplicate search query to the case. For example, if you import the same .txt file three times into a case, there will be three instances of each search query from the .txt file added to the case.
1.From Case Manager double-click a case.
2.On the Search tab, in the Search Request pane, click Import on the Search Toolbar. The Import Searches dialog displays.
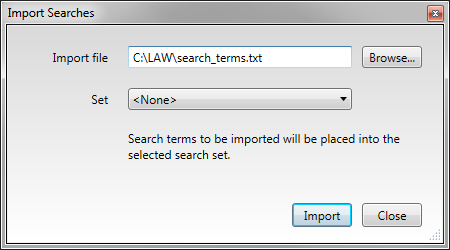
3.Click Browse. A file browser dialog displays.
4.Navigate to and select the search query .txt file you want to import, and then click the Open button. The path and file name you selected are displayed as the Import file.
i.When you are importing search queries into CloudNine™ Explore Web, you can designate whether the search queries are imported into a specific search set or the main saved searches list in the Search Request pane using the Set list in the Import Searches dialog box.
5.In the Set list, do one of the following:
•Click <none> to import the search queries into the main saved searches list.
•Click the search set you want to import the search queries to.
|
For more information about search sets, see Organizing Searches. |
6.Click the Import button. A message displays indicating the number of search queries imported.
7.Click OK to close the message.
The search queries are imported and added to the Saved Search Queries list on the Searches tab in the Search Request pane, and the New icon is displayed in the Status column for the imported search queries.
Exporting Searches
Saved searches on the Search tab can be exported from CloudNine™ Explore to a line-delimited .txt file. Only the text entered in the Search Term box in the New Search or Edit Search dialog box is exported. Search names, search sets, and filters assigned to a search query are not exported, and empty search queries are not exported.
If there are duplicate search queries in the saved searches list, only one instance of the search query will be exported to the .txt file.
1.From Case Manager double-click a case.
2.On the Search tab, in the Search Request pane, click Export on the Search Toolbar. The Save Search Terms to File dialog displays. By default, the search queries are exported to the case's directory, and the default File Name field is "Exported search terms.txt".
3.If you want to change where the file is saved to, browse to the new location.
4.If you want to change the exported file name, modify the File Name.
5.Click the Save button.
Clicking Save exports all the case's saved search queries (except empty and duplicate search queries) to the line-delimited .txt file. The export includes saved search queries located in Search Sets.