In CloudNine™ Explore Web, you can run new and saved searches against a case's filtered records from the Search Request pane on the SEARCH page. New searches are run by entering a search query in the New Search dialog and clicking SAVE AND SEARCH. Saved searches are run from the SEARCH page by selecting a saved search or searches and then clicking the Run checked searches (magnifying glass) button. You can run multiple searches simultaneously in CloudNine™ Explore Web. =
You can create and run basic and full-text searches in CloudNine™ Explore Web. When you are creating full-text searches you can manually add search terms or you can add search terms directly from the dictionary, fields, and field values. You can also help fine-tune your searches by applying search filters, including date ranges, in the New Search or Edit Search dialog.
Before defining searches, be sure to select the search options you want to use in the Search Options dialog. For more information see Search Options.
|
If the Any Words or All Words option is selected in the Search Options, the sequence of search term words in the query must be wrapped in quotes to prevent the search from inserting Boolean operators (like AND or OR) between the words in the sequence. |
Creating and Running a Basic Word Search
Starting from the SEARCH page for a case:
1.In the Search Request pane, click the New search (plus sign) button. The Create new search dialog displays.
2.Enter the word(s) to search for in the Type search terms here box.
3.Enter an optional Search Name, up to 100 characters. The provided Search Name will be displayed as the search name in italics in the Search Request pane. If a Search Name is not provided, the search query text will be displayed as the name in the Search Request pane.
4.If you want to add the search to a search set, select the applicable search set from the Set drop down.
5.Click SAVE AND SEARCH. The search runs and is added to the list in the Search Request pane.
6.After the search is complete, you can select the search in the Search Request pane to view results in the document list pane and see your search hits in the document details pane.
Creating and Running a Full-Text Search
Full-text searching includes additional advanced search features that allow you to write longer full-text queries. When writing advanced full-text search queries, you will want to learn how to use search operators that help provide precise search results. For more information see Search Operators.
Starting from the SEARCH page for a case:
1.In the Search Request pane, click the New search (plus sign) button. The Create new search dialog displays.
2.Enter an optional Search Name, up to 100 characters. The provided Search Name will be displayed as the search name in italics in the Search Request pane. If a Search Name is not provided, the search query text will be displayed as the name in the Search Request pane.
3.If you want to add the search to a search set, select the applicable search set from the Set drop down.
4.Enter the search query, including operators if needed, to the Type search terms here box.
5.Define any SEARCH FILTERS, SEARCH FIELDS, and DICTIONARY details you want for the search. For more information on these additional filter options, see details below.
6.Click SAVE AND SEARCH. The search runs and is added to the list in the Search Request pane. If you added SEARCH FILTERS to the search, the Search Request pane will display a Filter (funnel) icon with the search. You can hover your mouse pointer over the Filter icon to view the SEARCH FILTERS that were configured.
7.After the search is complete, you can select the search in the Search Request pane to view results in the document list pane and see your search hits in the document details pane.
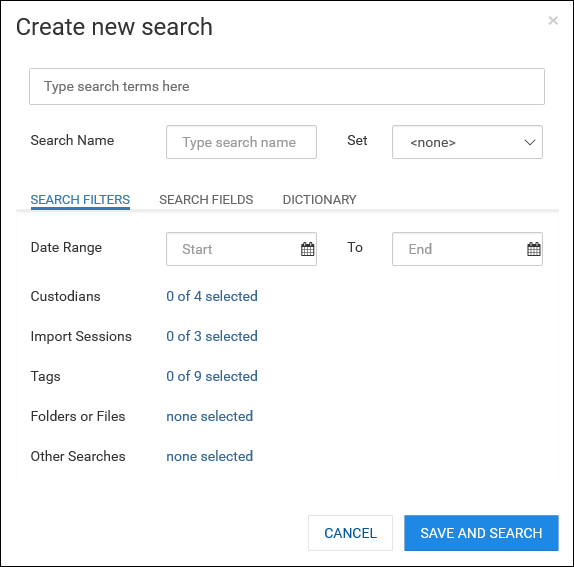
Create new search - SEARCH FILTERS
There are six customizable additional filters that you can add to a search query to fine-tune your search results.
Date Range Filter
The Date Range filter searches a specific date range within the filtered case records. On the Create new search dialog, type Start and/or End UTC dates into the edit boxes. Alternatively you can click the calendar icons in the Start and End fields to select dates from a calendar pop up.
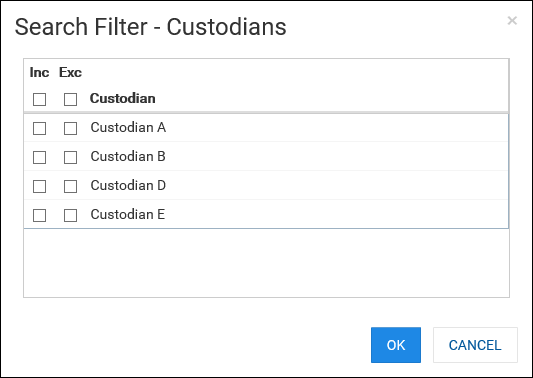
Custodians Filter
The Custodians filter searches specific custodians within the filtered case records. Click on the link next to the Custodians filter on the Create new search dialog. The Search Filter - Custodians dialog displays.
1.Select the Inc check box next to the custodians you want to include in the search results, or the Exc check box for those custodians you specifically want to exclude from the search results.
2.Click OK to save your selections. The Custodians link on the Create new search dialog updates to show the number of custodians selected.
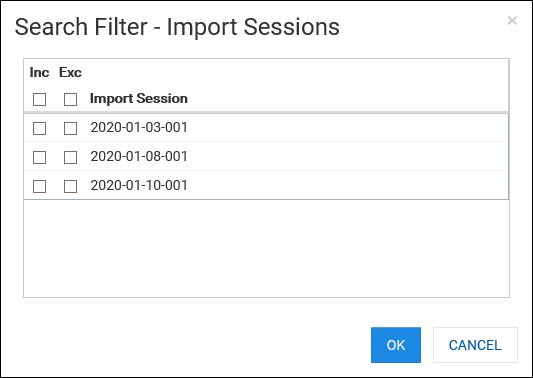
Import Sessions Filter
The Import Sessions filter searches specific import sessions within the filtered case records. Click on the link next to the Import Sessions filter on the Create new search dialog. The Search Filter - Import Sessions dialog displays.
1.Select the Inc check box next to the import sessions you want to include in the search results, or the Exc check box for those import sessions you specifically want to exclude from the search results.
2.Click OK to save your selections. The Tags link on the Create new search dialog updates to show the number of tags selected.
Tags Filter
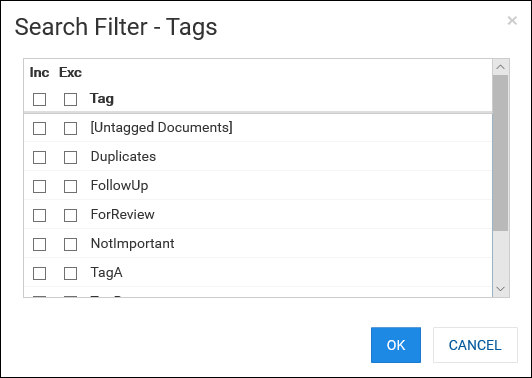
The Tags filter searches specific selected tags and/or the untagged documents within the filtered case records. Click on the link next to the Tags filter on the Create new search dialog. The Search Filter - Tags dialog displays.
1.If you want to include documents in the filtered case records that do not have ANY tags currently applied to them in the search results, select Inc for [Untagged Documents].
2.Select Inc for tags to include in the search results, or the Exc for tags you want to exclude from the search results.
3.Click OK to save your selections. The Tags link on the Create new search dialog updates to show the number of tags selected for the search.
|
To quickly identify the which filtered documents in the case do not have any tags applied to them, you can create and run a search query with just the [Untagged Documents] tag selected. |
Folders or Files Filter
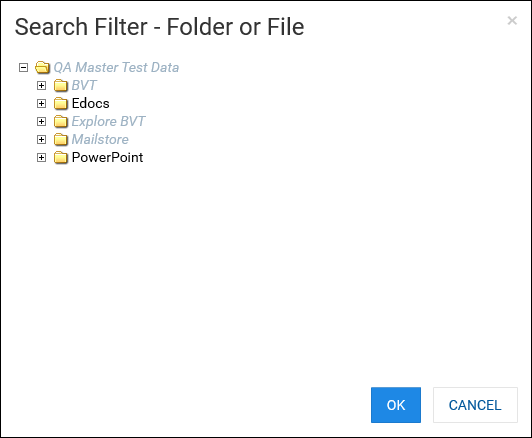
The Folders or Files filter searches the selected folder or file within the filtered case records. Click on the link next to the Folders or Files filter on the Create new search dialog. The Search Filter - Folder or File dialog displays.
1.All of the case's folders, mail store, and archive files are listed in a tree structure. If an entire folder of files was added to the case, the folder name will show in black and you won't be shown the individual files in that folder. If only some files in a folder are in the case, the parent folder for the file appears in gray and the individual files in black. Use the expand/collapse icons to review the list of folders and files. Use your mouse to select a folder or individual file to include in the search results. You can only select a single file or a single folder shown in black text.
2.Click OK to save your selections. The Folders or Files link on the Create new search dialog updates to show the file or folder you selected.
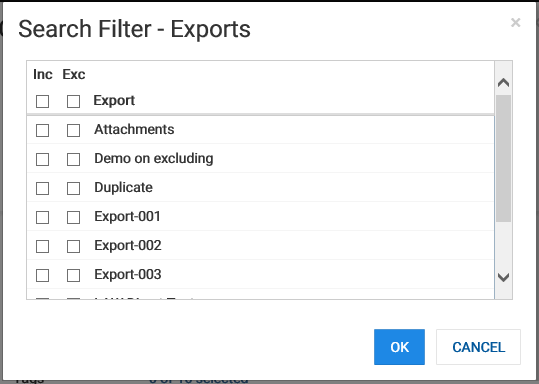
Exports
The Exports filter allows you to only include or selective exclude any exported documents from any export profile.
1. Click on whether to only include files from a previous export, exclude files from a previous export and from any active profile
2. Click OK to save your selections.
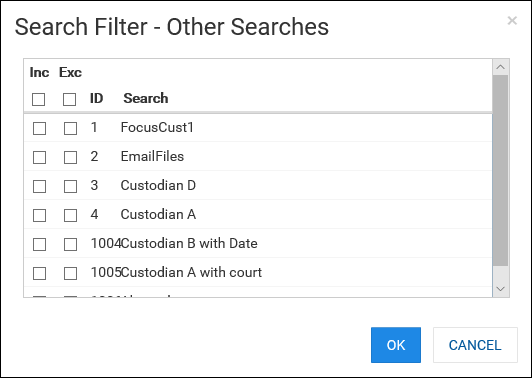
Other Searches Filter
The Other Searches filter searches the case's other selected search queries within the filtered case records. Click the link next to the Other Searches filter on the Create new search dialog. The Search Filter - Other Searches dialog displays.
1.Select the Inc check box next to the other searches you want to include in the search results, or the Exc check box for those other searches you specifically want to exclude from the search results.
2.Click OK to save your selections. The Other Searches link on the Create new search dialog updates to show the number of other searches selected.
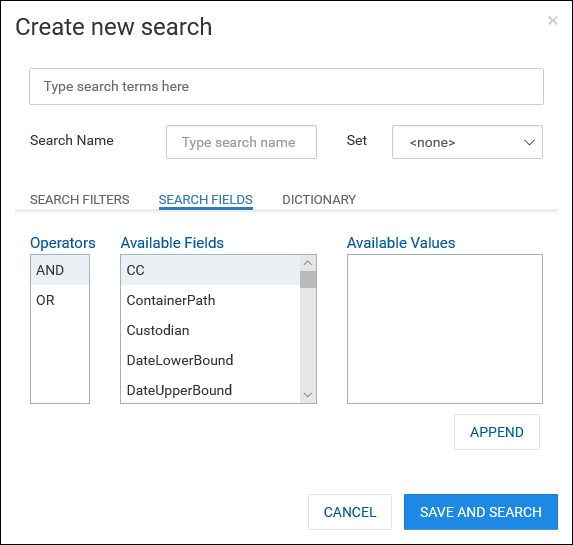
Create new search - SEARCH FIELDS
1.When creating or editing a search, click SEARCH FIELDS to configure searching within specific fields.
2.The Available Fields list contains all of the metadata fields available for use in your search. Select a field in the Available Fields list to see the possible values for that field in the Available Values list.
3.If this is the first term being added to the search query, the Operators selection is ignored. If a term already exists, select AND or OR in the Operators list to determine how the query terms will be joined together for the overall search query. For more information see Search Operators.
4.You can add just a field to a query in order to search for term(s) within that field. Alternatively you can add both a field and value together to a query in order to find results with a matching value in the associated field.
a.To search for term(s) within a field, select the field from the Available Fields list. Click APPEND. Additional query terms are added to the box at the top. You can edit the query to insert the specific term(s) you want to find.
b.To search for results with an available field value, select the field from the Available Fields list and then select the value you want in the Available Values list. Click APPEND. Additional query terms are added to the box at the top.
|
If you are adding a field value that contains special characters that dtSearch treats as spaces, CloudNine™ Explore will strip these special characters out of the field value and replace them with spaces when you click APPEND. When a field value with special characters is selected, a exclamation icon is displayed next to the APPEND button. |
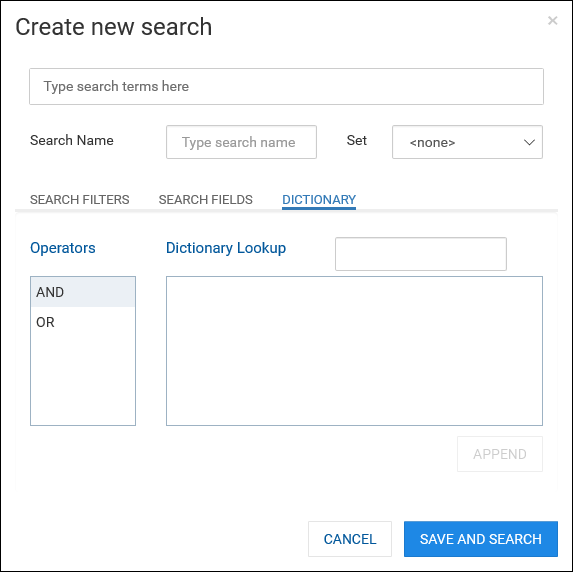
Create new search - DICTIONARY
CloudNine™ Explore creates a dictionary word list when indexing the records imported into a case. You can see these indexed words, and include them in your search queries.
1.When creating or editing a search, click DICTIONARY add indexed words to your search terms.
2.Type part or all of a word in the Dictionary Lookup edit box. The Word list box is updated to display words starting with the characters you entered. For each Word, a Doc Count and Hit Count is also displayed.
3.If this is the first term being added to the search query, the Operators selection is ignored. If a term already exists, select AND or OR in the Operators list to determine how the query terms will be joined together for the overall search query. For more information see Search Operators.
4.Click the Word you want to add to the search query and click APPEND. The word you selected is added to the query terms in the box at the top.