 How to Add Sources to an Import Session
A Knowledge Based Article on this subject can be found here: Adding Sources to an Import Session (cloudnine.com)
1.From the Case Manager tab, double-click on the desired Case to open it, and then navigate to Import sub-tab.
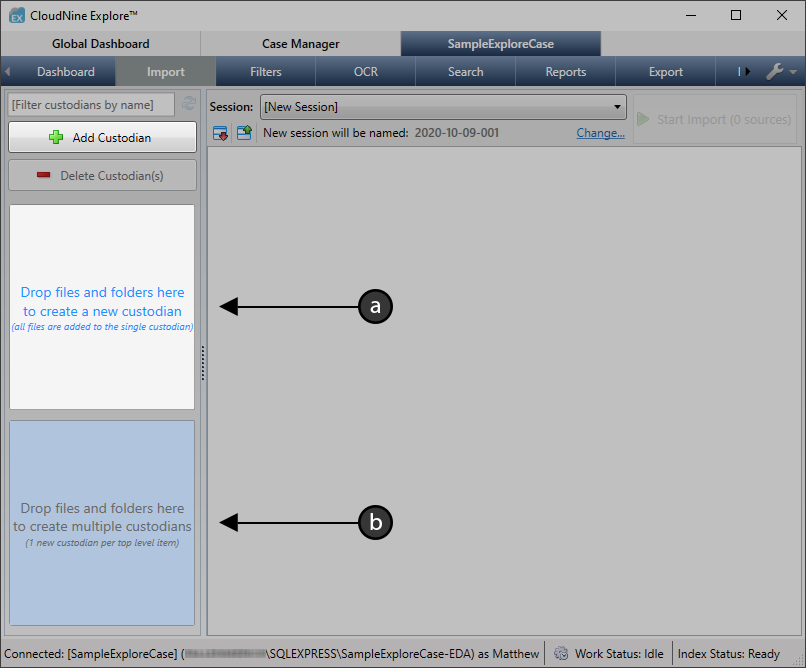
2.Using a Windows File Explorer, drag and drop the desired source files/folders onto one of the two available panes on the left:
a)Use the Top pane to create a Single Custodian for all sources.
b)Use the Bottom pane to create Multiple Custodians, one for each top-level source.
3.You can also use the![]() button at the top-left to create Blank Custodians instead.
button at the top-left to create Blank Custodians instead.
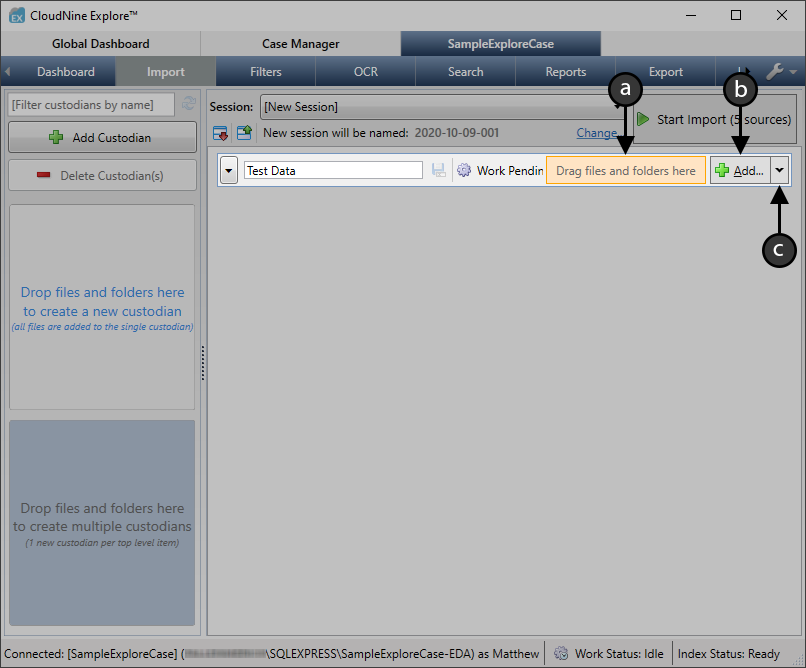
4.Once at least one Custodian has been created, you can add sources directly into any custodian in the following ways:
a)From any File Explorer, drag and drop the desired source files/folders onto the![]() target area.
target area.
b)Click the![]() button to open the Browse For Folder window, which will help you navigate to and select individual source folders to add.
button to open the Browse For Folder window, which will help you navigate to and select individual source folders to add.
c)Click the![]() button and select Add Files... from the drop-down to open a File Explorer, which will help you navigate to and select source files/folders to add.
button and select Add Files... from the drop-down to open a File Explorer, which will help you navigate to and select source files/folders to add.
5.When you're finished adding sources, you'll be ready to take the following actions as desired:
a)Remove Sources from the Import Session (see below).
b)Change the Import Session Label/Name.
c)Click Start Import at the top-right to begin importing any uncommitted sources.
|
Once the import has started, all sources will become permanently committed to their respective custodians. |
How to Remove Sources from an Import Session
A Knowledge Based Article on this subject can be found here: Removing Sources from an Import Session (cloudnine.com)
1.Add Sources to an Import Session (see above).
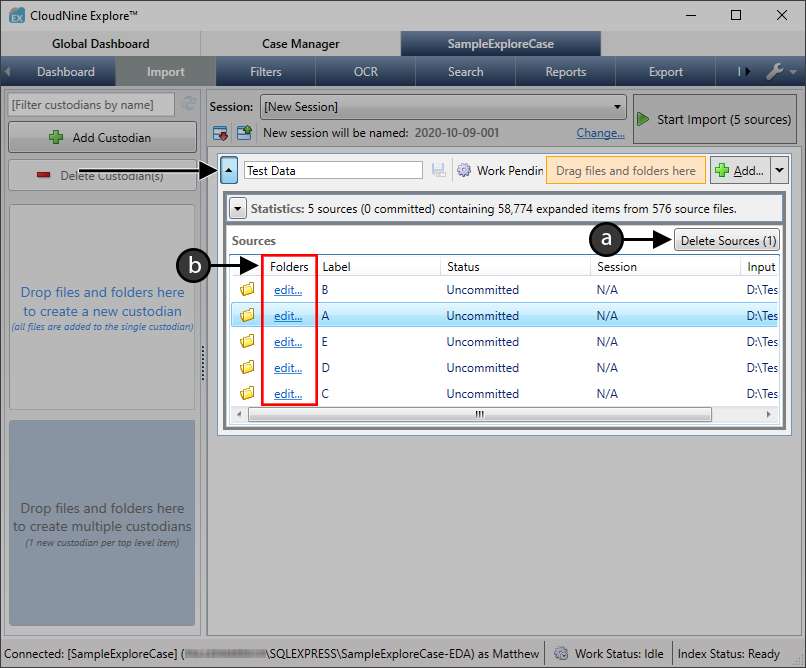
2.Expand whichever Custodian contains the desired sources by clicking the![]() button.
button.
3.From here, you can remove sources in the following ways:
a)Select any top-level source(s) you want to completely remove, and then click the Delete Sources button. This can also be done after sources have been committed.
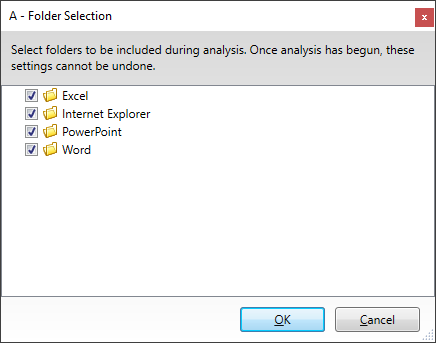
b)Click the edit... link under the Folders column for any top-level source to open the Folder Selection window. From here, you can exclude individual sub-folders from that source.
|
Once sources have been committed to a custodian, the edit... link changes to a view... link, and you will be unable to change sub-folder selections. |
4.Within the Folder Selection window, use the check-boxes to deselect any individual sub-folders that you want excluded, and then click OK to save any changes.
|
Once sources have been committed to a custodian, the Folder Selection window becomes read-only. |
5.When you're finished removing sources, you'll be ready to take the following actions as desired:
a)Change the Import Session Label/Name
b)Click Start Import at the top-right to begin importing any uncommitted sources.
|
Once the import has started, all sources will become permanently committed to their respective custodians. |