1.Run a search query to locate the documents you want to include in the report.
2.In Table view, use a table layout to organize the columns and column order you want to include in the report.
3.Click the arrow to the right of the Report button on the Standard toolbar and select Report writer. The Report Writer dialog displays.
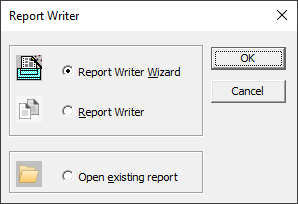
4.Select Report Writer Wizard and click OK. The Report Wizard - Documents dialog displays.
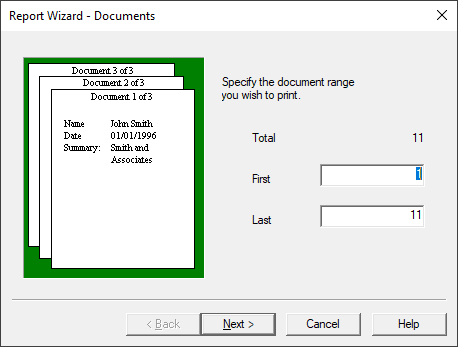
5.The First and Last fields are set to the first and last record numbers for the current Concordance query. You can modify these values to whatever records you want to use with the report writer.
6.Click Next. The Report Wizard - Page numbering and dates dialog displays.
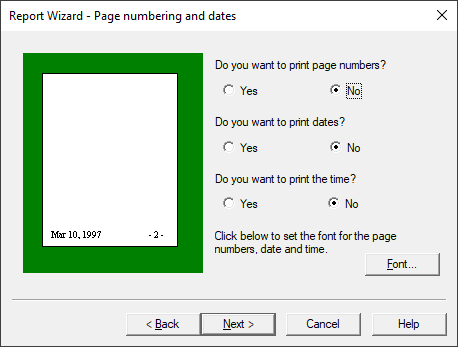
7.Select Yes or No for the three options displayed for page numbers, dates, and time. Click Font to display the Font Dialog and modify the font used to print page numbers, date, and time.
8.Click Next. The Report Wizard - Header/Footer dialog displays.
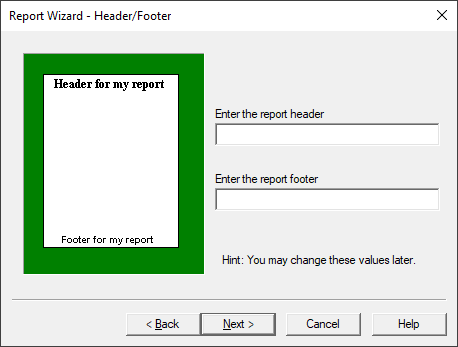
9.If desired, fill in Enter the report header and Enter the report footer with text to be used for your report.
10.Click Next. The Report Wizard - Options dialog displays.

11.Select Yes or No for the five options displayed for report record break, column border, and summary.
12.Click Next. The Report Wizard - Margins dialog displays.
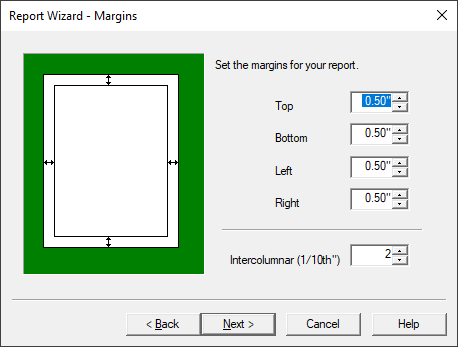
13.If desired, edit any of the print margins. Margin sizes are represented in inches. You can also update the spacing between columns in your report by adjusting the Intercolumnar value (represented in tenths of an inch).
14.Click Next. The Report Wizard - Printer dialog displays.
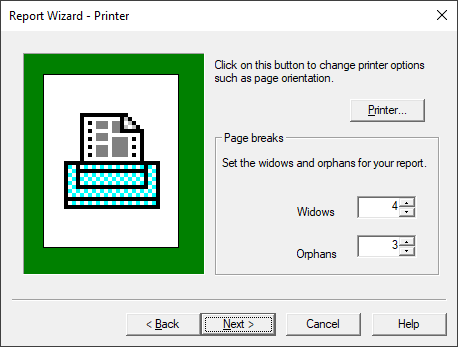
15.Click Printer to see the Page Setup dialog and adjust the paper, orientation, and margin settings. Click OK to return to the Report Wizard - Printer dialog.
16.The Widows field controls the minimum number of lines Concordance will allow to remain at the bottom of a page. If the number of lines to print at the bottom of the page is less than the value in the Widows field, then the document is moved to the top of the next page.
17.The Orphans field controls the minimum number of lines Concordance prints at the top of a page when splitting a document between pages. If the lines left to print are less than the value in the Orphans field, then lines are borrowed from the previous page until the orphan minimum is met. This may cause the preceding page to go below the Widows threshold, causing the entire column to print at the top of the next page.
18.Click Next. The Report Wizard - Exploded sort dialog displays.
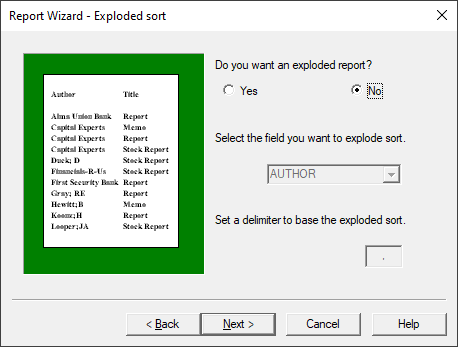
19.Select Yes for an exploded report. An exploded sort is a report where each entry in a multiple entry field is sorted in alphabetical order and given its own line in the report as if it were a separate record. Concordance determines each sub-entry in a field by grabbing the data between delimiters such as a comma. Any punctuation character can be used as the delimiter as long as it is used consistently. If you select Yes, you must also Select the field you want to explode sort and define a delimiter to use.
20.Click Next. The Report Wizard - Fields dialog displays.
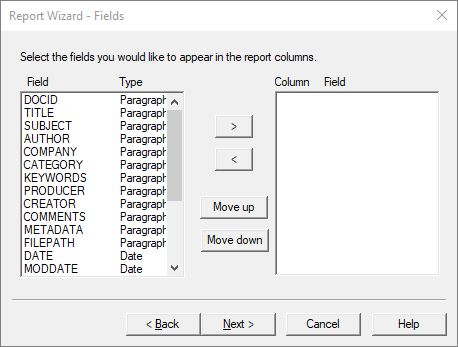
21.The wizard automatically sets the number of columns in the report to equal the number of fields selected in the Column list. The order the fields are listed in the Column list is the order the fields will be displayed in the report. Select a Field on the left and use the arrow and move buttons in the middle to fill the Column list in the appropriate order.
22.Click Next. The Report Wizard - Field Options dialog displays.

23.Each field can now have additional report details specified. Select a field on the left and then set the options you want on the right:
•Total will print a grand total of the field data in that column. If selected, provide values for Width (number of characters for the Total), Decimals (number of characters after the decimal point for the Total), and Style (how the total should be represented)
•Subtotal will print a total of the field data when broken into groups defined by Break column. If selected, provide the Column number from the list on the left in the Break column field, and Style (how the subtotal should be represented).
•Selecting New page on new entry will print each record on a separate page whenever the column's contents change between one record and the next.
•Selecting Suppress repetitive entries will only print the first instance of duplicate entries on the report.
•Selecting Underline hits will show all search hits in the selected field underlined in the report.
24.Click Next. The Report Wizard - Finish dialog displays.

25.Click Finish to create the report template.
26.The template is displayed within the Concordance Report Writer and the Report Writer toolbar is displayed at the top.
27.You can further customize the report, including adjusting the column widths, adding and removing columns, and adjusting text properties.
28.After finishing any remaining adjustments, click Print Preview on the Report Writer toolbar to preview the report.
29.If you are ready to print the report, click Print from the report preview.
30.To close Report Writer, click Exit on the Report Writer toolbar.