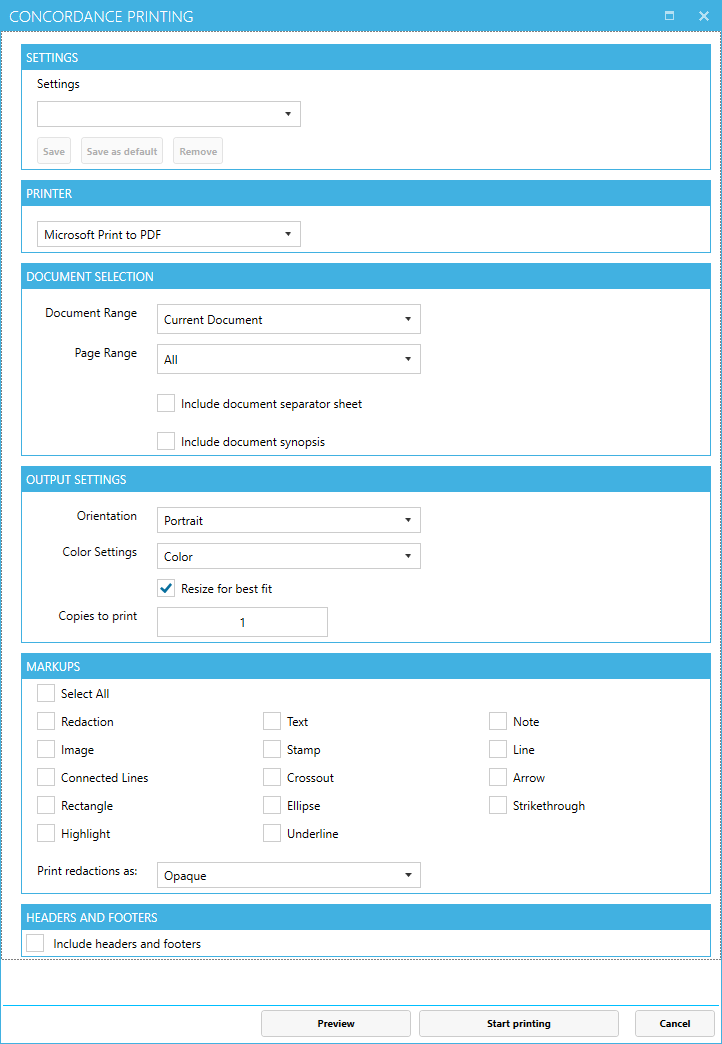
You can print the currently displayed document using Concordance Viewer. When printing in Concordance Viewer, be aware of the following:
•When printing documents that have been reviewed and redacted using Concordance Viewer, any redaction placed on the document will print transparent revealing the text underneath. If you want to print opaque redactions, be sure to select the Opaque option in the Markups section of the print settings.
•Printing documents that contain markups to Adobe PDF using the File>Print option, does not permanently burn the markups in the document. If you want markups burned in, you must run the documents through the Production process in Concordance, then print the produced document.
•Some document types such as .xls, the landscape option will split the page by columns and print as portrait.
•Make sure your printer's color properties are set appropriately.
•The maximum number of copies that can be printed is 100, and the copies are automatically collated.
•Crossout, strikethrough, highlight, and underline markups can all be applied to the same text, and if so, are combined in the printed file. This means, for example, if crossout and highlight are both applied, but only crossout is selected for printing, both the crossout and highlight will be printed.
To Print in Concordance Viewer
1.From the hamburger menu ![]() in the upper left corner, select Print. The Concordance Printing dialog displays.
in the upper left corner, select Print. The Concordance Printing dialog displays.
2.Select the Printer you want to use for printing the documents and/or images.
3.In the Document Selection section:
•Choose the Document Range and Page Range you want. If you select a page Range, you can also specify the range of pages to print for each document.
•Select the Include document separator sheet checkbox if you want separator sheets printed at the beginning of each document. See Configuring Separator Sheets for configuration information.
•Select the Include document synopsis checkbox if you want synopsis sheets printed at the end of each document. See Configuring Synopsis Sheets for configuration information.
4.In the Output Settings section:
•Select Portrait or Landscape for the Orientation.
•Choose Color or Greyscale in the Color Settings drop down.
•Select the Resize for best fit checkbox if you want the Concordance Viewer to adjust the size to fit the available print region.
•Specify the number of Copies to print.
5.In the Markups section:
•Check the Select All box if you want to include all markups. Otherwise you can select individual markups that you want to include in the printed document(s).
•In the Print redactions as drop down select either Opaque or Transparent to determine if your redactions will block out the underlying section of the document fully.
6.Select headers and footers to configure header and footer information for printing. See Configuring Headers and Footers for configuration information.
7.Optionally you can click Preview to see a preview of how the current document will appear when printed.
|
If you select Print in the Print Preview dialog you will only print what is shown in the preview and not the full document. To print the entire document, use the Start Printing button on the Concordance Printing dialog. |
8.Optionally you can go to the top of the Concordance Printing dialog and save all of the printing options you specified. Select a name for this configuration of Settings in the drop down, or type in a new Settings name. Once you have selected a name for the Settings you can Save or Save as default. The settings can be recalled by selecting the name in the drop down when printing in the future.
9.Click Start printing when you are ready to print.
Configuring Separator Sheets
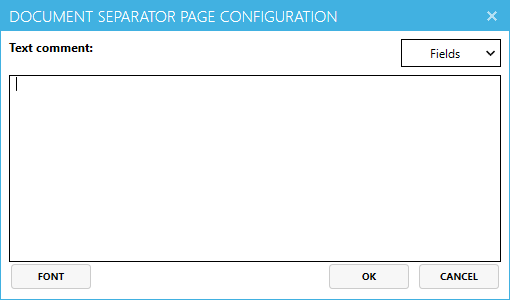
When you select the Include document separator sheet check box, click Configure separator sheet to specify the contents of your separator sheets. The contents are specified by typing into the Text comment box and/or adding Fields from the drop down on the top right. When you add a Field to the Separator Page Configuration, it is replaced in the text with the actual field value for the associated document from the Concordance database.
Use the Font button on the lower left to select the font attributes to use for your separator sheets.
Configuring Synopsis Sheets
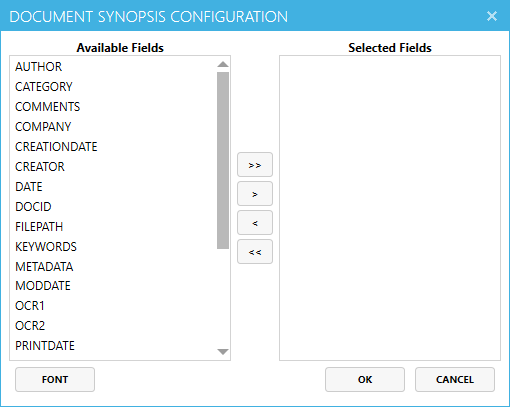
When you select the Include document synopsis check box, click Configure synopsis sheet to specify the contents of your synopsis sheets. The contents are specified by selecting fields from the Available Fields list on the left. Select individual fields or multiple fields and use the buttons in the center to add the fields to the Selected Fields list. You are allowed to specify up to a maximum of 20 Selected Fields.
Use the Font button on the lower left to select the font attributes to use for your synopsis sheets.
Configuring Headers and Footers

When you select Include headers and footers, several additional configuration options are displayed:
1.Click the Font button and select your font options in the Select Font dialog that displays. This includes Font Family, Font Size, and Font Style. Click OK to save your font selections and close the Select Font dialog.
2.In the Headers and Footers section, specify an item to print for each header and footer based on your needs. Leave the selection set to None if you want that header or footer to remain blank.
3.In the Margins section, specify an item to print for each section of the left and right margins based on your needs. Leave the section set to None for a blank margin.
4.Select an item for your Watermark, if desired, or leave None for no watermark.