Authority word lists are lists of words and phrases that open in Edit View when you place your cursor in a field associated with a word list. Typing text automatically scrolls the list to the word or phrase nearest in spelling. Most words and phrases are retrieved with just a few keystrokes. Authority list entries are always inserted at the current cursor location in Edit View.
An authority list can contain anything, including zip codes, author's names, and complex chemical names. Any data entry task that is repetitive and prone to errors is a good candidate for an authority list. Selecting entries from the list lowers the number of errors introduced through data entry, and the number of keystrokes — thus saving labor and expense while improving accuracy.
Authority lists are created in the List File Management dialog. Once an authority list is created, the list is assigned to a field or fields using the Data Entry Attributes dialog. Authority lists are saved in files with a .lst file extension.
You can create authority list values in three ways:
•Manually create list values
•Import existing values from a database field
•Import values from an ASCII file
After creating the authority list you need to associate it with a field in the database, and then verify that it works.
Create an Authority List
1.On the Tools menu, select Manage List Files. The List File Management dialog displays.
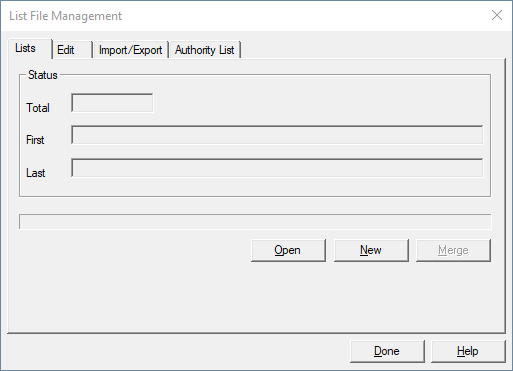
2.On the Lists tab, click New. A message displays asking if you want to allow duplicates in the list file. Select Yes or No.
3.A message displays asking if you want to create a case sensitive list file. Select Yes or No.
4.The Save As dialog displays. Navigate to the location for the new .lst file and enter a File name. Click Save.
5.The new list file is now open in the List File Management dialog. Select the Edit tab.
6.In the Key field, type an item to add to the authority list. The Key field is case sensitive and allows up to 240 alpha-numeric characters.
7.For authority list files, the Data value is not used. Leave this 0.
8.Click the Add button to add the new item to the list.
9.Repeat steps 6 through 8 for each new authority list item you want to add.
10.Click Done when you are finished.
Create Authority List From Field Data
1.On the Tools menu, select Manage List Files. The List File Management dialog displays.
2.On the Lists tab, click New. A message displays asking if you want to allow duplicates in the list file. Select Yes or No.
3.A message displays asking if you want to create a case sensitive list file. Select Yes or No.
4.The Save As dialog displays. Navigate to the location for the new .lst file and enter a File name. Click Save.
5.The new list file is now open in the List File Management dialog. Select the Authority List tab.
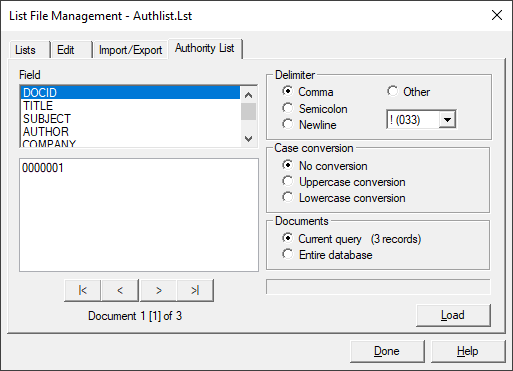
6.In the Field list, click the fields containing the values you want to use for your authority list. To select multiple fields, use CTRL+click.
7.In the Delimiter section, select the delimiter you want to use to separate items in the authority list file. The default is Comma.
8.In the Case conversion section, select whether you want all items to be converted to uppercase, lowercase, or to not be converted.
9.In the Documents section, select the Current query or Entire database option to determine which field values will be pulled into the authority list.
10.Click the Load button to add the field values to the authority list.
11.You can go to the Edit tab and modify any of the authority list items.
12.Click Done when you are finished.
Create Authority List From a File
If you have an ASCII file with listed or delimited data you can save time by importing it into an authority word list.
1.On the Tools menu, select Manage List Files. The List File Management dialog displays.
2.On the Lists tab, click New. A message displays asking if you want to allow duplicates in the list file. Select Yes or No.
3.A message displays asking if you want to create a case sensitive list file. Select Yes or No.
4.The Save As dialog displays. Navigate to the location for the new .lst file and enter a File name. Click Save.
5.The new list file is now open in the List File Management dialog. Select the Import/Export tab.
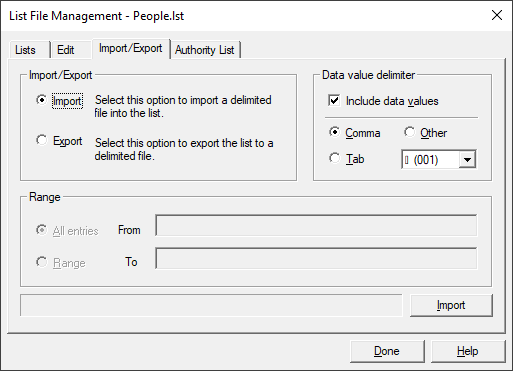
6.Select Import.
7.Data values are not used by the authority list, so it does not matter whether Include data values is selected. If it is selected, the import populates the Data value field on the Edit tab in the List File Management dialog box with any data values from the file.
8.In the Data value delimiter section, select the delimiter used in the file you will load. The default is Comma.
9.Click Import. Navigate to and open the ASCII .txt file you want to load into this authority list.
10.You can go to the Edit tab and modify any of the authority list items.
11.Click Done when you are finished.
Associate an Authority List with a Field
Once you have created an authority list in Concordance, you need to associate the list to a field so it can be used for data entry in the Edit View.
1.On the Edit menu, click Validation. The Data Entry Attributes dialog displays.
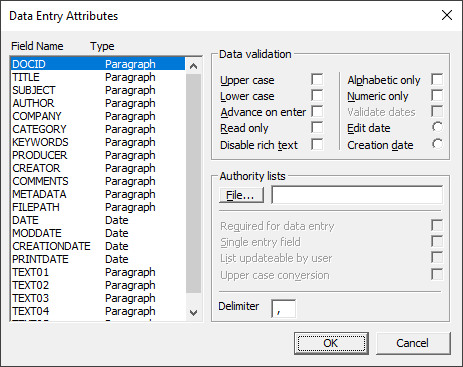
2.In the Field Name list, click the field you want to associate with the authority list.
3.In the Authority lists section, click the File button. Navigate to and open the authority list file (.lst).
4.Select the options that apply to the authority list:
•Required for data entry - When the user's cursor is placed in the empty field, the authority list automatically opens. If the field is already populated, the authority list opens when a user clicks the right mouse button or attempts to type in the field. When Required for data entry is selected, users can only choose a field value from the list or cut, copy or paste the text in the field.
•Single entry field - The field only allows one field value from the list to populate the field. If a user clicks another field value from the list, the original value is replaced by the newly selected value. You can select both Single entry field and the Required for data entry to ensure users only populates the field with one field value from the authority list.
•List updateable by user - Users can add and delete field values from the authority list assigned to the field. If you do not want users to modify the authority list, be sure List updateable by user is not selected. When List updateable by user is selected, the Insert and Delete buttons are displayed at the bottom of the authority list dialog.
•Upper case conversion - Concordance automatically converts all text to upper case before text is copied to the field or the text is added to the authority list. Do not select Upper case conversion if you are using an existing authority list containing lower case field values. If Upper case conversion is selected in this scenario, when a user selects a lower case field value from the list, the value will not be added to the field.
5.The Delimiter field defaults to the comma character. To change the field delimiter, type a different character in the Delimiter field. The character in the Delimiter field is used to separate field values that were added to the field from an authority list.
6.Click OK to save your changes.
|
The Data validation and Authority lists sections in the Data Entry Attributes dialog box are independent sections. For example, assigning an authority list with words to a field selected as Numeric only does not cause an error. The data from the authority list overwrites the Numeric only setting. |
Test an Authority List
After associating an authority list with a field, you can test to make sure that the authority list opens for the field in Edit View.
1.In Browse or Table View, select a record.
2.On the Standard toolbar, click the Edit button to open the record in the Edit view in edit mode.
3.Click the field you associated with the authority list.
•If Required for data entry was selected for the authority list in the Data Entry Attributes dialog, the authority list automatically opens when you click in the field if the field is empty. If the field is already populated, the authority list opens when a user clicks the right mouse button or attempts to type in the field.
•If Required for data entry was selected for the authority list, users can only choose a field value from the list or cut, copy or paste the text in the field.
•If Required for data entry was not selected for the authority list, users can right-click in the field to open the shortcut menu, and click the authority list file name to open the authority list associated with the field.