Return to Topic ![]()
Case Templates
Case Templates are XML files containing the Metadata Fields and partial/full folder structure (optional) from a specific Case Directory, which has been saved for later application on other new or existing Case Files. This is useful in instances where the same Custom Metadata Fields or custodian folders are consistently being used in different Case Directories, or when you need to quickly create numerous Metadata Fields within several Case Databases.
![]() For applying a Case Template to a new Case File, see the topic on Starting New Cases.
For applying a Case Template to a new Case File, see the topic on Starting New Cases.
![]() For advanced usage or modification of the original "#Default.xml" template file, see the Default Case Template topic.
For advanced usage or modification of the original "#Default.xml" template file, see the Default Case Template topic.
 Saving Case Templates
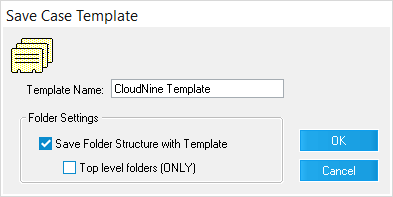
1.Start from the Menu of the Main User Interface by selecting File > Administration > Save Case Template. The Save Case Template window opens.
i.You can also click on the Save Template button within the Modify Fields utility.
2.Enter a name for your template in the Template Name field, and then enable any options under Folder Settings as desired (explained below).
3.Click on OK when finished to close this window. The Save Template dialog opens, indicating that your new template was saved.
4.Click on OK again to close this dialog.
|
 Applying Case Templates to Existing Cases
1.Start from the Menu of the Main User Interface by selecting File > Administration > Apply Case Template.
i.You can also click on the Apply Template button within the Modify Fields utility.
2.A File Explorer opens, targeting XML files within your "LAW50\Templates" install folder.
3.Select your desired XML template from the available files, and then click on Open at the bottom-right.
4.A dialog window opens indicating any changes made to the active Case Directory. Click OK to close this dialog.
Projects
Projects are an organizational tool used by LAW to group one or more Case Files together within the Open Case window. This is useful when managing multiple cases from the same client (customer), or when case lists grow so long that it becomes beneficial to group several cases together based on some form of contextual similarity. From within the Open Case window, you can change the Case List to project view mode by clicking on the Project/Client View button in the Toolbar.
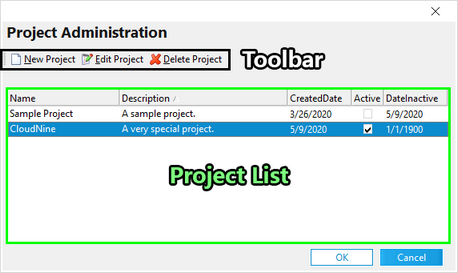
The Project Administration utility is used to manage all projects within LAW, including creating new projects, editing existing projects, or deleting projects that are no longer needed.
You can open the Project Administration utility from within any Case - Properties window by clicking on the Edit List button to the right of the Client or Project Name drop-down menu:

