Automate your administrative tasks on the Jobs tab where they can be set to run at scheduled intervals, as needed. Once scheduled, you can easily edit, disable, or remove a job whenever necessary. You can also manually start any scheduled job, if you need it to run immediately.
|
The Maintenance job is a built-in job that comes with the server and performs basic server maintenance. It cannot be removed from the Job list. |
To Add a New Job
1.On the Jobs tab, click the Add button.
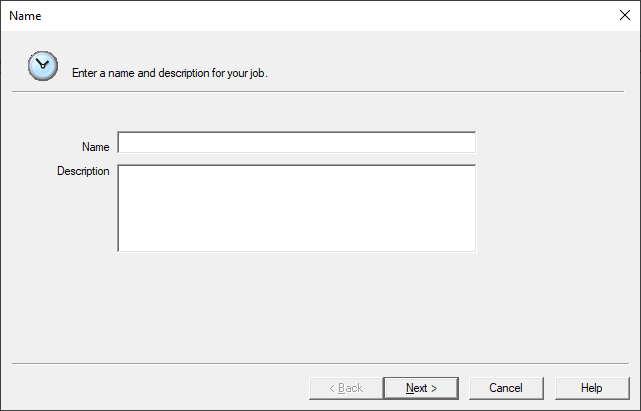
i.Clicking the Add button opens the Name dialog box.

2.In the Name field, type the job name.
3.In the Description field, type the job description.
4.Click Next to open Actions dialog box.

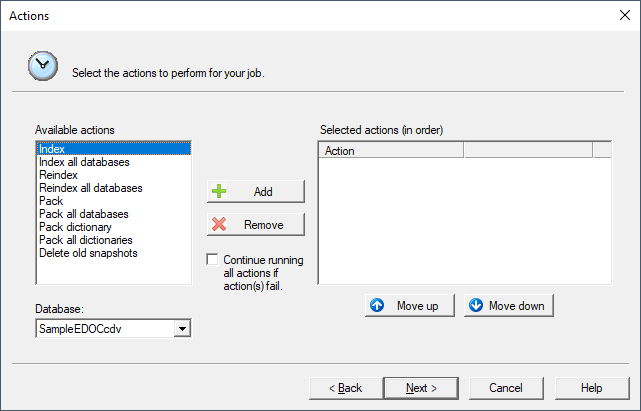
5.In the Available actions list, click the action you want to include in the job.
6.If the job is not for all databases, in the Database field, click the database you want the action run on.
i.If you are deleting old snapshots, in the Days prior field, type the number of days that a snapshot file remains unaccessed, before it is automatically deleted.
7.Click the Add button to add the action to the Selected actions (in order) list.
i.The job performs each action in the order the actions are displayed in the Selected actions (in order) list. To change the order of actions in the list, click the action you want to move, and click the Move up or Move down button to modify the action order.
8.If your job contains multiple actions, and you want the job to continue running the other actions if an action in the job fails, select the Continue running all actions if action(s) fail check box.
9.Click Next to open the Frequency dialog box.

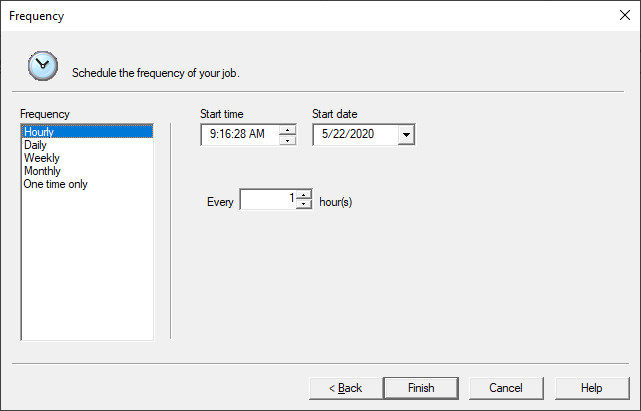
10.Define the job frequency settings, and click Finish.
|
Remember to send broadcast announcements to users prior to scheduled tasks for tasks that will affect their access to the server. For more information, see Sending broadcast messages. |
To Manually Run a Job
1.On the Jobs tab, click the job you want to run.
2.Click the Run button ![]() .
.
To Manually Cancel a Job
1.On the Jobs tab, click the currently running job that you want to cancel.
2.Click the Cancel button ![]() .
.
To Edit a Job
1.On the Jobs tab, click the job you want to edit.
2.Click the Edit button to open the Name tab in the Edit job dialog box.
i.You can change the name or description of the job on the Name tab.
3.To modify job actions or the order in which the actions run, click the Actions tab.
4.To change the time, date or frequency of a job, click the Frequency tab.
5.When you are finished editing the job, click OK to save your changes.
To Disable a Job
1.On the Jobs tab, click the job you want to disable.
2.Click the Disable button.
i.Clicking the Disable button disables the job and moves the job to the Inactive jobs list on the Jobs tab.
ii.To enable an inactive job, click the job and click the Enable button.
To Delete a Job
1.On the Jobs tab, click the job you want to delete.
2.Click the Remove button to permanently delete the job.