Return to Section Header
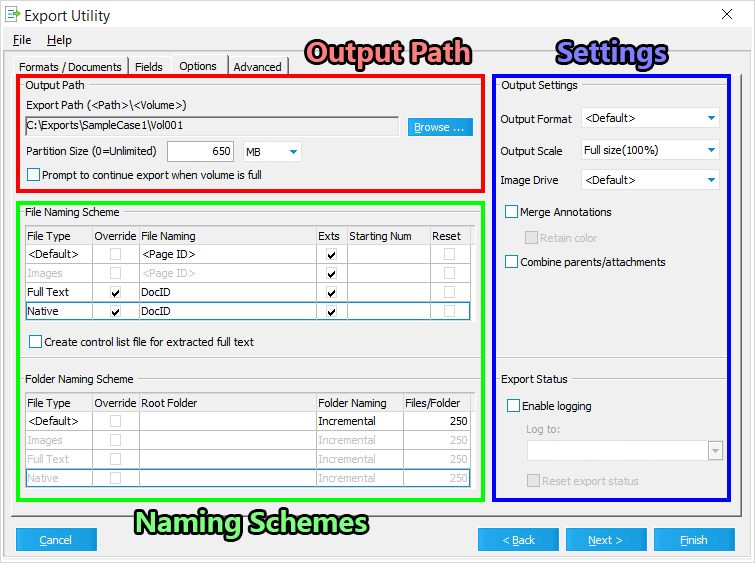
Use the Options tab to determine the Output Path for all documents and load files being exported, along with the file and folder Naming Schemes for the export package created at that destination.
 Running the Export Utility - Part 4 of 5
12.Click the Browse... button in the Output Path area to open the Select Export Path window, and navigate to the desired location for all documents and load files to be exported to. Click Accept to apply this location as the Export Path.
i.You can also type directly into the Current Path input box at the top of the Select Export Path window instead. This will allow you to specify an Export Path that doesn't yet exist.
ii.Keep in mind that everything shown after the final backslash (\) is treated as the Volume portion of the Export Path.
13.Type a numerical value into the Partition Size input box to limit the data size of all Volumes created at the Export Path, and use the adjacent drop-down to determine the data units being measured (KB, MB, or GB).
i.Multiple Volumes will be created at the Export Path selected, automatically incrementing by 001 for each Volume needed until all exported documents/files have been written.
ii.Using a Partition Size of 0 will remove the limit on Volume size, allowing a single Volume to be used instead.
iii.If you want to be prompted each time this limit is met, enable the Prompt to continue export when volume is full option.
14.Configure the Naming Schemes used with these Volumes, both for exported files and folders. Within the tables, the <Default> row applies to all File Types unless the Override column is enabled for a particular File Type.
15.Adjust your Output Settings as needed, though it's typically recommended to leave these settings at their default values. You can Enable logging as desired, provided you have a Custom Metadata Field available for tagging.
16.When you're ready to proceed, click Next in the bottom-right corner of the Export Utility to continue to the Advanced tab.
![]() These instructions are continued in the Export Utility: Advanced topic.
These instructions are continued in the Export Utility: Advanced topic.
|
|
The maximum character length for file paths in the Export Path field is 250 characters. If the file path exceeds 250 characters, any load files generated by the export will be saved to the $Invalid_Paths folder in the export directory. The rest of the files exported by LAW will be exported to the file path entered in the Export Path field. |
•Partition Size (0=Unlimited) - Use this input box to determine the max allowable size for each Volume created at the Export Path destination. Once this size is reached, a new Volume will automatically be created. This will continue until all export files have been written, and the name of each Volume created will automatically increment by 001.
oKB/MB/GB - This drop down specifies the data units to use in conjunction with the Partition Size specified.
•Prompt to continue export when volume is full - Each time the Partition Size is exceeded, a prompt will appear indicating that a new Volume is needed, and you must click Yes to continue exporting.
Naming SchemesEach Volume created at the Export Path is divided into separate sub-folders in order to organize all exported documents/files into different File Type groups. In this area of the Export Utility, you can determine the Naming Schemes both for the exported documents/files of each associated group, and for the sub-folders containing them.
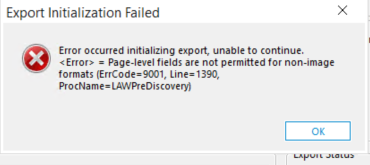
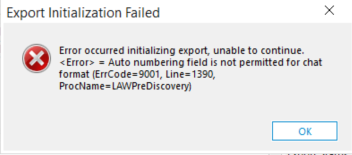
•File Naming Scheme - This table is used to specify the Naming Scheme for all exported documents/files, based on File Type groups: oFile Type - This column displays the File Type groups that apply to all exported documents/files. The <Default> group always enabled, and applies to exported documents/files of all types. oOverride - Checking the box(es) in this column will allow you to change the default File Naming being used for exported documents/files of each File Type. oFile Naming - This column displays the names being used for exported documents/files of each File Type. When the Override option is enabled, this column can be changed by selecting a different <Option> or Metadata Field from the drop-downs that become available. When a Metadata Field is selected, the values stored in that field are used as the name for each exported document/file of the associated File Type. oExts - Checking the box(es) in this column causes file extensions to appear in the names of page-level records for the associated File Type within exported load files. oStarting Num - When the <Auto Number> option is selected from the File Naming column, this column's input box can be used to specify a starting number for exported documents/files of the associated File Type. This value will automatically increment by 1 for each exported document/file. oReset - When the <Auto Number> option is selected from the File Naming column, checking the box(es) in this column will cause the document/file numbering to restart with the specified Starting Num at the beginning of each new Volume.
•Create control list file for extracted full text - The full text from each document will also be exported as a separate Control List (LST file) to the specified Export Path.
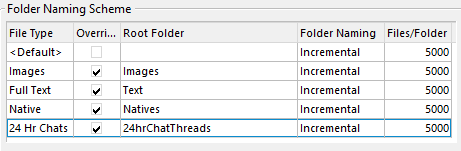
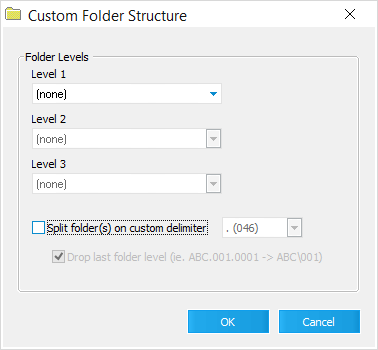
•Folder Naming Scheme - This table is used to specify the Naming Scheme for all sub-folders created within each export Volume, based on File Type groups: oFile Type - This column displays the available File Type groups for these sub-folders. All documents/files will initially be placed within the <Default> group until the other File Types have had their Override options enabled. oOverride - Checking the box(es) in this column will enable you to make changes to the other sub-folder File Type groups, and causes their associated documents/files to be placed within them instead of the <Default> folder. oRoot Folder - This column allows you to enter a name for the associated File Type group's root folder (top-level within each Volume). Enter folder names exactly as they should appear. Leaving a cell blank within this column will cause no folder to be created for that group. Note that the following characters cannot be used: < > : " / \ | ? * oFolder Naming - This column allows you to determine how sub-folders contained within each Root Folder should be created/organized. There are 3 options available: ▪Custom - Allows you to establish a custom sub-folder tree up to 3 levels deep, using Metadata Fields for organizational purposes. With this option selected, press the [...] button in the Files/Folder column to open the Custom Folder Structure window and configure the desired settings.
▪Incremental - The sub-folders will be created using an auto-numbering system, starting at 001 and incrementing by 1 for each new folder created. Enter a value into the Files/Folder column to specify the max number of documents/files to place within each sub-folder. ▪Mirror Original - The current Case Directory folder structure will be mirrored within the Root Folder for the associated File Type. oFiles/Folder - Use this column to specify the number of documents/files that should be included within each sub-folder when using the Incremental structure, or to select which Metadata Fields should be used for the Custom structure.
Settings
•Output Settings - The following settings only apply to exported documents/files: oOutput Format - Use this drop-down to specify an alternate export format for image files.
oOutput Scale - Use this drop-down to change the quality and size of all exported image files. oImage Drive - When using Hard Paths in load files, this drop-down lets you determine a new drive letter for exported image file paths, allowing you to import them into the target application without the need for modification. This should only be changed from <Default> option if the new drive letter being used is a known entity. oMerge Annotations - Permanently applies (burns) annotations to the exported image files ▪24Hr Chat Threads – Enabled, the exported message content of any chat with a HasRedaction field value of Y is replaced with [Redacted]. If not selected, redactions are ignored when generating the 24Hr Chat threads. ▪The entire chat is redacted, not just the redacted portion. ▪24Hr Chat threads are generated from the native file; the Advanced Native File Filtering option can be used to include tagged files only and to Enforce protection of redacted documents. ▪Retain color - Only applies to PDF and TIFF Output Formats using a multi-page export Format (load file). Color settings for all annotations will be preserved in the exported image files. This may significantly increase the file size for these exports, and may not be supported by all target applications.
oCombine parents/attachments - All attachment documents/files will be merged with their parent files, becoming exported as a single document.
•Export Status: - The following feature helps you to track case documents/files that have already been exported: oEnable logging - All documents/files being exported will be tagged as Y within the Custom Metadata Field selected in the Log to drop-down. No other documents/files will be tagged unless the Reset export status option is also enabled. ▪Log to - Use this drop-down to specify which Custom Metadata Field should be used to tag exported documents/files. It's recommended to create a field specifically for this purpose. ▪Reset export status - The Export Status of all case documents/files will be updated regardless of whether or not they're actively being exported. Those not yet exported are tagged as N. |