Case Templates
You can save the folder structure and field for reuse when creating a new case in a case template. Case templates are saved in XML files in the ..\LAW50\Templates folder. The file name is the same name as the template.
On a computer that has a LAW Admin license, you can save a case template from the File or Index menu.
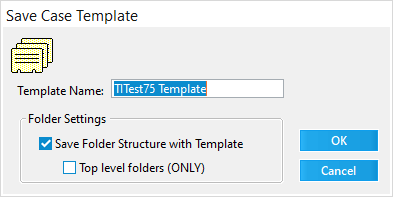
To save a case template from the File menu: 1.On the File menu click Administration, and then click Save Case Template. The Save Case Template dialog box appears.
2.Apply a folder setting. •Select Save Folder Structure with Template to save the current folder structure and field information of the case. •Select Top level folders (ONLY) to configure the template so that it consists of field information and only the folders located one level below the root.
To save a case template from the Index menu: 1.On the Index menu click Modify Fields, and then click Save Template. The Save Case Template dialog box appears. 2.Apply a folder setting. •Select Save Folder Structure with Template to save the current folder structure and field information of the case. •Select Top level folders (ONLY) to configure the template so that it consists of field information and only the folders located one level below the root.
For more information on working with fields, see Creating Index Fields.
|
To apply the case template at the time of case creation: 1.On the File menu click New Case. 2.Select a database and then click OK. The New Case - Properties form appears. 3.Clear Enable Electronic Discovery for this case.
4.Select a template from the Case Template list. 5.Fill out the rest of the form, and then click OK. A previously created template is applied to the new case. The template will have index fields and may also specify a folder structure for the new case.
|
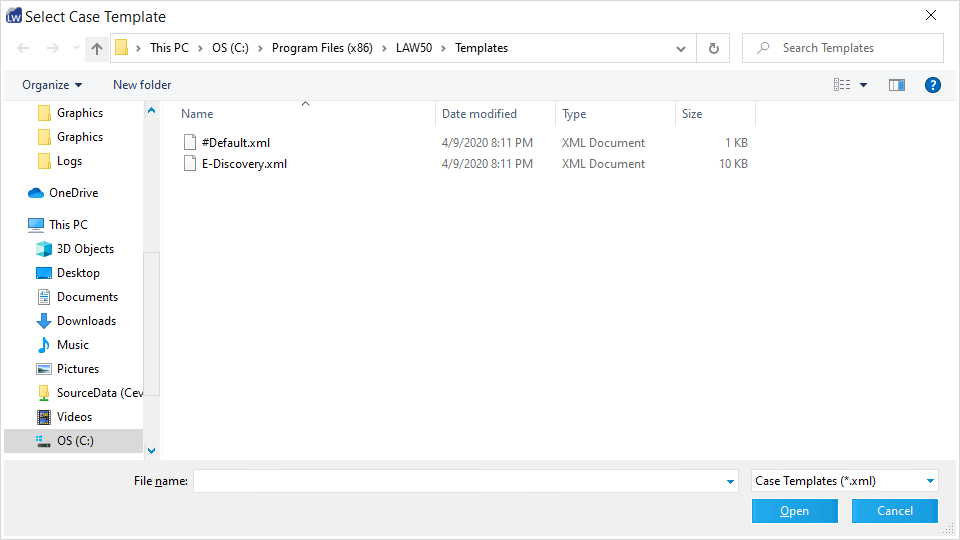
1.Open a case. 2.On the File menu click Administration, and then click Apply Case Template. The Select Case Template dialog appears.
3.Select a template and then click Open. 4.A listing of the fields that will be added to the case appears. Any field names that are duplicates of existing fields are ignored. Click Yes to proceed. The index fields and folder structure (if any) stored in the template will be applied to the case in addition to any already existing fields and folders.
|
The #Default.xml file is the default case template installed with CloudNine™ LAW. The #Default.xml file determines the default case properties, including fields, automatically defined for a case when a case is created, unless another case template is applied when the case is being created. To create this file, 1. Browse to the C:\Program Files (x86)\Law50\Templates folder. 2. Make a copy and past the "E-Discovery.xml" into the same folder and rename it "#Default.xml"
The #Default.xml file is stored in the Templates folder within the LAW installation folder (...\Progam Files\Law50\Templates). In CloudNine™ LAW, if you want each new case to be created with specific fields, you can modify the #Default.xml template file so that when a new case is created in CloudNine™ LAW, the case is automatically populated with the fields you defined in the #Default.xml file 1.Browse to C:\Program Files (x86)\Law50\Templates folder.
2.Before modifying the #Default.xml file, it is best practice to make a backup copy of the #Default.xml. 3.Right-click the #Default.xml file and open it in a text editor program. 4.Copy the text from <Field1> to </Field1> and paste it under the </Field1> line. <Field1> <FieldName>_FTIndex</FieldName> Correspond with the field name <FieldType>7</FieldType> Corresponds with the type of field please see table below. <MaxLength>0</MaxLength> Corresponds with the max length of the field. 0 = no limit <PageLevel>False</PageLevel> Corresponds if the field is page level or not <SpanHeight>1</SpanHeight> ‘This applies to memo fields only <Indexed>True</Indexed> Corresponds if the field is indexed or not <Unique>False</Unique> Corresponds if the field is Unique or not <Locked>True</Locked> Corresponds with if the field is editable or not <System>True</System> Corresponds if the field is a system field or not. <Visible>False</Visible> Corresponds with if the field is visible in the index and/or grid view automatically </Field1> 5.Change <Field1> and </Field1> to the corresponding field name. An example would be, for the second added field, change it to <Field2> and </Field2> 6.Change the value between <FieldName> and </FieldName> to match the field name you want in your cases. 7.Change the value between <FieldType> and </FieldType> to the numeric value of the field you would like in the case. Please see field type value chart below: Field Type: 0 = Text 1 = Auto-Increment 2 = List 3 = Memo 4 = Date 5 = Numeric 6 = Tag 7 = Tiny Int 8.Change any of the other values that you want for setting up the field. 9.Save the file with the same name, #Default.xml. 10.Create a new case. The case will automatically be populated with the new and/or modified fields from the #Default.xml file. For more information about creating a new case, see Creating a New Case.
|


