To install Concordance FYI Server, you must run the installation file from the server. To upgrade an earlier version of FYI Server to version 5.x or later, see Upgrading FYI Server. To learn more about FYI Server installation, see Before installing FYI Server.
|
If you are installing the latest version of FYI Server and have FYI Server 5.02 or earlier installed, you must uninstall the older version before proceeding with the installation to ensure that the application files are accessible to FYI Server. For more information about uninstalling FYI Server, see Uninstalling FYI Server. The default install directory for the application data files is C:\ProgramData\CloudNine\FYI Server 5. |
The fyi.db file in FYI Server version 4.x or later uses SQLite. SQLite is an embedded relational database file structure. Because SQLite is an embedded database, SQLite does not increase the required maintenance and administration of FYI Server and FYI Reviewer.
FYI Server version 5.x can be installed on the same hardware server on which FYI Server version 3.x is installed. This is known as a parallel install. If you want to install version 5.x on the same server as version 3.x, see Upgrading FYI Server for more information.
|
Make sure that you regularly back up your server data and strongly caution users to regularly back up their data on the workstations. Do not install Concordance FYI Server unless server data and workstation data has been backed up. Do not perform live backups if you are using backup software that locks files, even briefly. This has been known to cause read/write functions to the database files to fail, and can cause file synchronization or corruption issues. Check with your IT group and/or backup solution provider to verify that no file locking occurs before scheduling any backups on Concordance, Concordance Image, and FYI files that are in use. Be aware that anti-virus, firewall, and backup software can often interfere with network traffic and the locking of files, and in effect, could cause Concordance, Concordance Image, and FYI Server software to crash. |
The evaluation version of Concordance FYI Server is the same software as the full version, except the evaluation version has a 30-day limit. The evaluation version can be installed on your shared server. The installation process is similar to the full version but your company name and license key are not entered.
When you purchase Concordance FYI Server, you receive a license key, which you can use to install the full version of the software. If you installed an evaluation version of the software, and have purchased Concordance FYI Server, you will need to uninstall the evaluation version and install the full version using your new license key.
To Install the Full Version of FYI Server
1.Run the FYI_Server_5_Install.exe installation file directly on the FYI Server.
|
If you are installing the latest version of FYI Server and have FYI Server 5.02 or earlier installed, you must uninstall the older version before proceeding with the installation to ensure that the application files are accessible to FYI Server. For more information, see Uninstalling FYI Server. |
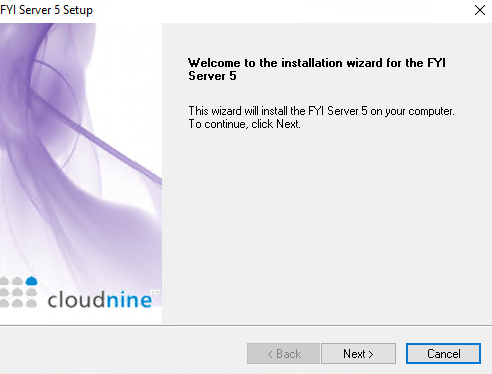
2.The Welcome dialog box appears. Click Next.
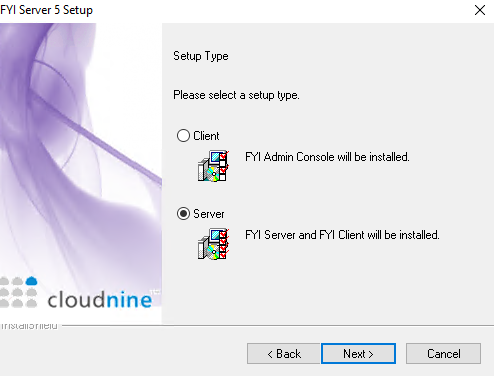
3.Click the Server option to install the FYI Server, FYI Admin Console, and sample database. Click Next.
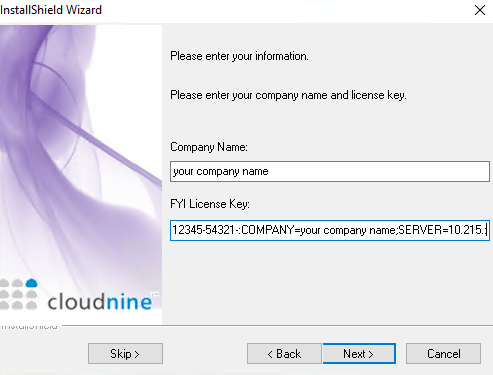
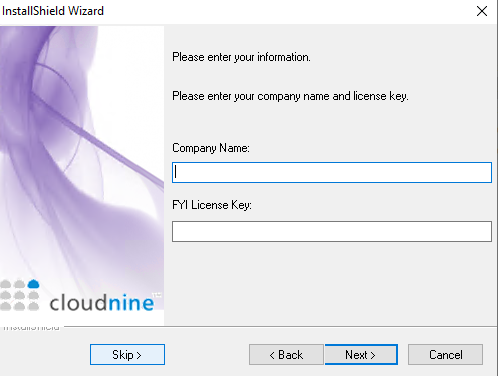
4.In the Company Name field type your company's name, and in the FYI License Key field, type your FYI license to activate FYI Server. Click Next.
i.To not activate FYI Server at this time, click Skip and click OK.
ii.An evaluation version of FYI Server will be installed. For more information, see To install the evaluation version of FYI Server.
|
You should have received an e-mail message containing your FYI license key. If you did not receive your FYI license key, or want to purchase new Concordance FYI Server licenses, contact Concordance Support. |
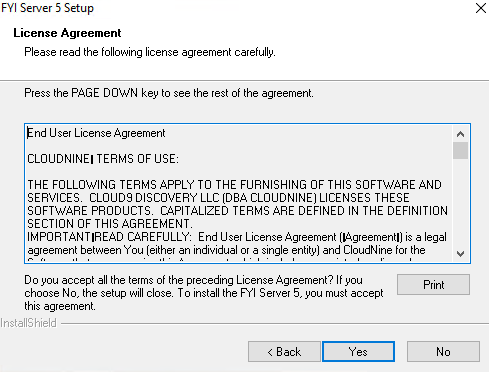
5.To print the End-User License Agreement, click the Print button. To agree to the End-User License Agreement, click Yes.
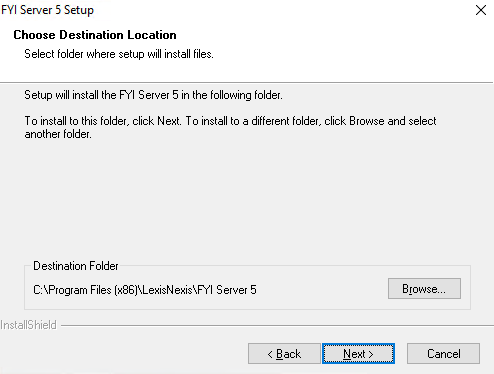
6.The default folder for FYI Server is C:\Program Files\CloudNine\FYI Server 5. To change the destination location, click the Browse button and choose a different folder.
i.For example, J:\Program Files\CloudNine\FYI Server 5.
7.When finished, click Next.
|
The default location for application data files is C:\ProgramData\CloudNine\FYI Server 5. |
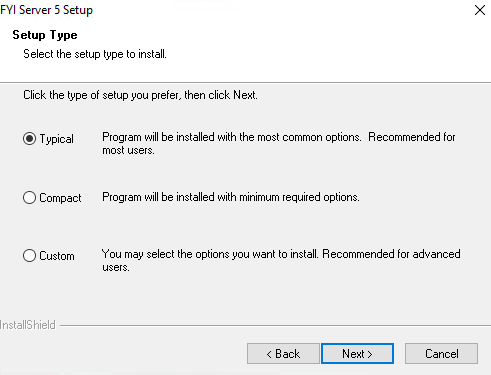
8.The Setup Type dialog box defaults to the Typical option. Click Next.
|
The Typical setup type option installs FYI Server and FYI Admin Console on the FYI Core Server, using the default settings. These settings can be changed later from the FYI Admin Console. For more information see About applying advanced server settings. |
|
To control the server from remote locations, you can install the FYI Admin Console on your workstation or laptop after the FYI Server installation is complete. For more details, see Setting up remote administration. |
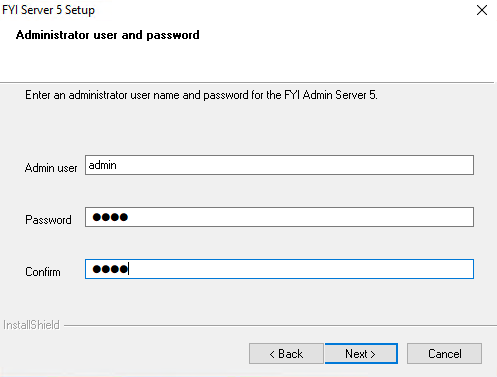
9.In the Admin user field, type the FYI Server administrator's user name. In the Password and Confirm fields, type the FYI Server administrator's password.
i.You will use the administrator's user name and password to log onto the FYI Admin Console. You can add additional administrators later through the administration console, but you will need to create the first administrator here before continuing.
|
Before moving on to the next step, write down the FYI Server administrator user name and password. You will not be able to access the FYI Admin Console without it. If you lose this information, you will need to uninstall and reinstall FYI Server. |
9.When finished, click Next.
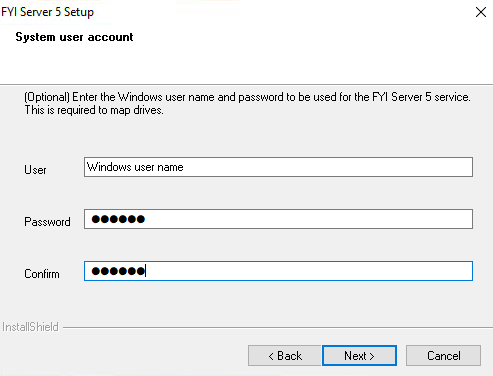
10.If you are using a dedicated service account to run Concordance FYI Server services, in the User field, type the Microsoft Windows user name, in the Password and Confirm fields, type the Windows user's password, and click Next.
i.It is best practice to use a dedicated service account, instead of a local system account, to run Concordance FYI Server services if you plan to launch and view E-docs referenced in Concordance using FYI Reviewer or a .FYI database, or if you plan to use mapped drives in the FYI Server. The dedicated service account must be set up before filling out the System user account dialog box during installation. For more information about setting up a dedicated service account, see To set up a dedicated service account.
ii.If you are using a local system account, leave the fields blank on the System user account dialog box, and click Next.
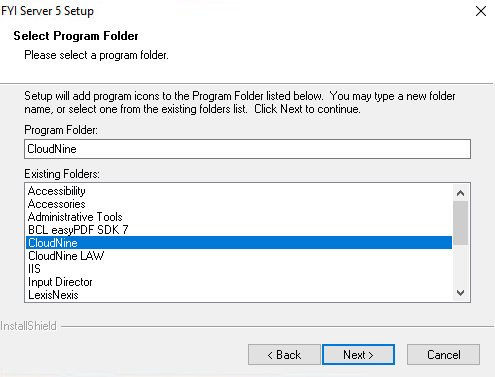
10.The default program folder is CloudNine. To change the program folder name, click an existing program folder in the Existing Folders list or type a new program folder name in the Program Folder field. Click Next.
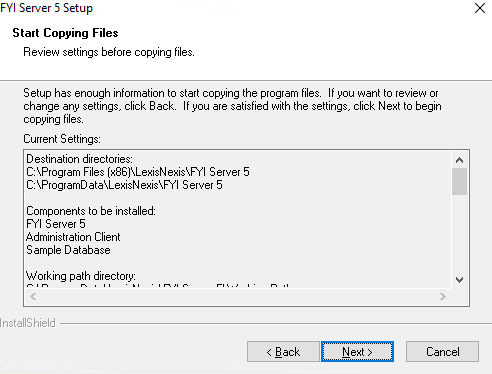
11.To start the installation, click Next.
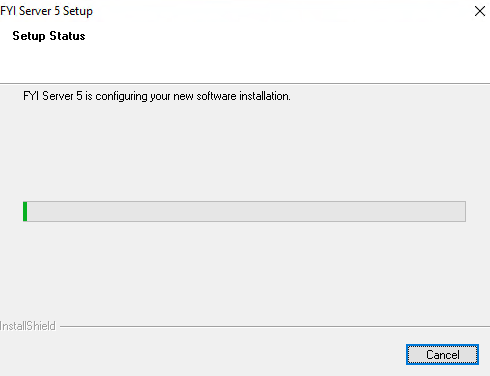
The process setups and installs the FYI Server files.
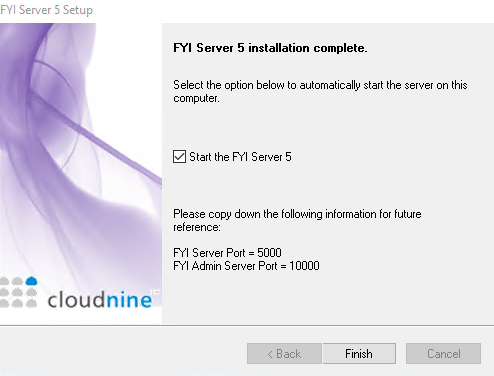
12.Keep the Start the FYI Server 5 check box selected to start the FYI Server after installation is finished. The ports for the FYI Server and Administration Console Server are displayed. Make note of the ports, because you will need this information to log on to FYI Reviewer (Concordance FYI Server Port) and FYI Admin Console (Concordance Administration Console Server Port). Click Finish.
The FYI Server and components are now installed and can be accessed from your program folder. There are two new icons on your desktop:
|
FYI Admin Console 5 |
|
Cowco.fyi (sample database) |
|
Another sample database, Sample.fyi, is installed in your program folder. You can use it to connect to the Concordance Demo Server. However, it does not interact with the FYI Server and components that you have installed. |
To Install the Evaluation Version of FYI Server
1.Run the FYI_Server_5_Install.exe installation file directly on the FYI Server.
|
If you are installing FYI Server version 5.03 and have an older version of FYI Server already installed, you must uninstall the older version before proceeding with the installation. For more information, see Uninstalling FYI Server. |
2.The Welcome dialog box appears. Click Next.
3.Click the Server option to install the FYI Server, FYI Admin Console, and sample database. Click Next.
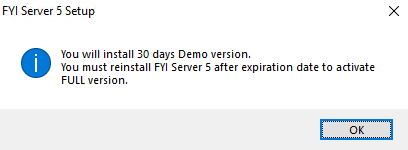
4.Click Skip to install the evaluation version of FYI Server.
i.To install the full version of FYI Server, enter your company name and FYI license key. For more details, see To install the full version of FYI Server.
5.Click OK to acknowledge the demo version message.
6.To print the End-User License Agreement, click the Print button. To agree to the End-User License Agreement, click Yes.
7.The default folder for FYI Server is C:\Program Files\CloudNine\FYI Server 5. To change the destination location, click the Browse button and choose a different folder.
i.For example, J:\Program Files\CloudNine\FYI Server 5.
8.Click Next.
|
The default location for application data files is C:\ProgramData\CloudNine\FYI Server 5. |
9.The Setup Type dialog box defaults to the Typical option. Click Next.
|
The Typical setup type option installs FYI Server and FYI Admin Console on the FYI Core Server, using the default settings. These settings can be changed later from the FYI Admin Console. For more information see About applying advanced server settings. |
|
To control the server from remote locations, you can install the FYI Admin Console on your workstation or laptop after the FYI Server installation is complete. For more details, see Setting up remote administration. |
10.In the Admin user field, type the FYI Server administrator's user name. In the Password and Confirm fields, type the FYI Server administrator's password.
i.You will use the administrator's user name and password to log onto the FYI Admin Console. You can add additional administrators later through the administration console, but you will need to create the first administrator here before continuing.
|
Before moving on to the next step, write down the FYI Server administrator user name and password. You will not be able to access the FYI Admin Console without it. If you lose this information, you will need to uninstall and reinstall FYI Server. |
11.Click Next.
12.If you are using a dedicated service account to run Concordance FYI Server services, in the User field, type the Microsoft Windows user name, in the Password and Confirm fields, type the Windows user's password, and click Next.
i.It is best practice to use a dedicated service account, instead of a local system account, to run Concordance FYI Server services if you plan to launch and view E-docs referenced in Concordance using FYI Reviewer or a .FYI database, or if you plan to use mapped drives in the FYI Server. The dedicated service account must be set up before filling out the System user account dialog box during installation. For more information about setting up a dedicated service account, see To set up a dedicated service account.
ii.If you are using a local system account, leave the fields blank on the System user account dialog box, and click Next.
13.The default program folder is CloudNine. To change the program folder name, click an existing program folder in the Existing Folders list or type a new program folder name in the Program Folder field. Click Next.
14.To start the installation, click Next.
15.The process setups and installs the FYI Server files.
16.Keep the Start the FYI Server 5 check box selected to start the FYI Server after installation is finished. The ports for the FYI Server and Administration Console Server are displayed. Make note of the ports, because you will need this information to log on to FYI Reviewer (Concordance FYI Server Port) and FYI Admin Console (Concordance Administration Console Server Port). Click Finish.
The FYI Server and components are now installed and can be accessed from your program folder. There are two new icons on your desktop:
|
FYI Admin Console 5 |
|
Cowco.fyi (sample database) |
|
Another sample database, Sample.fyi, is installed in your program folder. You can use it to connect to the Concordance Demo Server. However, it does not interact with the FYI Server and components that you have installed. |
To Setup a Dedicated Service Account
It is best practice to use a dedicated service account, instead of a local system account, to run Concordance FYI Server services if you plan to launch and view Edocs referenced in Concordance using FYI Reviewer or a .FYI database, or if you plan to use mapped drives in the FYI Server. You will want to add a use a dedicated service account with administrative rights to access the network directory where databases reside. If you do not have a valid service account set up that has rights to this directory structure, you will not be able to connect to your images or native files if they are stored on a separate server.
The dedicated service account can also be the same account as the administrator account used to access the FYI Administration Console, or you can make separate accounts for stronger security.
To set up a dedicated service account, you need to set up a Microsoft Windows user account with Log on as a Service rights. The dedicated service account should be set up before installing FYI Server. If you did not set up the dedicated service account before installation, you can change the logon information for the FYI Server service in the Services Manager.
|
Please contact your System Administrator to grant Log on as a service rights. Incorrect use of the Microsoft Windows administration tools may create system instability and affect security levels. The tools are used at your own risk. |
To Grant Log-on as a Service Rights to a Microsoft Windows User Account
1.Open the gpedit.msc file.
2.Opening the gpedit.msc file opens the Group Policy dialog box.
3.Select Computer Configuration > Windows Settings > Security Settings > Local Policies > User Rights Assignment from the tree view.
4.Double-click Log on as a service in the Policy column to open the Log on as a service Properties dialog box.
5.Click the Add User or Group button to open the Select Users or Groups dialog box.
6.Add your account and click OK to close the Select Users or Groups dialog box.
7.Click OK to close the Log on as service Properties dialog box.
8.Close the Group Policy dialog box.
9.Refresh the policy for your account by running GPUPDATE /TARGET:COMPUTER from the command line.
10.If you have not installed FYI Server yet, install FYI Server, and during the installation, enter the Microsoft Windows user account with Log on as a Service rights in the System user account dialog box.
i.If you installed FYI Server before setting up the account, change the FYI Server service logon information in the Services Manager.
To Change FYI Server Service Logon Information in Services Manager
1.Open the services.msc file.
i.Opening the services.msc file opens the Services dialog box.
ii.You can also open the Services dialog box from the Control Panel dialog box. From the Start menu, click Control Panel, double-click Administrative Tools, and double-click Services to open the Services dialog box.
2.Right-click FYI Server 5 in the Name column and click Properties.
i.Clicking Properties opens the FYI Server 5 Properties (Local Computer) dialog box.
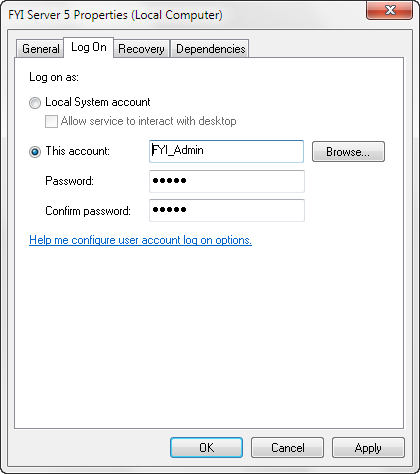
3.Click the Log On tab.
4.Click the This account option.
5.Add the Microsoft Windows user account with Log on as a Service rights to the This account field.
6.Type the user account’s Microsoft Windows password in the Password and Confirm password fields.
7.Click OK.