Running the TagHistoryAndStoreIt CPL
The TagHistoryAndStoreIt_<version>.cpl allows you to take the information from the Tag history panel in the Tags task pane and place it into a field for the purpose of searching, backups or storing historical information.
Storing a database's tag history can help you track tagging issues, such as a user accidentally bulk un-tagging a group of documents. The information captured by the TagHistoryAndStoreIt_<version>.cpl allows you to run relational searches on specific tags, users, and the date that an event occurred.
Tag history will also need to be stored when using the Export as a Concordance Database feature because the export includes a database's current tagging information, but does not include the tag history.
By default, the CPL places all of the tag history for a query of documents into the TAGINFO field. If you want to store the tag history in different field in your database, you need to replace the TAGINFO field name with the other field name in the TagHistoryAndStoreIt_<version>.cpl file before running the CPL.
If your database has an existing field named TAGINFO, then you do not need to modify the CPL before running the CPL.
To Change the Tag History Field in the CPL
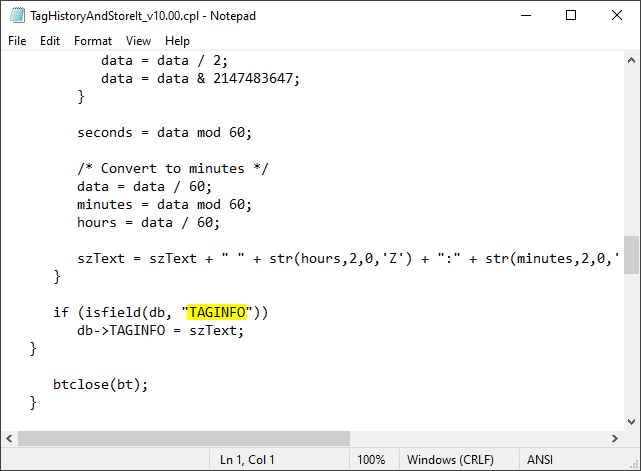
1.Open the TagHistoryAndStoreIt_<version>.cpl using a text editor.
2.Search and replace all references to the TAGINFO field with the name of the field you want to use to store your tag history. If you have an existing field named TAGINFO, then you will not need to modify the cpl.
3.Save your changes and close the TagHistoryAndStoreIt_<version>.cpl file.
To Store Tag History
1.In Concordance, on the Standard toolbar, click the All button to query all records in your database.
2.On the File menu, click Begin program.
3.Navigate to the CPL directory installed with Concordance, and click the TagHistoryAndStoreIt_<version>.cpl file. The default directory CPLs installed with Concordance is C:\ProgramData\CloudNine\Concordance 10\CPL.
4.Click Open. The CPL automatically extracts your tag history from each database record and adds the tag history to the TAGINFO field, or its equivalent, for each record.
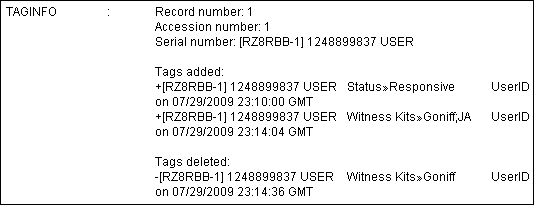
5.Open the Browse view and locate the field where you placed the tag history. The field now lists the tags that were added to and removed from the record, when the tags were added or removed, and by whom.
Running the TagSaver CPL
You can create a backup file of your tags or restore the backed up tags into another database using the TagSaver_<version>.cpl. We recommend running this CPL script once or twice daily, depending on how much active reviewing is occurring. The tag back-up is stored in a database's .gat file and the tag data is retrievable, when needed.
TagSaver CPL benefits:
•You can move tag application information to different databases
•You can restore backup files (.gat) to other databases to move tag structure
|
When restoring tags from a .gat file, the maximum number of characters allowed in a tag name is 199. |
To Back Up Tags in a Database
1.In Concordance, click the All button on the Standard toolbar to query all records in your database.
2.On the File menu, click Begin program.
3.Navigate to the CPL directory installed with Concordance, and click the TagSaver_<version>.cpl file. The default directory for CPLs installed with Concordance is C:ProgramData\CloudNine\Concordance 10\CPL.
4.Click Open to open the Tag Saver Options list.
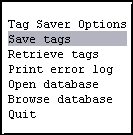
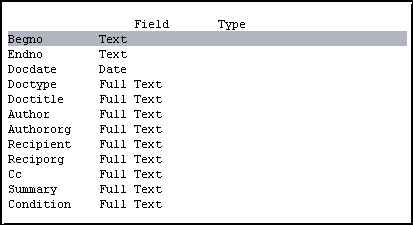
5.Click Save tags or press Enter. Clicking Save tags or pressing Enter opens the field list. Use the arrow keys on your keyboard to scroll through the field list.
6.Click or press Enter on the field you want to associate with the tags. You need a common field with a unique value, such as the Begno (Bates number) field. Do not use the Access ID field when exporting tag history.
7.After you select the field, the CPL creates the <database name>.gat file in the same directory as the database's .dcb file. This is your tag backup.
8.The Tag Saver Options list displays. Click Quit to return to Concordance.
The database's .gat file is not automatically updated when you add or modify tags in the database. It is best practice to run the TagSaver_<version>.cpl periodically to ensure your tag backup is current.
To Restore Tags From a .GAT File to a Database
1.Copy the .GAT file containing the tags you want to add to your database, and paste the file into the database directory for the database you want to add the tags.
2.Rename the .GAT file you copied to the database directory using the same name as the database's .dcb file. For example if the database's .dcb file is Cowco.dcb, the .gat file needs to be named Cowco.gat.
3.In Concordance, open the database you want to add the tags.
4.On the Standard toolbar, click the All button to query all records in your database.
5.On the File menu, click Begin program.
6.Navigate to the CPL directory installed with Concordance, and click the TagSaver_<version>.cpl file. The default directory for CPLs installed with Concordance is C:ProgramData\CloudNine\Concordance 10\CPL.
7.Click Open to open the Tag Saver Options list.
8.Click Retrieve tags. The CPL adds the tags for all the records that were tagged in the .gat file to the database.
9.The Tag Saver Options list displays. Click Quit to return to Concordance.
10.Open the Tags task pane to verify the tags were added and applied correctly to the database.