When you select a Markup Tool, the top of the Viewer pane updates to display an appropriate toolbar to use for adding or editing that markup. You can change the appearance, size, and location of markups after you add them. All changes are tracked in the Markup History view of the Media Information pane.
The Markup Properties Toolbar
Tools |
Name |
Description |
|---|---|---|
|
Color |
Defines color for a markup tool |
|
Text Format |
Includes Font Name, Font Size, and additional Font Attributes (Text Background, Underline, Italic, Bold). |
|
Line and Shape Format |
Defines width and style for lines or shapes |
Add Text Markup
1.On the Markup toolbar, click Text Box tool.
2.Use your mouse to select an area in the document where you want the text box to appear.
3.In the text box, type the text you want to add.
4.Using the Markup Properties toolbar, modify the color, or other text attributes as needed.
5.Navigate to another document to save the markup.
Add a Note
1.On the Markup toolbar, click the Note tool.
2.In the Markup Properties toolbar, select the color you want to use for the note.
3.Use your mouse to click a spot in the document where you want to place the note. The Changemark Note dialog displays.
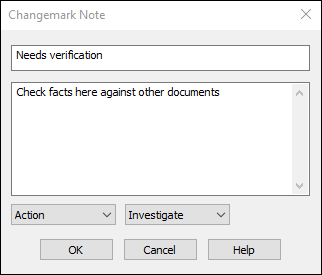
4.Edit the information in the dialog box: title, text for the note, note type, and note state detail.
5.When finished, click OK.
6.Navigate to another document to save the markup.
|
After applying a note, with the Pan tool selected, you can move the mouse over the note to display the first 40 characters of the contents of the note. To view the full contents of the note (maximum of 520 characters), use the Note tool and double-click the note to display the Changemark Note dialog and view the entire note. |
Add a Line or Shape Markup
1.On the Markup toolbar, select the line or shape tool corresponding to what you want to add.
2.In the Markup Properties toolbar, select the color, and line or shape attributes you want.
3.Use your mouse to draw the line or shape on the document.
4.Navigate to another document to save the markup.
Selectable Text Markups
When a document contains selectable text, the Strikeout, Underline, and Highlight tools become available.
1.On the Markup toolbar, select the Strikeout, Underline, or Highlight tool.
2.In the Markup Properties toolbar, select the color you want to use.
3.In the document, use your mouse to select the text to apply the markup to.
4.Navigate to another document to save the markup.
Editing a Markup
1.On the Markup toolbar, click the Selection tool.
2.Use your mouse to select the markup to edit in the document.
3.In the Markup Properties toolbar, modify any properties as needed.
4.Depending on the markup type, after selecting the markup to edit the display updates to display resize and rotate handles. You can select any of these to modify the size or rotate the markup as needed.
5.Navigate to another document to save the markup changes.
Editing Another User's Markups
1.From the Markup toolbar, click the Selection tool.
2.Press Shift and then select the markup you want to edit.
3.Follow the instructions above for Editing a Markup.
Delete a Markup
1.On the Markup toolbar, click the Selection tool.
2.Using your mouse, select one more more markups you want to delete. For multiple markups, press CTRL while selecting.
3.Press Delete. The selected markups are removed.
4.Navigate to another document to save the markup changes.