Return to Section Header
You use tag fields to mark records with a Yes or No value. In the grid displays, a Yes value appears as a checked checkbox. A No value appears as an unchecked checkbox. Tag fields are potentially useful for many purposes, such as tracking status of records. To learn how to create a tag field, see Creating Tag Fields.
You can tag records by using any of the following methods:
•Select records to update using the mouse.
•Edit records using hotkeys.
•Batch update.
•Tag list import. See the Importing Tag Lists topic for information on the third method of tagging multiple documents.
•Promote tags to near-duplicate documents. See Promoting Tags to Near Duplicates the topic for more information.
![]() To Tag Records Individually Using a Mouse
To Tag Records Individually Using a Mouse
1.Open a grid display. 2.Make sure the tag field you want to work with is visible. Right-click the field names title bar. The Field List dialog box appears. 3.Select your tag field. 4.In the grid, select or deselect the checkbox in the tag field for the record.
|
![]() To Tag Multiple Records at Once
To Tag Multiple Records at Once
1.Open a grid display. 2.Make sure the tag field you want to work with is visible. 3.Right-click the field names title bar. The Field List dialog box appears. 4.Select your tag field. 5.Filter records as needed. 6.Select rows to tag or leave rows unselected to tag all. 7.Right-click a cell in the tag field and then click one of the options: •Tag Selected Rows as Yes. Marks selected rows as Yes. •Tag Selected Rows as No. Marks selected rows as No. •Toggle Tag for Selected Rows. On selected rows, changes tags marked No to Yes and tags marked Yes to No. •Tag All Rows as Yes. Tags all rows in current view, whether selected or not to Yes. •Tag All Rows as No. Tags all rows in current view, whether selected or not to No. •Toggle Tag for All Rows. Regardless of selection, changes any tag in current view marked No to Yes and any tag marked Yes to No. A message box provides the number of records updated. 8.Click OK.
|
![]() To Tag Using Hotkeys
To Tag Using Hotkeys
You can assign a hotkey to tag fields. Tagging fields using a hotkey can be more efficient than using the mouse to select records. To tag using hotkeys you must perform three steps: 1.Assign hotkeys to tags. In this step you create a link between a keyboard key, such as F1, and a tag field. 2.Enable review mode. In this step you prevent conflicts between your hotkeys and those provided by default in CloudNine™ LAW. Enabling review mode temporarily suspends all default hotkeys in LAW and allows the hotkeys you assigned to function according to your configuration choices. 3.Tag records using hotkeys. In this step you use the assigned hotkey to edit the value in the tag field.
These steps are described in the sections that immediately follow:
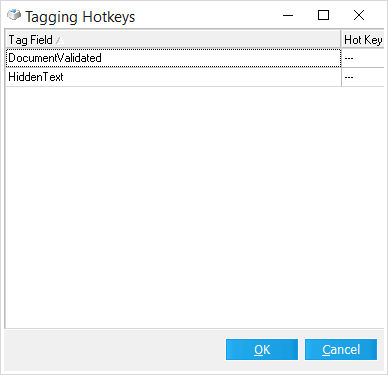
1.In a standalone or embedded grid click the Tagging Hotkeys button:
2.Select a hotkey for any tag field listed and then click OK.
To enable review mode 1.In a standalone or embedded grid click the Review Mode button: A message at the bottom of the grid indicates that review mode is enabled:
•When enabling review mode in the embedded grid, a Review Mode Enabled message box will appear after clicking the review mode button. The button will appear "depressed" to indicate that review mode is enabled (in both grids).
To use hotkeys to tag records 1.In a standalone or embedded grid click with review mode enabled, use the up and down arrow keys to navigate through the records in the grid display. 2.After a relevant record is found, press the assigned hotkey to toggle the tag value in the tag field. •The cell displays a green check mark when a record is flagged with the Yes value. Press the hotkey a second time to toggle the current value. •When you are finished tagging with hotkeys, to disable review mode in either grid, click the Review Mode button again.
|
![]() To Tag Using Batch Updates
To Tag Using Batch Updates
Batch updating is the process of applying the same value to an index field for multiple records. This feature can be used for tagging in addition to updating any other type of user-defined or any other unlocked index field. In most cases, the batch tagging options mentioned above will be more efficient than using this feature when working with tag fields. 1.Perform a search or filter to ensure only the desired records are displayed in the grid. 2.On the Edit menu, click Batch Update. The Batch Update dialog box appears. 3.Click within the cell in the Field column and then choose a tag field from the drop-down list. When a tag field is selected, a check box will appear in the associated Value cell. 4.Update the current record set as follows: •To update records to Yes, select the checkbox in the Value field. •To update records to No, deselect the checkbox in the Value field. 5.Click OK. All records currently displayed in the grid are updated.
|

 The
The