Main Topics for Managing Distributed Processes![]()
The LAW Management Console manages distributed processes (jobs) between multiple LAW workstations. It can be used accomplish the following tasks:
•Start/Stop distributed processes
•Add/Remove workstations from distributed processes, including unresponsive ones
•Change the priority of distributed processes in the queue
•Monitor the overall progress of a distributed process
•Detect when workstations have become unresponsive
•View license keys that are available or currently in use
In order for the LAW Management Console to operate correctly, the following requirements must be met:
•Each workstation participating in a distributed process must have LAW with the LMC installed
•The SQL Server used to create the active Case File (for which a distributed process is being run) must be accessible by all participating workstations.
Opening/Closing the LAW Management Console
![]() With the LAWConsole.exe
With the LAWConsole.exe
 To open the LAW Management Console, locate and run LAWConsole.exe from your LAW install directory, usually found in C:\Program Files (x86)\LAW50\Console\.
1.Use Windows Explorer to browse to the path that contains the LMC executable file. By default, file path is:
C:\Program Files (x86)\Law50\Console\
2.Double click LAWConsole.exe.
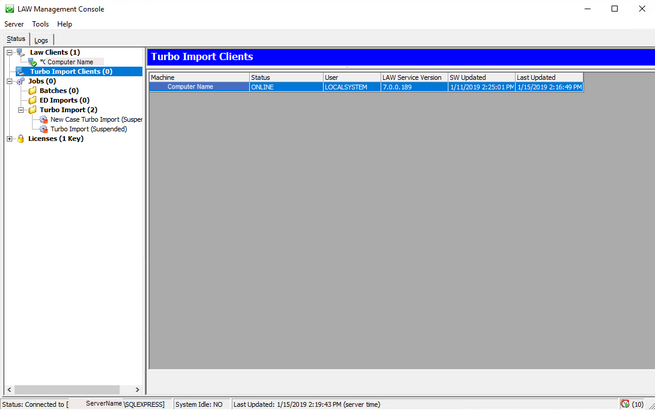
The LAW Management Console screen appears.
3.The LMC is configured through the LAW Configuration Utility. It will use the same SQL server that is configured as the Management Database.
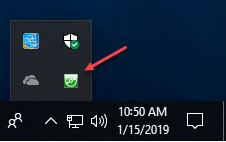
Once opened, the LMC will continue to run in the background, even if the window itself is closed. To re-open or fully close the LMC, use the LAW Management Client icon in your system tray.
 Windows 10/Windows Server 1. Mouse over the LMC icon located in the Windows notification area. 2.Click the LMC icon or right click the icon and then click Restore. The LMC starts. •If necessary, log on to an instance of SQL Server. •If the LMC icon is not visible in the Windows notification area, see the previous section in this topic To start the LMC for the first time.
|
 Windows You can use the LMC icon in the Windows notification area to restore the LMC, stop the LMC, or perform a quick check of its connection status to SQL Server. 1.Mouse over the LMC icon located in the Windows notification area. 2.Perform the following tasks as needed:
|
![]() To Configure LMC to Start with Windows
To Configure LMC to Start with Windows
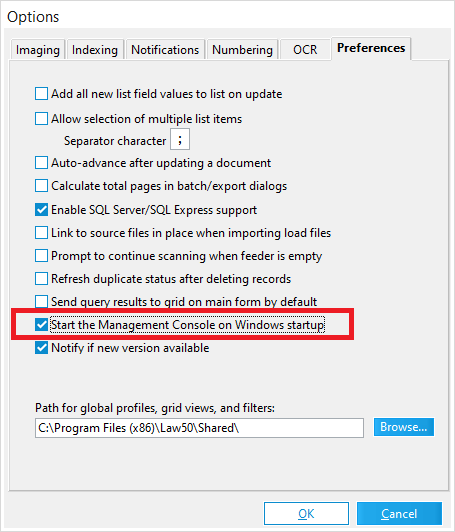
1. 2.From the main window, on the Tools menu, click Options, and then click Preferences. 3.Select the Start the Management Console on Windows Startup check box. 4.Click OK. Click Yes if you are prompted to start the LMC. The LMC starts. Every time you restart Windows, the LMC will also start automatically but run minimized. You can then restore the LMC by selecting its icon in the Windows notification area.
|

 Start CloudNine™ LAW.