Scanner Settings
Brightness and Contrast
The Brightness and Contrast settings are set via the Main Interface in LAWtsi. Each setting has a reset button that will restore to the default value.

Figure 1
Brightness and Contrast settings - This is where users set the contrast and brightness.
The Auto-Brightness option will allow the scanner to automatically detect what brightness to use for the document when enabled. This option is not available on all scanners.
![]()
Figure 2
Auto-Brightness button - This toggle button will enable auto-brightness if supported by the selected scanner.
Color Selection
The selected scanner may support different color modes. The options are Black and White, GreyScale or R.G.B. (Full Color) if supported by the selected scanner. To change this setting click the Color button on the Main Interface of LAWtsi.
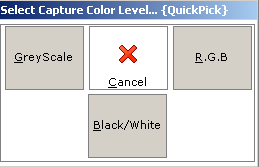
Figure 1
Color Picker - This dialog is used to select the color mode of the scanner.
Paper Size Selection
Depending on the selected scanner, one or multiple paper sizes may be available to scan. To select the paper size before scanning click the Paper Size button.
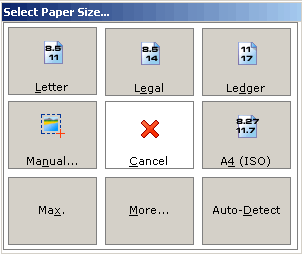
Figure 1
Select Paper Size dialog - This dialog is used to select the paper size to be scanned.
The common paper selections are available from the Select Paper Size dialog. The selections below are listed starting in the upper left hand corner and are listed clock-wise:
?Letter - Letter paper size is 8 1/2" by 11".
?Legal - Legal paper size is 8 1/2" by 14".
?Ledger - Ledger (Double Letter) paper size is 11" by 17".
?A4 (ISO) - A4 (ISO) paper size is 8.27" by 11.7".
?Auto-Detect - The Auto-Detect paper size will try to automatically detect the paper size that is fed through. This setting is not available on all scanners.
?More - The More button will bring up the Available Paper Sizes dialog (Figure 2) which allows users to select any paper size that is available for the selected scanner.
?Max - The Max paper size button will set the paper size to the maximum available paper size for the selected scanner.
?Manual - The Manual paper size button displays the Manual Paper Sizing (Figure 3) dialog which allows users to manually configure the capture area.
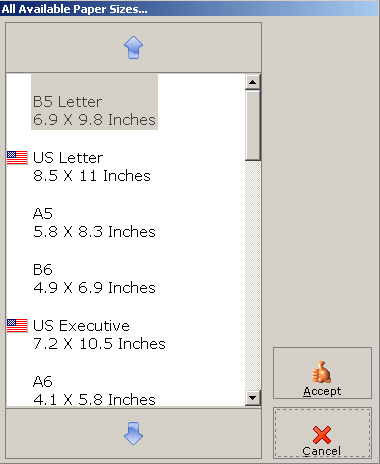
Figure 2
Available Paper Sizes dialog - This dialog displays all available paper sizes for the selected scanner.
Manually configuring paper size is done using the Manual Paper Sizing dialog. This is used for scanning non-standard sizes.
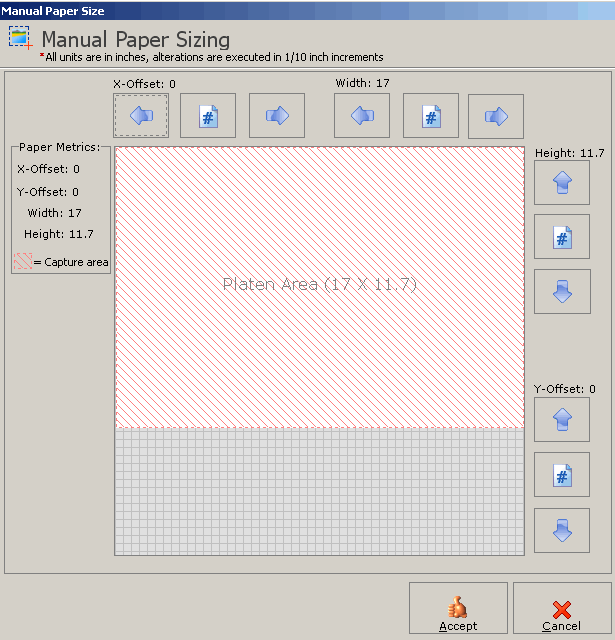
Figure 3
Manual Paper Sizing dialog - This dialog is used to set the scanner to scan at a non-standard paper size.
This dialog has 4 different configuration options.
?X-Offset - The X-Offset value is the Left offset on the page.
?Width - The Width value is set to equal the width of the scan.
?Height - The Height value is set to equal the height of the scan.
?Y-Offset - The Y-Offset value is the Top offset value of the page.
Paper Source
The Paper Source is selected by clicking the Paper Src. button on the Main Interface of LAWtsi. When clicked, this button displays the Paper Source dialog (Figure 1), which allows users to select whether to use the Automatic Document Feeder (ADF) in either simplex or duplex mode. This is also where the scanner can be set to use the Flatbed when scanning.
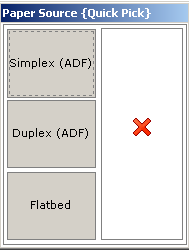
Figure 1
Paper Source dialog - This dialog is used to select the paper source.
