Endorsing Headers and Footers
You can use the Batch Process tool to add custom headers and footers to images and both searchable and image-only Adobe Acrobat PDF files. The same header and footer may also be applied to printed images and PDF files during batch processing, although it will not be stamped on the image unless the endorse process is selected.
|
After headers and footers are added to a PDF-converted file, and the PDF file is endorsed or printed, the original version of the PDF file, [original file name]_original.pdf, is created in the <case root>\$Image Archive folder, even if a PDF file is printed without the Endorse Image check box selected. |
When applying header and footers, a border is added to the image to eliminate the chance of overwriting image data. Placing headers and footers on a border also makes it easier to edit or remove any header or footer previously applied by CloudNine™ LAW.
|
The following languages are currently supported for endorsing Adobe Acrobat PDF images:
Bulgarian, Catalan, Czech, Danish, English, Estonian, Finnish, French, Greek , Haitian Creole, Hebrew, Hmong Daw, Hungarian, Indonesian, Italian, Klingon, Latvian, Lithuanian, Malay, Norwegian, Polish, Portugese, Romanian, Russian, Slovak, Slovenian, Spanish, Swedish, Turkish, Ukranian, Urdu, Vietnamese
If an endorsement contains a language other than one the languages listed above, the endorsement will not be applied to the PDF image.
|
![]() Preview Window Version 7.0.206+
Preview Window Version 7.0.206+
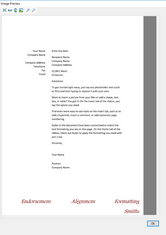
In Version 7.0.206+, the ability to preview your endorsement settings prior to endorsing was introduced. The preview button 1. To use the preview window, select Preview. The Image Preview opens in a new window. 2. The Image Preview toolbar allows you to adjust the displayed image. 3.
4. Selecting OK closes the Image Preview window. |
After endorsing, you can also validate the endorsement using the Scan for Errors dialog box. See Scanning for Errors for details.
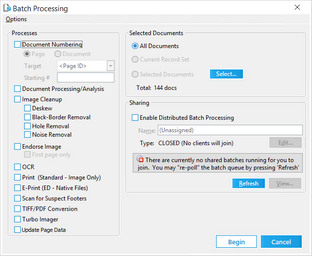
1.From the main form on the Tools menu, click Batch Process. The Batch Processing tool opens. 2.Select the documents to process. For more information on selecting documents see Selecting Documents for Processing. 3.Select Endorse Image and then either select or clear First page only, as needed.
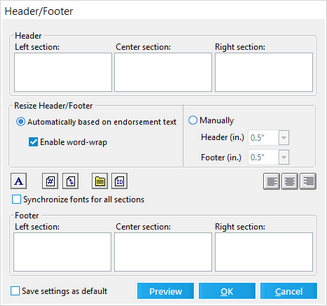
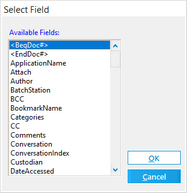
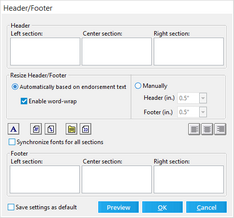
4.On the Options menu, click Header/Footer. The Header/Footer dialog box appears. 5.Add text as needed to occupy the left, center and right sections of the header and footer.
6.Configure header and footer options as needed: 7.Click OK. 8.Optionally, select Enable Distributed Batch Processing and configure the session as needed. For more information on using distributed batch processing see Distributed Batch Processing. 9.Click Begin. |
1.From the main form on the Tools menu, click Batch Process. The Batch Processing tool opens. 2.Select the documents that you want to apply headers/footers to, for example, select: All Documents or Current Record Set, or click Select to specify documents individually. For more information on selecting documents see Selecting Documents for Processing. 3.Select Endorse Image and then either select or clear First page only, as needed.
4.On the Options menu, click Header/Footer. The Header/Footer dialog box appears. 5.Do one of the following: •To create a new header/footer, edit the header and footer as needed. •To remove the existing header/footer, without adding a new one, remove any text in the header and footer fields, or set the border size to None. 6.Click OK. 7.Click Begin. CloudNine™ LAW removes the previously applied headers/footers and adds any new one that you specified. |
After endorsing, you can also validate the endorsement using the Scan for Errors dialog box. See Scanning for Errors for details. |
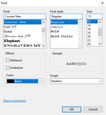
Note the following best practices when working with headers and footers: •Before you apply a header or footer to a large set of documents, first apply the specified header/footer on a small subset of documents. Be sure that text fits and that other results match your expectations and then if necessary adjust accordingly and retest. •If trying to position text using spaces, it is easiest to use a monospace font, such as Courier New or Lucida Console in which all characters are the same width. •Use caution when working with rotated images containing an existing endorsement. If the endorsement does not appear on the top or bottom of the image due to a manual rotation (as viewed in CloudNine™ LAW), removing or modifying the existing endorsement on this image will cause LAW to remove the endorsement (which LAW thinks exists on the bottom of the image) and may remove actual document data located at the bottom of the image. One way to prevent this from occurring is to first rotate the image so the endorsement that LAW applied to the image appears as it was applied. |

