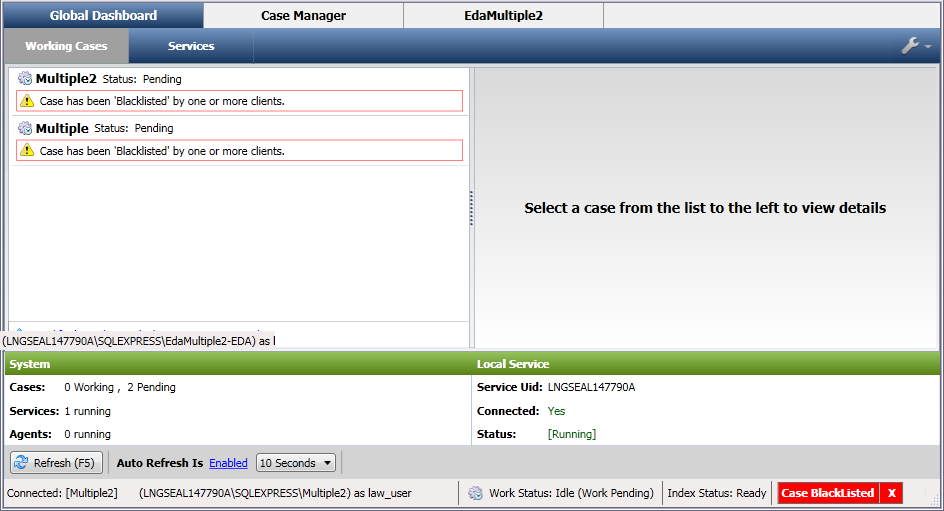
Definition
Blacklisting is a mechanism in which a service instance stops processing a case after repeated attempts to work on the case fail. The service will try 5 times before a case is blacklisted. When a case is blacklisted, the service removes the case from consideration for further work. For example, the service will not start agents for inventory or perform analysis.
Blacklisting is scoped to the service and case level. This means that a single service will blacklist a single case. For example, if a single service has 5 cases to process, and the service blacklists 2 of the cases, the service will continue to work on the other 3. Only the 2 blacklisted cases are ignored. In another example, suppose that 3 services are running on 3 workstations, with each service connected to the same management store. If each service is processing a different case and one service blacklists its case, the other 2 services will continue to operate as normal.
Purposes
Blacklisting cases can help to:
•Enable the CloudNine™ Explore service to process other cases that are available for processing.
•Alert you to losses of connectivity, permission issues, and other potential problems that might impair work on cases.
Causes for Blacklisting
The most common cause of blacklisting is the inability of the CloudNine™ Explore service to access the case directory. This situation may be the result of setting the login for the CloudNine™ Explore service to using the Local account. Other less common issues can include: loss of connectivity or permissions issues with the connection to SQL Server, unhandled exceptions from the agent, or initialization failures from the agent.
|
To determine the type of login that the service uses, or to reconfigure CloudNine™ Explore to use a Windows account, you can use the Windows Services management console. If the CloudNine™ Explore service is found to be running under a local account, you can try stopping the CloudNine™ Explore service, reconfiguring it to use a Windows account to login, and then restarting the service. |
Resuming Blacklisted Cases
1.From the Global Dashboard tab, the Working Cases tab lists the cases with running processes. Any Client can flag a case for blacklisting.

2.Select a blacklisted case.

3.Do any of the following:
•Click X on the status bar notification to reset a blacklisted case. This action causes the service to restart processing the case.
•Click Remove All to reset all blacklisted cases. This action causes the service to restart processing of all cases.
•Click Save to save all log entries.