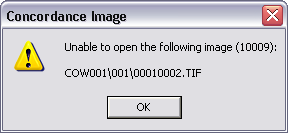
After registering your images, if you receive an error message stating that Concordance is unable to open an image, you need to edit the directory path. The directory path listed in the message box is where Concordance Image is looking for your image files so it can open and launch the image. You need to change the path to the directory location where your images actually reside.

You can fix the imagebase directory path in three ways:
•Modify the directory in the image load file
•Modify the directory in Concordance Image
•Map images on drives
Modify the Directory in the Image Load File
1.Navigate to and open the database's image load .log file in any text editor program.
2.Find the portion of the file path that needs to be modified.
3.Use the text editor's search and replace feature to update the file path(s) to the correct location.
4.Save the edited load file with a new filename. This will retain the original image load file in case you need it.
Modify the Directory in Concordance Image
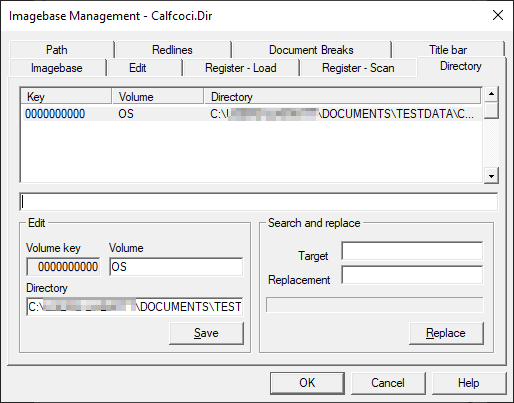
If you moved your database files, you need to reset the directory path where your images are now stored. To do so, you need to update the directory path on the Directory tab in the Imagebase Management dialog.
|
Use caution when resetting directory paths as there is no undo function and changes are permanent. We recommend backing up the .dir and .vol files before performing this process or other imagebase management tasks. |
1.In Concordance Image, on the Tools menu, select Imagebase Management.
2.Navigate to and Open the database's .dir file. The Imagebase Management dialog displays.
3.Click the Directory tab.

i.The current image directory paths are listed at the top of the Directory tab. The Edit section of the tab is used to edit individual image directory paths, and the Search and replace section is used to globally search and replace directory path information throughout the imagebase.
4.To edit an individual directory path, select the applicable directory in the directory list and then edit the Volume and/or Directory fields. Click Save.
5.To run a global Search and replace, in the Target field type the directory text you want to search for and in the Replacement field type the new directory text. Click Replace.
|
When using Search and replace |
|
If you use Search and replace be careful how to specify the paths. If you want to only replace the drive letter you need to include the proper punctuation. For example, type "C:\" instead of just "C" in the Target field. Otherwise you would replace every instance of the letter C with the Replacement text. |
6.When you are finished making the applicable directory path changes, click OK to close the Imagebase Management dialog.
Map Images on Drives
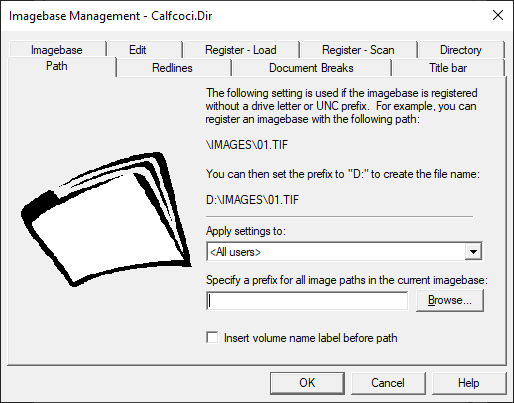
If want you register your images without specifying a drive letter or UNC prefix, you can do so on the Path tab in the Imagebase Management dialog. You can specify a prefix to all image paths for the current imagebase. Settings and specifications entered on the Path tab globally affect the imagebase, and Concordance assumes that all images are stored in the same location.
1.In Concordance Image, on the Tools menu, select Imagebase Management.
2.Navigate to and Open the database's .dir file. The Imagebase Management dialog displays.
3.Click the Path tab.

4.In Apply settings to, select which user you want to apply the image path settings. You can apply the settings to all the database users by selecting <All users>, or you can apply the settings to an individual user by selecting their user ID in the Apply settings to field.
5.In Specify a prefix for all image paths in the current imagebase, type the drive letter you want to use for all image paths in the imagebase.
•You can register an imagebase in Concordance Image without specifying a drive letter or UNC prefix. This gives you the flexibility to access the images from different workstations with different drive mappings. For example, you can register the following image on a CD: \IMAGES\CASE01\01\01.TIF
•Let’s say user1 maps his CD-ROM drive to D: and user2 maps his CD-ROM drive to E:. User1 can set his prefix as D: and user2 can set his prefix to E:. There is no need to register one imagebase for each user. The same can apply to users on a network that have different drive mappings to servers. In fact, one user can map to the images using a UNC mapping while another can map to the images using a drive letter.
6.To register images on a CD jukebox, select Insert volume name label before path.
•If you do not want to register images on a CD jukebox, clear the Insert volume name label before path check box.
•Adding a drive letter and selecting the Insert volume name label before path check box along with a path prefix, allows you to register images on a CD jukebox. Multiple users with different drive mappings (or UNC mappings) to the jukebox can use the same imagebase. With most CD jukeboxes, the CD volume name is placed in front of the root level directory of the CD. For example, you can register the following image on a CD with volume label, CD001: \IMAGES\CASE01\01\01.TIF
•Let’s say a user maps the jukebox to drive J:. Selecting the Insert volume name label before path option maps the image to the following path: J:\CD001\IMAGES\CASE01\01\01.TIF
7.Click OK to save your changes and close the Imagebase Management dialog.