Export Profiles
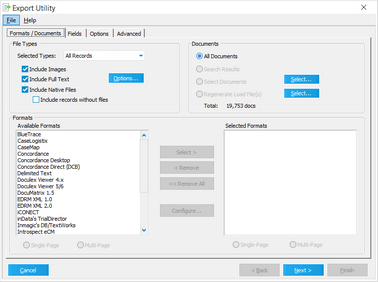
Export profiles are used to save settings used in a particular export. Export profiles can save time and help reduce errors when specifying index fields to use and other settings.
Note the following basic facts about export profiles:
•You work with export profiles by using the Export Utility.
•When you save an export profile the file gets the PFL extension.
•You select the folder location where the file is saved.
•No profile is loaded by default when the Export Utility is launched in a new case.
The profile can be created and saved to a file at any time when working in the Export Utility; otherwise, you are prompted to save the settings after after you start the export or even when you open the Export Utility and change a setting.
1.On the Tools menu click Export Utility. •Or click the The Export Utility dialog box appears. 2.Click File from the menu bar and then click Save As. 3.The Save As dialog box appears. 4.Choose a location and enter a name for the profile. •Create an 'ExportProfiles' folder in a directory (i.e. LAW50 folder) Or •Keep profiles with the associated LAW case. 5.Click Save. The profile name will appear in the title bar of the Export Utility dialog as shown.
|
Saved profiles can be applied to additional exports for any CloudNine™ LAW case provided they match, or closely match, the settings needed for a particular export. If the profile does not meet the requirements, it may be edited within the Export Utility by simply opening the profile, changing the desired settings, and then saving the changes.
To open and apply an existing profile 1.In the main window, on the Tools menu, click Export Utility. The Export Utility opens. 2.On the File menu click Open. The Open dialog box appears. 3.Browse to a PLF file and then click Open. All settings saved to this profile will be applied to the current export session.
|


