Inserting Documents and Pages
You can insert scanned documents, scanned pages, and existing images in the desired locations within the current folder.
The main insertion modes are listed along with descriptions for the best use of each: •Inserting a document. Use this mode when you want to add a document after the first round of scanning is done. Insert multiple documents if the Detect Barcode Breaks setting is enabled and the pages are separated by barcode break sheets. This feature is important because, unless documents are specified by a query, all processing functions, such as batch processing and exports, are executed in scan order. •Inserting a page. Inserting a page is often used when a page, such as the back of a page, was skipped during the initial scan process.
|
1.Select a document. 2.On the Edit menu click Insert and then click Scanned Document(s). The document is inserted above the currently selected document.
|
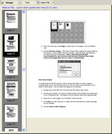
1.On the View menu click Thumbnails or Page and Thumbnails. 2.Select the thumbnails display on the main form. CloudNine™ LAW will always insert a page or document prior to the one highlighted. In the screen image above, a new page would be inserted between pages 21 and 22 2.Click a page that the inserted page will precede and then press the SPACEBAR. 3.On the Edit menu, click Insert, and then click New Page(s).
|
1.On the Edit menu, click Insert and then click Existing Page(s), 2.Browse to the image file to be inserted and then click Open. The image is inserted as a page in the document above the currently selected page.
|

