The Output screen provides several configuration options to customize your CloudNine Collection Manager session.
1.The Output Path specifies a local or network path where the collected data should be placed. Click Select Path and use the displayed file explorer to choose a path or type a path directly in the text field. Collection Manager will automatically append a timestamp-named directory to your chosen Output Path for each collection run.
2.Custodian Assignment determines the naming convention that Collect uses to assign Custodians to the Output Data. You can select from these two options:
a.Master Custodian - this option creates one single output file for all selected mailboxes together. This is helpful when you need multiple Custodians within one file and you plan on doing additional processing/filtering downstream. If you select this option you must enter a Custodian name to use in the box below Custodian Assignment.
b.Unique Custodians - this option creates one output file for each selected mailbox. For this option you need to select one of these two Custodian naming conventions that will be used for each file created:
i.Name (Ex: Last Name, First Name) - each selected mailbox will have an output file named with the display name (ex. "Smith, Fred.PST")
ii.Custodian ID (Ex: lastname@xyz.com) - each selected mailbox will have an output file named with the Custodian ID (ex. "fredsmith@abc.com")
3.Choose your Output Format:
a.PSTs
b.ZIP Files
4.Select the Collection Options you want:
a.Selecting Collect Calendar Items will retrieve calendar data from the previously selected mailbox(es).
5.Select the OneDrive Collection options you want:
a.Include Documents linked from Emails - this option tells Collection Manager to open and extract attachments to emails.
b.Include User's Personal OneDrive Content - this option tells Collection Manager to extract all documents in the personal OneDrive associated with the mailbox account.
6.Select a Time & Date Range if desired. You can apply an upper and lower date/time restriction to narrow the scope of your targeted data. Either leave both the From and To date fields set to Any, or pick both a specific From and To date. Date filtering is based on the "Received Date" values for emails. There is no date filtering for OneDrive documents.
The Next button will be enabled when you have selected or entered all required data on this screen. If the Next button is not enabled, please double check to see that you have:
•Selected an Output Path.
•Specified a custodian name if you selected Master Custodian.
•Selected an appropriate Time & Date Range. The From and To should both be set to Any, or both set to a specific date/time. You cannot have one field set to Any and the other set to a specific date/time.
If you chose to load your collection results to Explore, for each custodian, there will be a maximum of 2 files loaded to Explore. The collected email and calendar items will be in one file, and the second is a zip file containing OneDrive content (if selected). These files will be loaded to Explore even if they contain no content (for example if the mailbox has no messages in it).
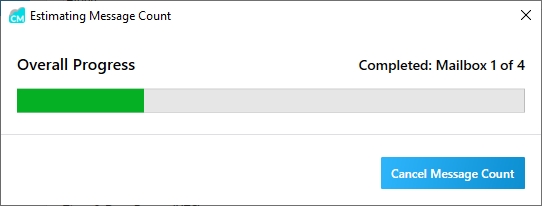
When you click Next, the Estimating Message Count dialog displays while Collection Manager looks at your selected mailbox(es) to determine the total message count for those mailbox(es). Select Cancel Message Count to discontinue processing and stay on the Output page. Otherwise the Confirm Settings screen will display after the message count is determined.