The Preferences dialog box contains settings used by both the administrator and reviewers. You can choose to prevent certain users from accessing the Preferences dialog box by applying security to this menu item. Most of the preferences are Microsoft Windows registry settings, but there are several options that allow you to apply selections to all databases.
Setting some of your viewing parameters helps ease browsing by offering more record detail onscreen, and changing the red highlight color for keywords.
The Preferences dialog box contains seven tabs:
•General - settings used when starting and closing Concordance Desktop, enable/disable Workspace options, and assigning fields for attachments.
•Searching - settings for the default search behavior and search engine.
•Browsing - settings for the title bar field, default query field, and tag and issue options.
•Import - import settings related to numbering and indexing.
•CPL - settings for CPLs, such as the CPL font selection.
|
Any setting changes made in the Preferences dialog box require you to close Concordance Desktop and restart the application before the changes take effect. |
To Set General Preferences
1.Do one of the following:
•On the Tools menu, click Preferences.
•On the Standard toolbar, click the Tools button, and then click Preferences.
i.Clicking Preferences opens the General tab in the Preferences dialog box.
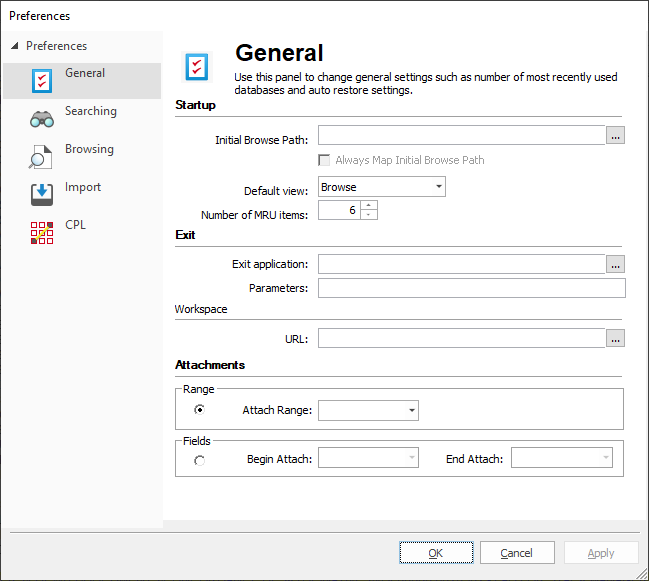
i.The Startup section defines the startup view when opening Concordance Desktop and databases.
ii.For more information about customizing the start-up view in Concordance Desktop, see Customizing the start-up view.
iii.The Initial Browse Path field is used to determine the initial folder that opens when you browse for a file or open a new database. For example, entering C:\CloudNine\MyDatabases opens the MyDatabases folder when selecting Open database from the Databases task pane. During each Concordance Desktop session, the browse path is a dynamic setting and remembers the last folder opened. The next time you browse for a file or select Open database, the previous folder location opens. Each time you close and restart Concordance Desktop, Concordance Desktop resets the browse path to the original Initial Browse Path field setting.
|
You need to restart Concordance Desktop for this change to take affect. |
2.To define the initial browse path, click the ellipses (...) button next to the Initial Browse Path field, to open the Browse For Folder dialog box.
3.Navigate to and click the folder you want to open when you browse for a file or open a new database, and click OK.
i.Clicking OK adds the folder path to the Initial Browse Path field.
4.To ensure all workstations installs open the path in the Initial Browse Path field, select the Always Map Initial Browse Path option.
i.The Default view field determines whether the Browse or Table view automatically opens when you open a database in Concordance Desktop.
5.To define the default view, in the Default view field, click Browse or Table from the view list.
i.The Number of MRU items field determines the number of database files listed in the most recently used (MRU) file list. The MRU file list is displayed on the File menu and the Recent panel in the Databases task pane. The Number of MRU items field defaults to 6. You can display up to nine files in the list.
|
If a user's Recent panel or Recent Files list is blank, your company may have a policy preventing the user's computer from writing to the MRU registry key. |
|
You need to restart Concordance Desktop for this change to take affect. |
6.To modify the number of database files listed, in the Number of MRU items field, type or scroll to the number of files to list in the most recently used (MRU) file list.
i.The Exit section defines what happens when you close Concordance Desktop.
ii.The Exit application field allows you to set up an application to automatically launch after Concordance Desktop is closed, like a reviewer time card application. Concordance Desktop launches the application when it terminates normally. Any additional parameters for the application file are entered in the Parameters field.
7.To launch an application after Concordance Desktop closes, click the ellipses (...) button next to the Exit application field, to open the Open dialog box.
8.Browse to and click the application executable file, and click Open.
i.Clicking Open adds the application's file path to the Exit application field.
9.In the Parameters field, type any additional parameters for the application.
10.By default, Concordance Desktop displays the Workspace tab with links to the CloudNine website. You can customize your Workspace tab to display internal or external web pages by updating the URL field in the Workspace section. To add a link to an external HTML web page, in the URL field, enter the website URL. Be sure to include http:// or https://. For example: https://ediscovery.co/software/concordance/. To add a link to an internal .HTM file located on your server, in the URL field, enter the full UNC path. For example: J:\CloudNine\Internal_Links.htm or \\MyServer\MyFolder\mylinks.htm.
11.In the Attachments section, if the attachment fields were not set up during the database creation process, to specify the fields to use with the Find Attachments feature, do one of the following:
•To set a field to a range of attachments, select the Attach Range option, and then select the field that contains the attachment range data.
•To set up the beginning and ending attachment fields, select the Fields option, and then from the Beg Attach and End Attach list select the fields that contain the attachment data for the beginning attachment number and ending attachment number.
|
When using the Find Attachments feature, it is best practice to setup the fields as paragraph type fields to increase the performance and make sure to index/reindex the database. For more information about the Find Attachments feature, see Finding attachments. |
12.Click OK to save your changes.
To Set Searching Preferences
1.Do one of the following:
•On the Tools menu, click Preferences.
•On the Standard toolbar, click the Tools button, and then click Preferences.
2.Click the Searching tab.
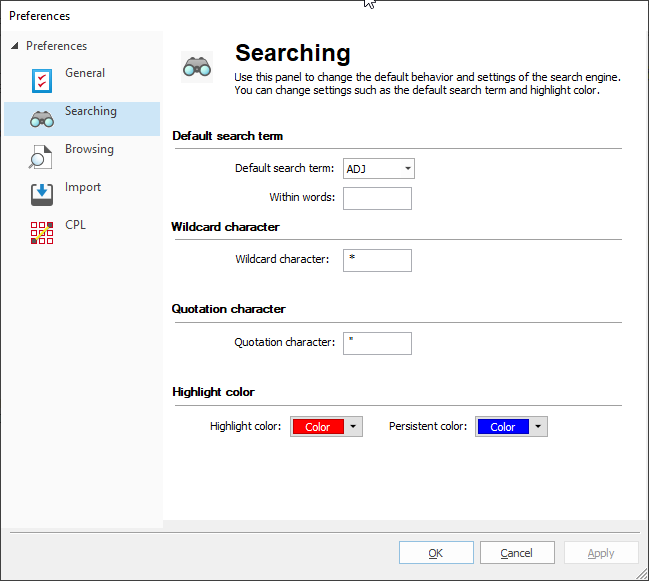
i.The settings on the Searching tab define settings for your search query results.
ii.The Default search term section determines which search operator is used when two search terms are entered without an intervening search operator, and the number of words within the search. The search operator selected in the Default search term field is automatically inserted when Concordance Desktop encounters this scenario. The Default search term field defaults to the adjacent (ADJ) search operator.
iii.For example, searching for Anza Borrego is interpreted as Anza ADJ Borrego.
3.To change the default search operator, in the Default search term field, select the default search operator you want to use.
4.To expand the number of words included in the search results, in the Within words field, type the number of words to include within the search.
i.For example, if ADJ is selected in the Default search term field and you enter 3 in the Within words field, Concordance Desktop searches for Borrego within 3 words of Anza.
ii.The Wildcard character field determines the wildcard character for searches. The wildcard character is used as a prefix or suffix mask when running a search. The Wildcard character field defaults to an asterisk (*). You can change this character to any non-alphanumeric character.
5.To modify the wildcard search character, in the Wildcard character field, type the non-alphanumeric character you want to use.
i.Quote characters are used when your search query includes numbers or special characters, such as periods (.), asterisks (*), and spaces. The quotation character can be redefined as any non-alphanumeric character, such as the apostrophe. The quotation character is not included in the dictionary unless it occurs as embedded punctuation. To search for the quote, use this option to change the character recognized as the quote, then do the search.
ii.The Quotation character field defaults to the quotation mark (") character. It is best practice to leave the quotation mark character in the Quotation character field, which is necessary for locating punctuation in relational searches.
iii.For more information about quotes in searches, see Running relational searches.
|
On occasion you may need to search for a quote. To do so, you must first change this setting to a non-alphanumeric character, like an apostrophe, so that the quotation mark is searchable. To search for the word “and”, you need to use quotes in your query “AND”, otherwise it is read as a search operator by Concordance Desktop. |
6.To change the quotation character, in the Quotation character field, type the non-alphanumeric character you want to use.
i.The Highlight color field determines the color used to display search hits from searches performed using the Quick, Simple, Form, and Advanced Search features. The Persistent color highlights the terms found in the record from the list of terms in the <databasename>_Persistent.txt file when the Persistent Search feature is enabled. It is best practice to choose a color that stands out against the Browse view background and is different than the data or field font color. The Highlight color field defaults to red. The Persistent color defaults to blue.
7.To change the hit color, do any of the following:
•For search hits using Quick, Simple, Form or Advanced searching, click the Highlight color list, in the color selection box, click the color you want to use.
•For Persistent Search hits, click the Persistent color list, in the color selection box, click the color you want to use.
i.Clicking OK opens the Changes may not be reflected until Concordance Desktop is restarted message.
8.Click OK.
To Set Browsing Preferences
1.Do one of the following:
•On the Tools menu, click Preferences.
•On the Standard toolbar, click the Tools button, and then click Preferences.
2.Click the Browsing tab.
i.The settings on the Browsing tab define the browse settings by database and field data parameters.
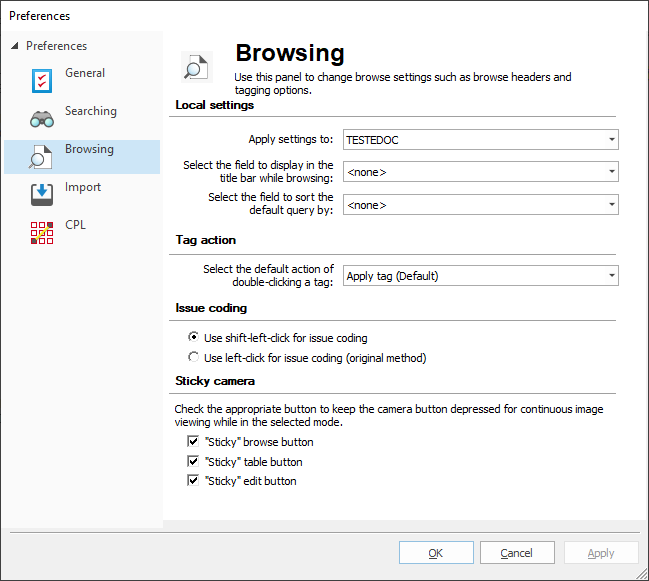
ii.The Local settings section determines where the browse settings are applied. The browse settings can be applied to any database in a group of concatenated databases.
3.In the Apply settings to field, select the database you want to apply the settings.
i.In the Select the field to display in the title bar while browsing field, you can select a field to display on the Title bar for the current document. The field is displayed on the Title bar in the Browse, Table, and Edit views.
ii.Having a field's content displayed on the Title bar can help when viewing long documents, such as depositions, where you may be deep within the document and forget the deponent's name or the document's title. It can also help you see relevant document information when scrolling through records in the Table view.
iii.For transcript databases, Concordance Desktop automatically displays the name, date and volume of the current document in the Title bar.
|
For concatenated databases, you can choose a different Title bar field for each database. |
iv.Use the Select the field to display in the title bar while browsing field to select a field for other non-transcript databases.
v.In the Select the field to sort default query by field, you can modify the default field sort order of a database when the database is opened and before running a search. This is called the "default query." The database is sorted in ascending order by the field selected in the Select the field to sort default query by field. The field can be any field designated as a key field on the New or Modify dialog box. For more information about key fields, see Creating databases.
vi.Selecting <none> sorts the database by the document number.
4.To adjust the default sort order of a database, in the Select the field to sort default query by field, click the field you want to use for the default sort order.
i.In the Select the default action of double-clicking a tag field, you can determine whether double-clicking a tag applies the tag to or removes the tag from a document or whether double-clicking a tag opens the tagging options menu. The Select the default action of double-clicking a tag field defaults to Apply tag (Default).
ii.Regardless of the Select the default action of double-clicking a tag field's setting, clicking directly on the tag’s check box will apply or remove the tag as usual, and you can always access the tagging options menu in Concordance Desktop by right-clicking a tag.
5.To modify tagging actions, in the Select the default action of double-clicking a tag field, click Apply tag (Default) to apply a tag when you double-click a tag or click Displays menu to open the tagging options menu when you double-click a tag.
i.Double-clicking a tag applies the tag to a document or removes it from the document if it's already selected. You can change this action to display the tagging options menu, which is usually displayed by right clicking a tag.
ii.The Issue coding section determines how issues are applied in Concordance Desktop. By default, issues are are applied to highlighted text in a document using SHIFT+left-click. You can change the setting to apply issues using only left-click.
6.To modify the issue coding setting, in the Issue coding section, click the Use shift-left-click for issue coding or Use left-click for issue coding (original method) option.
i.If you change the issue coding setting, the change will not take effect until you close and reopen Concordance Desktop.
ii.In the Sticky camera section, you can determine whether the View Image (camera) button on the Dynamic toolbar automatically stays selected, also known as "sticky," for continuous image viewing in the Browse, Table, and/or Edit views.
iii.When a "Sticky" [view name] button check box is selected, the View Image button is automatically selected in the view. When the check box is cleared, users manually have to click the View Image button to view the images associated with the documents in the viewer.
iv.By default, the Sticky browse button, Sticky table button, and Sticky edit button check boxes are selected.
7.To turn off "Sticky" [view name] button function for a view, clear the check box for the view.
8.Click OK to save your changes.
i.Clicking OK opens the Changes may not be reflected until Concordance Desktop is restarted message.
9.Click OK.
To Set Import Preferences
1.Do one of the following:
•On the Tools menu, click Preferences.
•On the Standard toolbar, click the Tools button, and then click Preferences.
2.Click the Import tab.
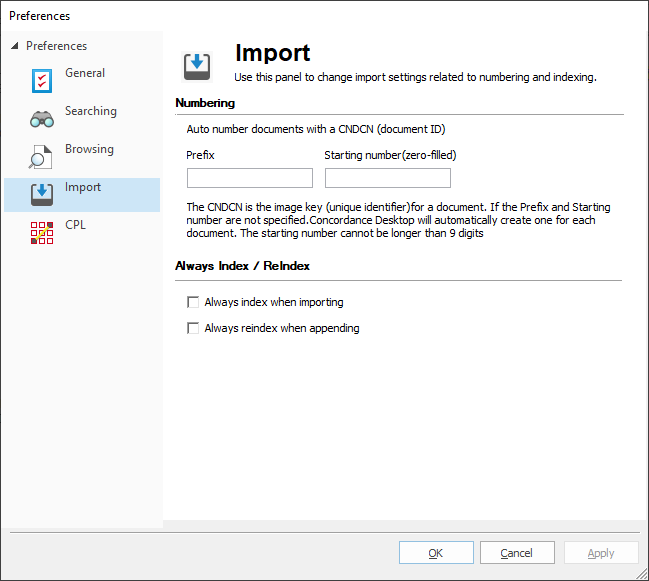
i.The settings on the Import tab allow you to define import settings related to numbering and indexing.
3.In the Prefix field, type the prefix you want to precede the production number.
i.The prefix can be any combination of letters, numbers, or punctuation that are valid folder or file names. You can use up to 57 characters.
4.In the Starting Number field, type the number you want to use to start numbering the production files.
i.Zero fill your starting number to determine the desired number width. You can use up to 9 digits.
ii.Clicking OK opens the Changes may not be reflected until Concordance Desktop is restarted message.
5.Click OK.
To Set CPL Preferences
1.Do one of the following:
•On the Tools menu, click Preferences.
•On the Standard toolbar, click the Tools button, and then click Preferences.
2.Click the CPL tab.
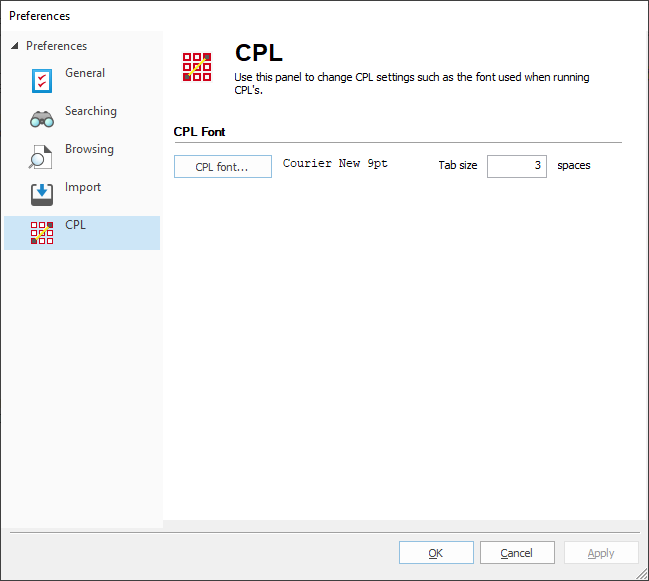
i.The CPL tab determines the font and tab size settings used when running Concordance Desktop Programming Language (CPL) programs.
ii.The CPL font field defaults to Courier New 9pt and the Tab size field defaults to 3 spaces.
3.To change the CPL font, click the CPL font button. The Font dialog displays.
4.Modify the settings and click OK.
i.Clicking OK closes the Font dialog box, and adds the font settings to the CPL font field.
5.To change the tab size, in the Tab size field type the number of spaces you want a tab to contain.
6.Click OK to save your changes.
i.Clicking OK opens the Changes may not be reflected until Concordance Desktop is restarted message.
7.Click OK.