 How to Create a New Explore Case
A Knowledge Based Article on this subject can be found here: Creating a New Explore Case (cloudnine.com)
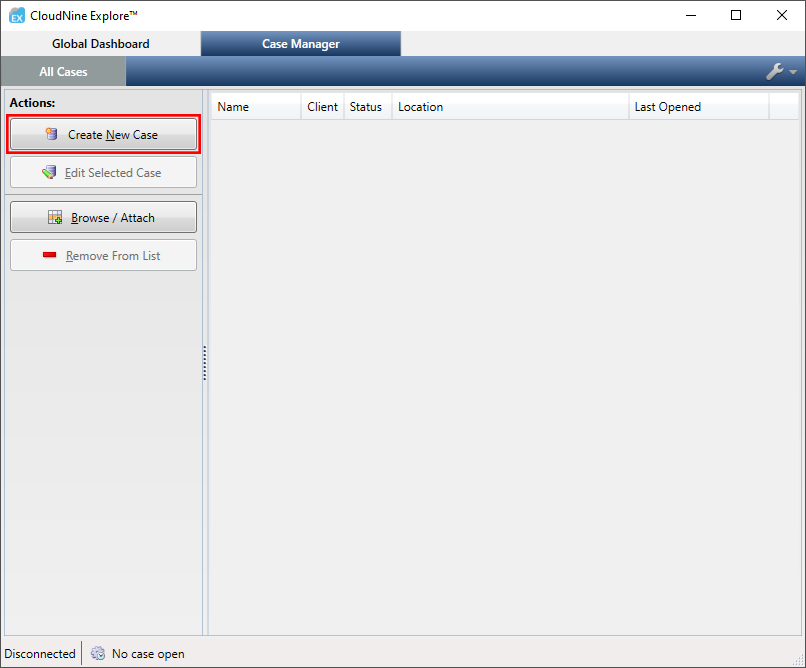
1.Launch Explore if it's not already open, and navigate to the Case Manager tab.
2.From here, click the Create New Case button at the top-left.
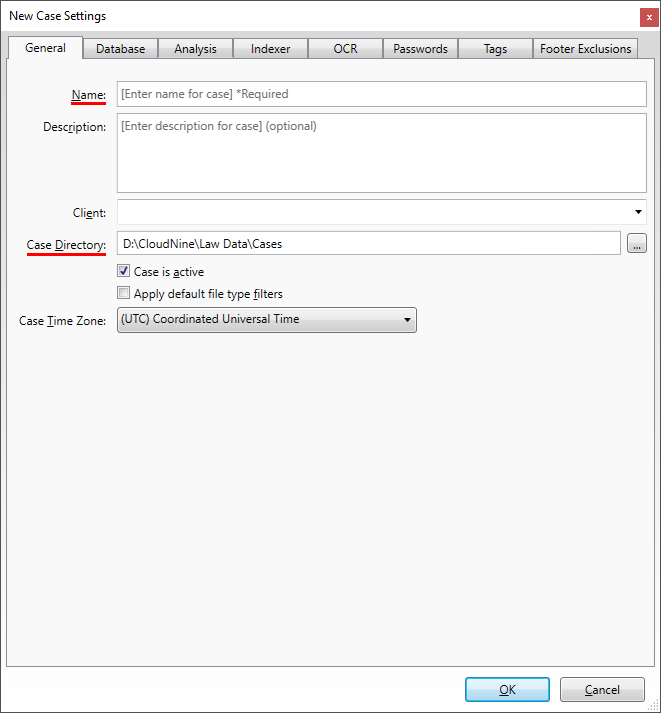
3.The New Case Settings window will open under the General tab. Enter a Name for your new case into the box provided. This is typically the only required input when creating new cases.
4.Ensure that the Case Directory is set to the desired location. You can use the![]() button on the right to open the Browse For Folder window, which will help you navigate to and select a location.
button on the right to open the Browse For Folder window, which will help you navigate to and select a location.
|
If a local path is used for the Case Directory, you will see the |
5.Optional: Refer to the following Answer Center topics to further adjust the available settings tabs:
6.When finished, click OK to close the New Case Settings window and create your new case.