User accounts for all users must be added to the Concordance Desktop server in order to have access to the databases created, migrated to, and registered on that Concordance Desktop server. As users are added to the server, they are automatically added to a group named "All Users." The "All Users" group, that includes the user name of every user and their field rights and menu access settings, is automatically applied to a matter named "All User Groups." As databases are created, migrated to, or registered on the Concordance Desktop server, they too are automatically associated with the "All User Groups" matter. It is this association that allows all users to access all databases on the Concordance Desktop server.
User accounts are added to the Concordance Desktop server in any one of three ways:
•Manually adding each user's user account in the Admin Console - Management tab, under Users
•Migrating and registering a Concordance 10.x database on the Concordance Desktop server
•Adding user accounts from an external domain, such as Active Directory
When adding users through the Admin Console, by default, full rights to fields (read and write) and full menu access (all menus in each database) are granted to the user. However, these defaults can be changed if you need to restrict the user's field rights and menu access rights across all databases. See Restricting user access on databases for more details.
When adding users by registering a migrated Concordance 10.x database, user accounts and rights to the migrated database are carried over from the Concordance 10.x database and applied to that database in Concordance Desktop. However, for all other databases on the server, field rights and menu access defaults are used. Therefore, users added through migration may have restricted rights, while all other users on the Concordance Desktop server still have full rights to the migrated database. If you need to restrict user rights on these migrated databases, you can do so from the User Management screen. See Restricting user access on databases for more details.
When adding users through an external domain (such as Active Directory), as with users manually added in the Admin Console, the default of full rights to fields (read and write) and full menu access (all menus in each database) are granted to each user. These defaults can be changed if you need to restrict a user's field rights and menu access across all databases. See Restricting user access on databases for more details.
It is important to note that no matter how users are added to the Concordance Desktop server, if you need to setup restrictions for a user across all databases, you need to do so in the user's user account in the Admin Console immediately after their user account appears in the Admin Console. This is the only way in which to ensure that the restrictions you setup will be applied to all databases on the Concordance Desktop server. If you setup restrictions later on, the new settings will only apply to all databases added to the server from that point forward.
|
Concordance Desktop does not support user names, passwords, or database names containing characters in Unicode, such as Chinese or Japanese characters. Currently, it only supports user names, passwords, or database names containing single-byte characters, such as English characters. |
|
Concordance Desktop does not support the use of special characters such as %, &, #, etc. in user names, user group names, matter names, client names, or database names. Characters in Unicode are also not supported in user names, password, and databases. |
|
When adding users, the user name cannot be greater than 22 characters in length. |
To Add Users When Using Concordance Desktop Authentication
When using Concordance Desktop as your authentication type, you add users to the server one at a time in the Users list, from the Management tab in the Admin Console.
You must be an administrator on the Concordance Desktop server where you need to add users, as only Administrators can open the Admin Console.
To add a user to the server:
1.Log onto the server where the user account needs to be added.
i.This can be done by either:
▪Logging into the computer/server that has been registered as the Concordance Desktop server
▪Using Windows Desktop Remote to log into the physical Concordance Desktop server computer/server
2.Run Concordance Desktop on the server computer.
3.From the File menu, click Administration, and then Admin Console.
4.Enter your administrator Logon name and Password.
5.Enter the Concordance Desktop server Host name and the Port number (usually 10001) to use for accessing the Admin Console.
6.Click Connect.
i.The Admin Console opens.
7.Click the Management tab.
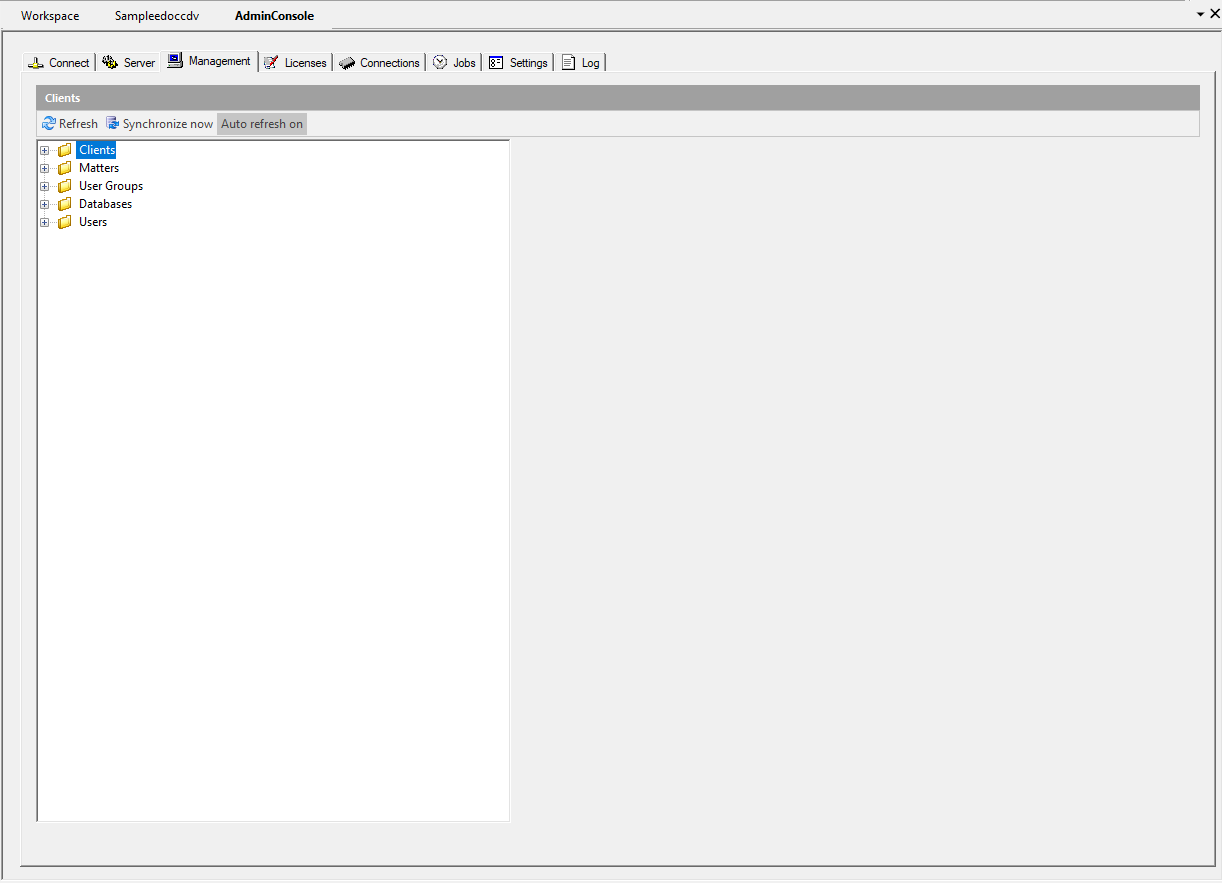
8.Right-click on the Users folder and click on New user, to open a box in which to type the new user name.
9.Type the user name and press Enter to display the fields for setting up a user.
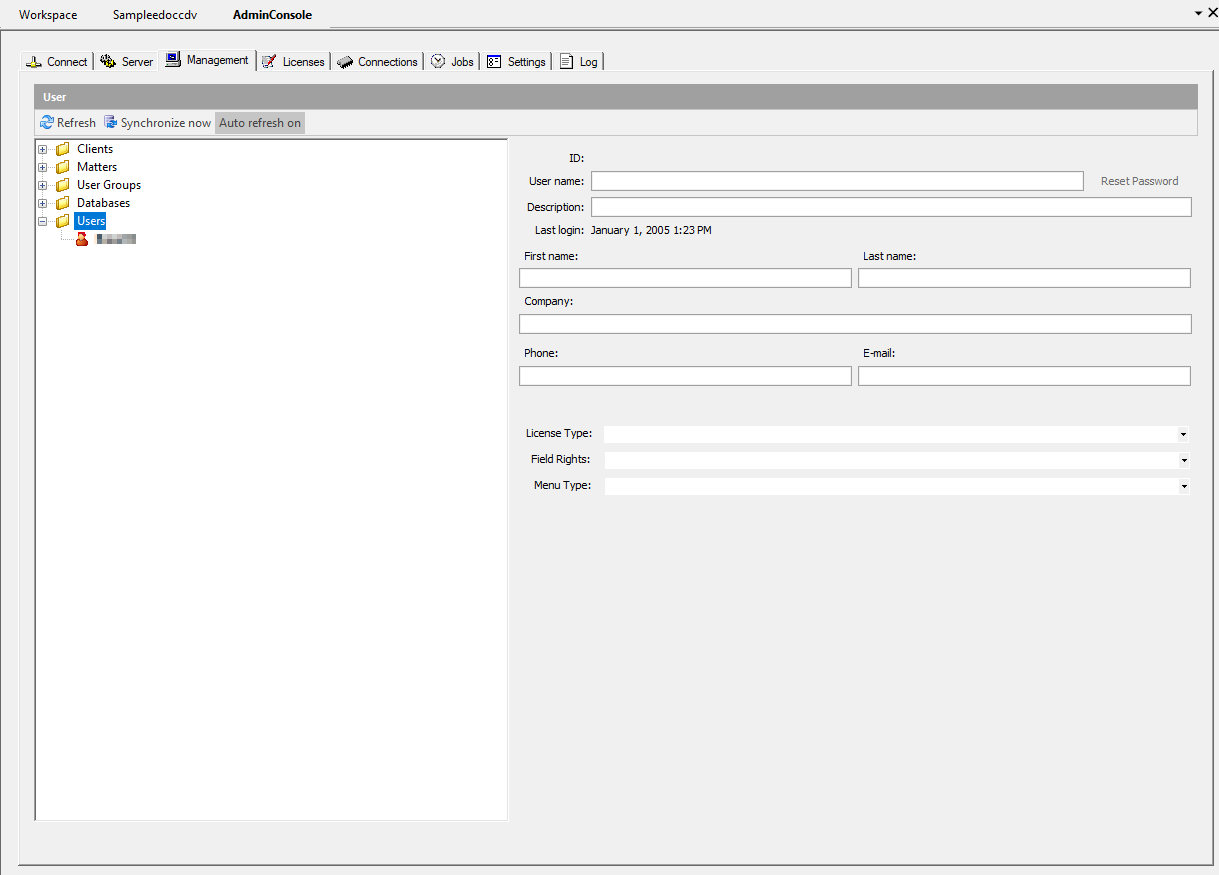
i.The User name field automatically populates with the user name you entered in step 3.
ii.The Description field is used to indicate how the user was added to the server. If this user was added along with other users from a server list, or from the migration of a Concordance 10.x database, that information is displayed in the this area.
iii.The Last login field indicates the last time the user had logged into the server. Because you are just setting up this user account, "(never)" is displayed in this field.
iv.Adding the user's contact information is optional, and what you enter should be based on your organization’s user account guidelines.
10.After adding the user, if you want to add contact information, click on their name in the Users list, to open the user account pane for their account.
11.In the First name field, type the user's first name.
12.In the Last name field, type the user's last name.
13.In the Company field, type the company/firm name.
14.(Optional) In the Phone field, type the user's phone number.
15.In the Email field, type the user's e-mail address if they are to receive e-mail notifications.
i.By adding an e-mail account, the administrator is notified when a license is about to expire, if you have setup the license notification options under the Licenses tab. The notification is sent to all Administrators who have an E-mail address in their user account.
|
E-mail notifications need to route through an existing SMTP server and Port (the standard default port is 25). The SMTP options can be setup on the Settings tab in the Admin Console. See Setting up SMTP options for more details. |
|
Ensure that the Concordance Desktop server and SMTP server have IP trust between them. For instance, the anti-spamming rules must accept emails from the servers. |
16.Click the License Type down-arrow and select Administrator, to setup this account as an administrative user.
17.Click the Field Rights down-arrow and select Read and Write, to ensure this account has full rights when working with databases.
•Read and Write: Read/write access to fields. This level of access for all fields is required for anyone who will be performing maintenance functions such as indexing, packing, or a database modify. If the user does not have full access to the fields, Concordance Desktop does not either.
•Read only: Ability to search, browse, and print fields. User with this access cannot edit or otherwise modify read-only fields. Commands such as Global edit and Load will not display fields which have read-only access. These fields are displayed in Edit view, but only for reference or to copy text to the clipboard.
18.Click the Menu Type down-arrow and select the preset you want to apply for the user.
•Supervisor: User has access to all menus and menu commands.
•Administrator: User has access to all menus and menu commands except the Modify, User Management, and Zap menu commands.
•Editor: User does not have access to the menu commands restricted in the Administrator preset, and does not have access to the following menu commands: New, Reindex, Index, Pack, Begin program, Edit program, and the menu commands for data validation. Though Editors can still search and edit, perform a global edit, load and unload data, and run reports.
•Researcher: User does not have access to the menu commands restricted in the Administrator and Editor presets, and cannot edit or append, load, overlay, import data, perform global edits, or unload a copy of the database's structure.
•No Access: User does not have access to any menus or menu commands. User can only open and exit the database.
19.Click the Synchronize now button (at the top of the Admin Console pane) to synchronize the new user account with the databases on this Concordance Desktop server.
To Add Users When Using External Domain Authentication
Domain users can only be added to the Concordance Desktop server when External by domain, External by NT Server, or External by Active Directory LDAP is selected as the authentication type on the Settings tab in the Admin Console. When any one of these authentication types are selected, the 'Insert domain user' option is available when you right-click on the Users folder under the Management tab.
You must be an administrator on the Concordance Desktop server where you need to add domain users, as only Administrators can open the Admin Console.
|
User passwords cannot be changed when using an external authentication method. |
To add/insert users from the selected domain:
1.Log onto the Concordance Desktop server where the users need to be added.
i.This can be done by either:
▪Logging into the computer/server that has been registered as the Concordance Desktop server
▪Using Windows Desktop Remote to log into the physical Concordance Desktop server computer/server
2.Run Concordance Desktop on the server computer.
3.From the File menu, click Administration, and then Admin Console.
4.Enter your administrator Logon name and Password.
5.Enter the Concordance Desktop server Host name and the Port number (usually 10001) to use for accessing the Admin Console.
6.Click Connect.
i.The Admin Console opens.
7.Click the Management tab.
8.Right-click on the Users folder and click on Insert domain user, to open a box in which to type the new user name.
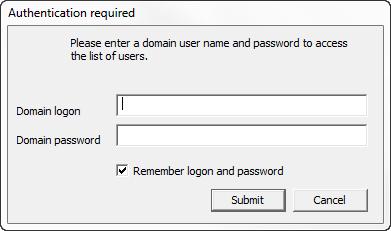
•If this is the first time you have accessed the domain user list, you are asked for your domain user name and password. Type them in the appropriate fields and click Submit to continue.
i.The Domain user import dialog box opens.
•If this is not the first time you have accessed the domain user list, the Domain user import dialog box opens. If you have been logged into the server and Admin Console prior to clicking on Insert domain user, you are not asked to provide your domain user name and password.
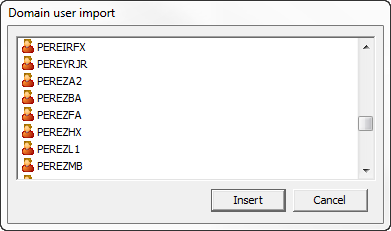
9.Click the domain user you want to insert, and click the Insert button.
i.To select multiple users at once, use SHIFT+click or CTRL+click and then click the Insert button.
ii.Adding user contact information is optional, and what you enter should be based on your organization’s user account guidelines.
10.After inserting a domain user, if you want to add contact information, click a user's name in the Users list, to open the user account pane for their account.
11.In the First name field, type the user's first name.
12.In the Last name field, type the user's last name.
13.In the Company field, type the user's company name.
14.In the Phone field, type the user's phone number.
15.In the E-mail field, type the user's e-mail address if they are to received email notifications. Usually, the email address is only added for administrators.
i.By adding an e-mail account, if the user is an administrator, they are notified when a license is about to expire, if you have setup the license notification options under the Licenses tab. The notification is sent to all Administrators who have an E-mail address in their user account.
|
E-mail notifications need to route through an existing SMTP server and Port (the standard default port is 25). The SMTP options can be setup on the Settings tab in the Admin Console. |
|
Ensure that the Concordance Desktop server and SMTP server have IP trust between them. For instance, the anti-spamming rules must accept emails from the servers. |
16.Click the License Type down-arrow and select the license type this user is to use on this Concordance Desktop server.
a.Available License Types are:
i.Administrator: This license is to be used for those users who require access to the Admin Console and all administrator features for this Concordance Desktop server. This includes database administration.
ii.Full Reviewer: This license is to be used for those users who require the ability to search and view documents in their near native format (PDF format) and apply notations, redact text, etc. to those PDF copies.
iii.Data Reviewer: This license is to be used for those users who require the ability to search and view documents in text format only.
17.Click the Field Rights down-arrow and select whether the user should have Read and Write or Read Only rights, to all the databases on the Concordance Desktop server.
18.Click the Menu Type down-arrow and select the preset you want to apply for the user.
•Supervisor: User has access to all menus and menu commands.
•Administrator: User has access to all menus and menu commands except the Modify, User Management, and Zap menu commands.
•Editor: User does not have access to the menu commands restricted in the Administrator preset, and does not have access to the following menu commands: New, Reindex, Index, Pack, Begin program, Edit program, and the menu commands for data validation. Though Editors can still search and edit, perform a global edit, load and unload data, and run reports.
•Researcher: User does not have access to the menu commands restricted in the Administrator and Editor presets, and cannot edit or append, load, overlay, import data, perform global edits, or unload a copy of the database's structure.
•No Access: User does not have access to any menus or menu commands. User can only open and exit the database.
19.Click the Synchronize now button (at the top of the Admin Console pane) to synchronize the settings with all the databases on this Concordance Desktop server.
To Modify a user's Field Rights and Menu Access Settings
If you need to change a user's field rights and menu access settings across all databases, you can make the changes in the Admin Console under the Management tab, by following the instructions below. However, if you need to change a user's field rights and menu access settings on a specific database, you must open the database in Concordance Desktop and make the changes in the User Management screen instead. For more information about changing field rights and menu access at the database level, see Restricting user rights to databases.
Modifying a user's field rights and menu access settings across all databases:
1.Log onto the server where the user account needs to be added.
i.This can be done by either:
▪Logging into the actual computer/server that has been registered as the Concordance Desktop server
▪Using Windows Desktop Remote to log into the physical Concordance Desktop server computer/server
2.Run Concordance Desktop on the server.
3.From the File menu, click Administration, and then Admin Console.
4.Enter your administrator Logon name and Password.
5.Enter the Concordance Desktop server Host name and the Port number (usually 10001) to use for accessing the Admin Console.
6.Click Connect. The Admin Console opens.
7.Click the Management tab.
8.Double-click on the Users folder to display the list of users on the Concordance Desktop server.
9.Locate and click on the user you need to change, to display the user account pane for the user.
10.Click the Field Rights down-arrow and select whether the user should have Read and Write or Read Only rights, to all the databases on the Concordance Desktop server.
i.If a user has been added to the server from the migration of a Concordance 10.x database, their rights on that database cannot be overridden with this setting. Instead, you need to make the changes at the database level, from the User Management screen. See Restricting user rights to databases for details.
11.Click the Synchronize now button (at the top of the Admin Console pane) to synchronize the settings with all the databases on this Concordance Desktop server.