In the Concordance Desktop viewer, you can zoom, magnify, pan and rotate documents depending on the record type and particular content. For instance, handwritten documents are harder to read online and perhaps illegible in some instances too. Special magnifying tools allow you to read with ease and inspect signature details.
![]()
Tool |
Name |
Description |
|---|---|---|
|
Zoom on Selection |
Enlarges a selected region |
|
Magnifier |
Displays a magnifier window for viewing sections of the current document |
|
Fit to Height |
Adjusts the zoom height so that the entire height of the document appears in the workspace |
|
Fit to Width |
Adjusts the zoom width so that the entire width of the document appears in the workspace |
|
Zoom slider |
Controls the magnification of the document being displayed |
|
Rotate Clockwise |
Rotates the document in 90 degree clockwise increments |
|
Rotate Counter Clockwise |
Rotates the current document in 90 degree counter clockwise increments |
|
Toggle Thumbnails |
Opens the Thumbnails pane |
To Adjust the Magnification of the Document View
On the Navigation toolbar, do any of the following:
•To enlarge a selected area, click the Zoom on Selection tool and drag the tool across the area you want to enlarge.
•To open a magnifier window, click the Magnifier tool and drag the tool over the area you want to magnify.
•To fit the entire height of a document in the workspace, click the Fit to Height button.
•To fit the entire width of a document in the workspace, click the Fit to Width button.
•To zoom in or out on a document, using the Zoom slider drag the slider to the right to increase the magnification or to the left to decrease the magnification.
•To rotate a document in 90 degree increments, click the Rotate Clockwise or Rotate Counter Clockwise button.
|
If your mouse has a scroll wheel, you can use the wheel to quickly zoom in or out on a document. Click in the workspace, and then turn the mouse wheel to zoom in or out of the document. |
To Toggle the Options of the Magnifier Window
1.On the Navigation toolbar, click the Magnifier tool.
2.Toggle the icon in the upper left corner for different viewing preferences.
•When the Eyeglass icon ![]() displays, click on any area of the document and the window will snap to that area and display the selected section.
displays, click on any area of the document and the window will snap to that area and display the selected section.
•When the Bird's Eye icon ![]() displays, a small rectangle displays with the cursor when it is moved off the magnifier window.
displays, a small rectangle displays with the cursor when it is moved off the magnifier window.
i.As you move your cursor over the document, the area contained in small rectangle displays in the magnifier window.
•When the Dock ![]() icon displays, you can click on an area of the document and that area stays docked in the magnifier window.
icon displays, you can click on an area of the document and that area stays docked in the magnifier window.
i.You can scroll on the document and the view that is currently in the magnifier remains the same until another area selection is made.
3.Click or drag the corner or edge of the magnifier window to expand its size.
4.Click on the Adjustment Handle ![]() to decrease or increase the font size within the magnifier window.
to decrease or increase the font size within the magnifier window.
5.Click the Close button to exit the magnifier window.
Using Sticky Zoom and Sticky Rotate
Many documents are often scanned with a portrait page view setting, making online reading a challenge unless the page is rotated. The Sticky Zoom and Sticky Rotate settings make reviewing easier by changing the page layout to a landscape view and keeping it there even while navigating between records.
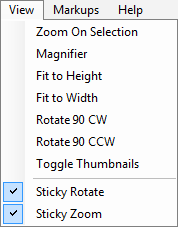
The Sticky Zoom and Sticky rotate functions are located on the View menu:
•Sticky Zoom - keeps your preferred magnification settings as you move from record to record. If you uncheck the selection, and then navigate to the next record, the record defaults to the full page view.
•Sticky Rotate - retains the rotated settings as you page through a record. These settings are especially helpful if you are reviewing a spreadsheet. If you uncheck the selection, and then navigate to the next record, the record defaults its original view.
A check mark next to each option on the Tools menu indicates that this setting is selected. The selections are maintained for the current database when Concordance Desktop Viewer is closed and reopened.