The Concordance Desktop application can be installed on any Windows 7, Window 10, Windows Server 2008 R2, Windows Server 2012, or Windows Server 2012 R2 computer (for networks, this could be a server or a workstation) that will either be used as a Concordance Desktop database server, or as a reviewer's computer. To install, you simply download the application setup file, install it on a computer or server, and then if you want to use that installation as a Concordance Desktop database server, activate the server functionality with a Server license. Reviewer computers do not have to be activated. There Concordance Desktop functionality is controlled by the available user licenses on the Concordance Desktop server, and their user account access level on that server. On a single computer that is not on a network, the process is the same, except that you have to activate the installation with a Mobile license, which activates the installation as a Mobile, and enables all functionality for a single user on that computer.
In a network environment, at least one computer should be designated as a Concordance Desktop database server, and be activated with a Server license. All other Concordance Desktop installations on the network (LAN or WAN) can then be used as reviewer computers. Depending on the user licenses that get added to the Concordance Desktop server, the users of the computers on which Concordance Desktop is installed, can open and work with the databases on that server. For Concordance Desktop installation on a single (non-networked) computer, a Mobile license must be activated in Concordance Desktop, to enable all Concordance Desktop functionality for a single user on that computer.
|
Before installing Concordance Desktop, check to ensure that the Microsoft .NET 3.5 and 4.0 Frameworks are installed and enabled. |
|
Concordance Desktop must be installed at its default location on the C drive. |
To Install Concordance Desktop
1.Download the installation file and save it to the computer, a network server, a flash drive, or an external usb drive.
2.Open the folder where you downloaded and saved the install file.
3.Right-click on the Concordance Desktop_Install.exe file and select Run as administrator.
4.You are asked if you want to allow the program to makes changes, click Yes to launch the installer. The welcome window opens.
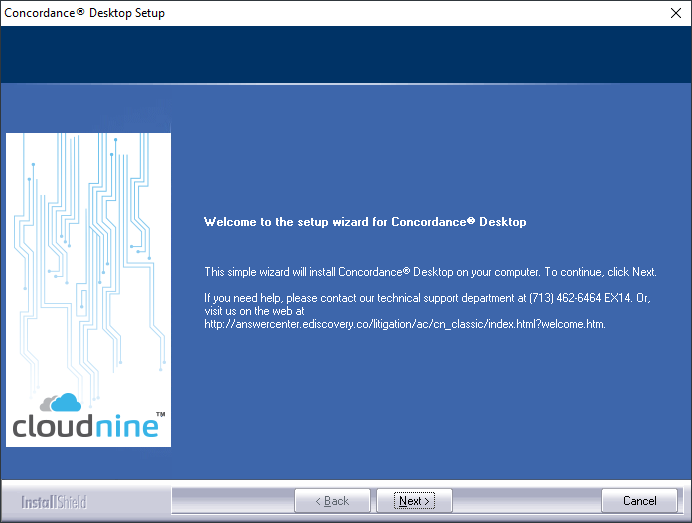
5.Click Next. The License Agreement window opens.
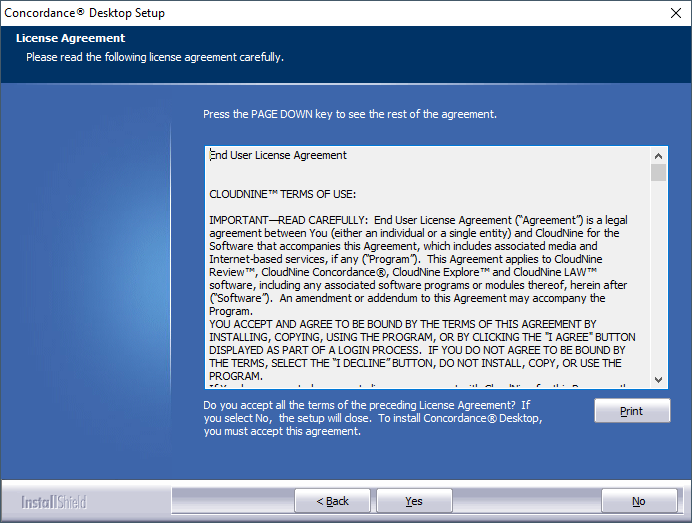
6.If you would like to print the License Agreement, click the Print. Click Yes to continue with installation. The Start Copying Files window opens.
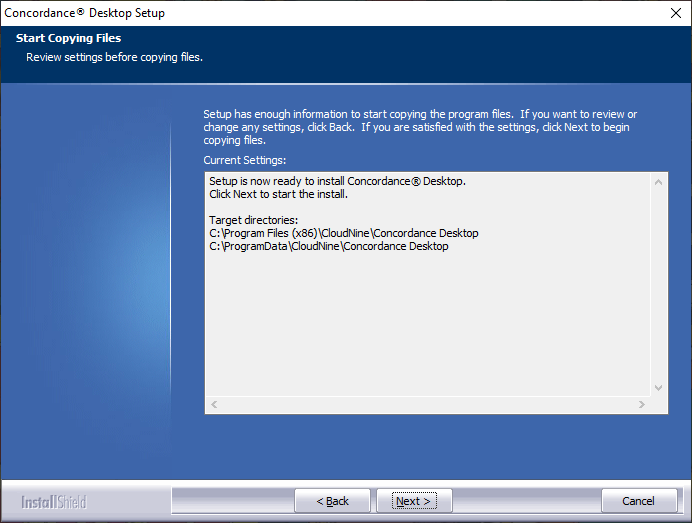
7.Click Next. The Ready to Install the Program window opens.
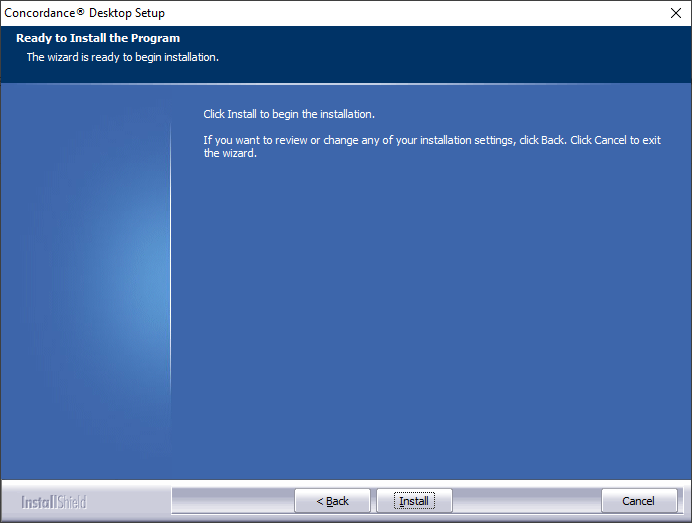
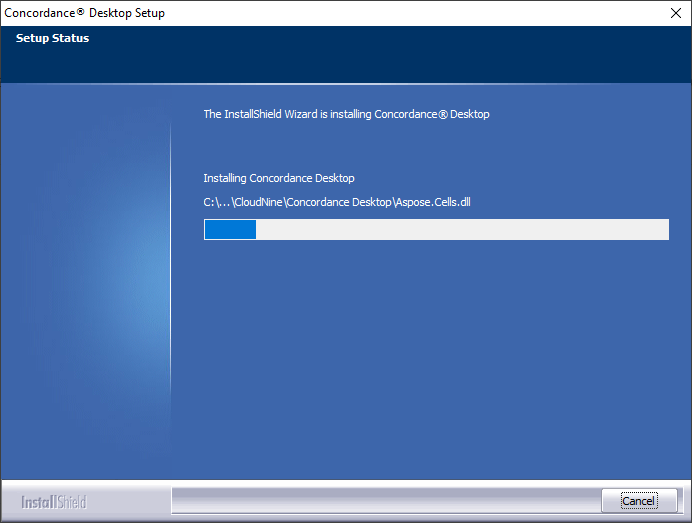
8.Click Install. The installation begins. A progress bar displays the status.
9.When the installation finishes, the Setup is now complete window opens.
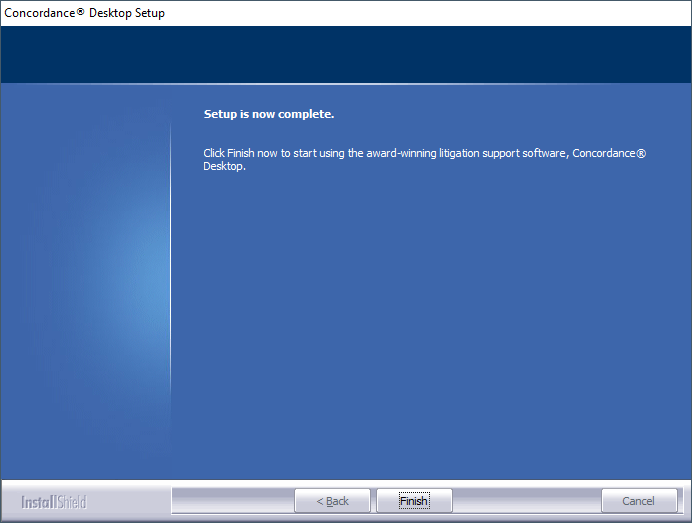
10.Click Finish.
If you just installed Concordance Desktop on a server or network computer you intend to use as a Concordance Desktop database server, you need to activate the server functionality on the computer using a Server license. If this installation was on a network computer to be used by a reviewer, no activation is required. For more details regarding activation and licensing, please see the "About Licensing and Activation" topic.
To Set Up a Dedicated Service Account
It is best practice to use a dedicated service account, instead of a local system account, to run Concordance Desktop Services to view data in the database, plan to use mapped drives or work remotely. You will want to add and use a dedicated service account with administrative rights to access the network directory where the databases reside. If you do not have a valid service account set up that has rights to this directory structure, you will not be able to connect to your images or native files if they are stored on a separate server.
The dedicated service account can also be the same account as the administrator account used to access the Concordance Desktop Administration Console, or you can make separate accounts for stronger security.
To set up a dedicated service account, you need to set up a Microsoft Windows user account with Log on as a Service rights. The dedicated service account should be set up before installing Concordance Desktop. If you did not set up the dedicated service account before installation, you can change the logon information for the Concordance Admin Server and Concordance Server services in the Services Manager.
To Change the Concordance Desktop Server Service Logon Information in Services Manager
1.Open the services.msc file.
i.Opening the services.msc file opens the Services dialog box.
ii.You can also open the Services dialog box from the Control Panel dialog box. From the Start menu, click Control Panel, double-click Administrative Tools, and double-click Services to open the Services dialog box.
2.Right-click Concordance Admin Server in the Name column and click Properties. Clicking Properties opens the Concordance Admin Properties (Local Computer) dialog box.
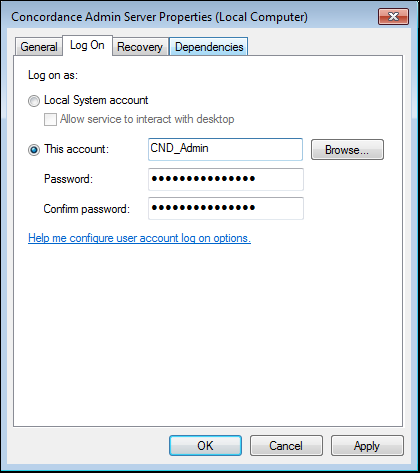
3.Click the Log On tab.
4.Click the This account option.
5.Add the Microsoft Windows user account with Log on as a Service rights to the This account field.
6.Type the user account’s Microsoft Windows password in the Password and Confirm password fields.
7.Click OK.
8.Repeat steps 2-8 for the Concordance Server service.
9.Stop and restart both the Concordance Admin Server and Concordance Server services.