Load files or delimited text files typically have extensions ending in .dat, .csv, or .txt. Each file contains record metadata, but some may also include body text. We recommend having your OCR separated into individual text files and imported separately using a CPL script.
As an administrator, you should always make a practice of opening and reviewing your delimited text files when you receive them, as the files are not always prepared perfectly and may need to be modified. See Reviewing Load Files for more information.
|
When importing records into a concatenated database, records are updated when the fields of an imported record match an existing record. When importing a delimited text file using the Load option, records with mismatched fields are appended as new documents to the main database, which is the first database in the concatenated set. However, when using the Overlay option, importing records with mismatched fields can cause a loss of data. |
Updating the Current Database with Delimited Text
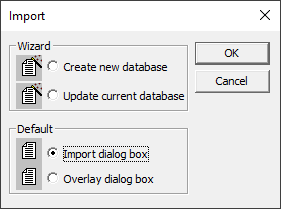
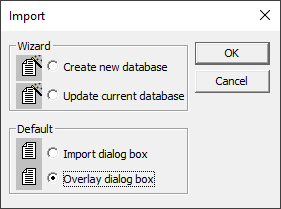
1.On the Documents menu, select Import, and then click Delimited text. The Import dialog displays. Select Update current database.
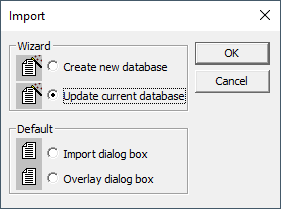
2.Click OK. The Import Wizard dialog displays.
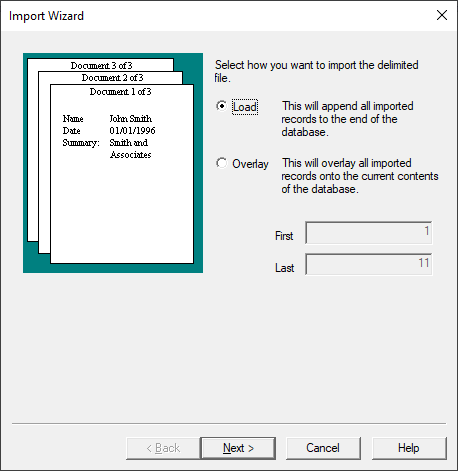
3.Do one of the following:
•To append all imported records to the end of the existing database records, select Load.
•To replace existing records in the database with the imported records, select Overlay. Overlay allows you to specify a range of records for overlaying. All of the data in the delimited text file is loaded into the documents in the current query. Documents can be overlayed in sorted order too. Just sort the query before importing. If you want to replace specific records by matching field values, then you should import a Concordance database instead. If you select Overlay, and the delimited text file contains more records than the query, the additional records are appended to the database as new documents.
oIn the First field, type the first document number in the query to overlay.
oIn the Last field, type the last document number in the query to overlay.
4.Click Next. The Import Wizard - Format dialog displays.
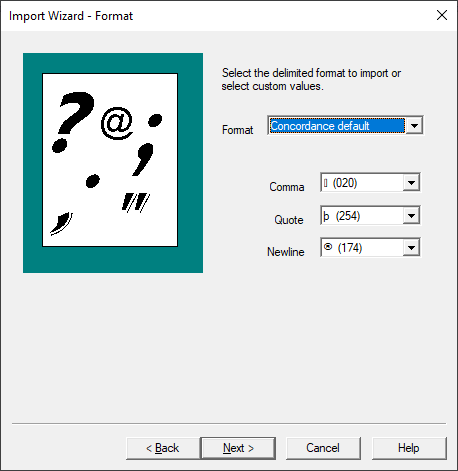
5.Specify the Format for the delimiters in the data you are loading:
•Concordance default - use this option if you are importing/exporting documents within Concordance.
•Comma delimited (CSV) - use this option if the data you are loading is a standard comma delimited file.
•Tab delimited - use this option if the fields in your data are separated by tabs.
•Custom - use this option to specify each delimiter value.
6.Modify the individual Comma, Quote, and Newline characters after selecting a Format only if you are using these characters in the text of your delimited file.
7.Click Next. The Import Wizard - Date format dialog displays.
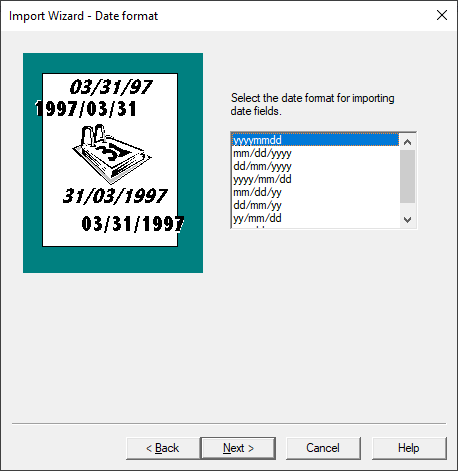
8.Select the date format that matches the data in your delimited text file. Click Next. The Import Wizard - Fields dialog displays.
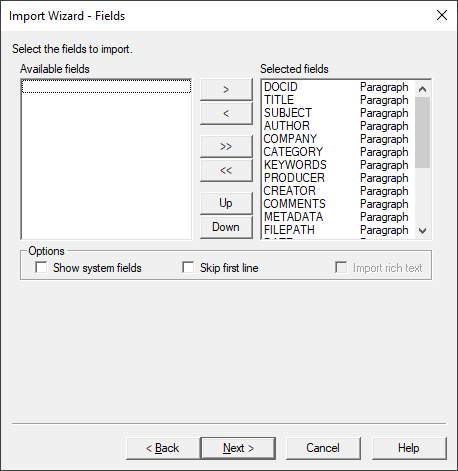
9.By default, all the database fields are added to the Selected fields list. Adjust the fields to import based on your needs by moving fields in or out of the Selected fields list using the buttons in the center. You should also make sure the order of the fields matches the delimited text file you are loading. If the Selected fields does not match the field structure of your delimited text file, the data will not import properly.
10.The Skip first line check box tells Concordance that the first row of your delimited text file contains field names rather than field data.
11. Once you have the fields configured to match your delimited text file, click Next. The Import Wizard - Open dialog displays.
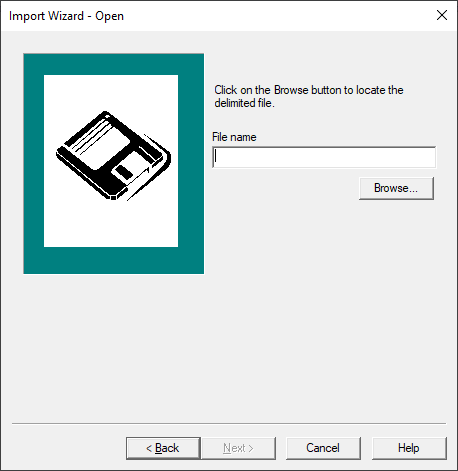
12.Click the Browse button, navigate to and open the delimited text file you want to import into the database.
13.Click Next to open the Import Wizard – Finish dialog.

14.Click Finish to load or overlay the delimited text file.
15.If any data overflow issues occur they will display in the Data overflow list. The Documents number updates to show the number of successfully loaded documents.
16.Close the wizard using the X in the upper right corner.
Using Import Dialog with Delimited Text
1.On the Documents menu, select Import, and then click Delimited text. The Import dialog displays. Select Import dialog box.
2.Click OK. The Import Delimited Text dialog displays.
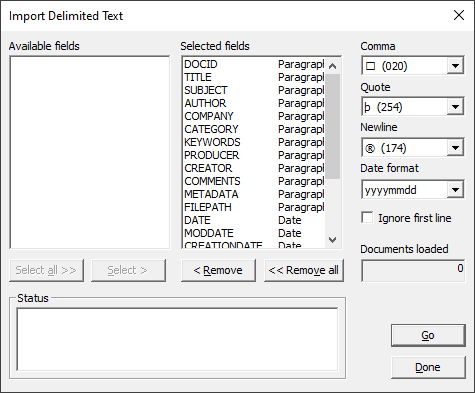
3.By default, all the database fields are added to the Selected fields list. Adjust the fields to import based on your needs by moving fields in or out of the Selected fields list using the buttons below the Available fields and Selected fields. You should also make sure the order of the fields matches the delimited text file you are loading. If the Selected fields does not match the field structure of your delimited text file, the data will not import properly.
4.The Ignore first line check box tells Concordance that the first row of your delimited text file contains field names rather than field data.
5.Modify the individual Comma, Quote, and Newline characters only if you are using these characters in the text inside your delimited text file.
6.Select the Date format that matches the data in your delimited text file.
7.Click the Go button to display the Load delimited file dialog. Browse to and select the delimited text file you want to import. Click Open.
8.If any data overflow issues occur they will display in the Status list. The Documents loaded number updates to show the number of successfully loaded documents.
8.Click Done to close the Import Delimited Text dialog box.
Using Overlay Dialog with Delimited Text
1.On the Documents menu, select Import, and then click Delimited text. The Import dialog displays. Select Overlay dialog box.
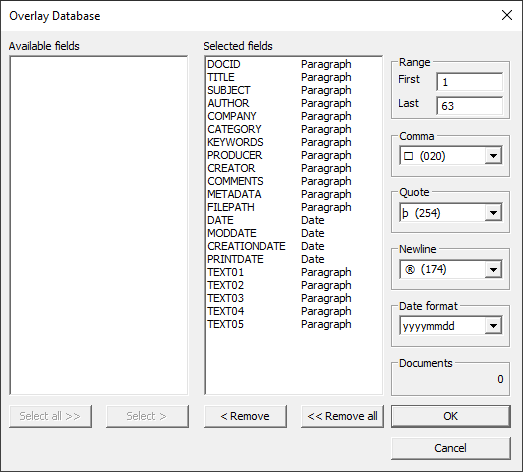
2.Click OK. The Overlay Database dialog displays.
|
You can go directly to the Overlay Database dialog by selecting Import>Overlay on the Documents menu. |
3.By default, all the database fields are added to the Selected fields list. Adjust the fields to import based on your needs by moving fields in or out of the Selected fields list using the buttons below the Available fields and Selected fields. You should also make sure the order of the fields matches the delimited text file you are loading. If the Selected fields does not match the field structure of your delimited text file, the data will not import properly.
4.In the First field, type the first document number in the query to overlay. In the Last field, type the last document number in the query to overlay. By default, all documents in the current query are overlayed.
5.Modify the individual Comma, Quote, and Newline characters only if you are using these characters in the text inside your delimited text file.
6.Select the Date format that matches the data in your delimited text file.
7.Click the OK button to display the Overlay delimited file dialog. Browse to and select the delimited text file you want to import. Click Open.
Verify the Metadata
After importing a delimited text file, verify your imported delimited text files in Concordance. If you are importing a delimited text file into a new database, you will also need to index the database. If you are importing or overlaying a delimited text file into an existing database, you will also need to reindex the database.
To verify your imported delimited text files:
1.On the Toolbar, click Table to open the Table view.
2.Verify the imported records are in the record listing. If you imported records into an existing database, the new records are added after the last existing record in the database.
3.On the Toolbar, click Browse to open the Browse view.
4.On the Tools menu, click Empties. The Empties command determines whether empty fields are displayed in the Browse view. By default, Concordance does not display or print empty fields. With Empties enabled you can verify the field data you imported or overlayed is populated with the correct data.
5.If you imported or overlayed the delimited text file into an existing database, reindex the database. If you imported or overlayed the delimited text file into a new database, index the database.